


-
35
-
18. Ulead COOL 360
Double click the
COOL 360
icon on your desktop to open the
program.
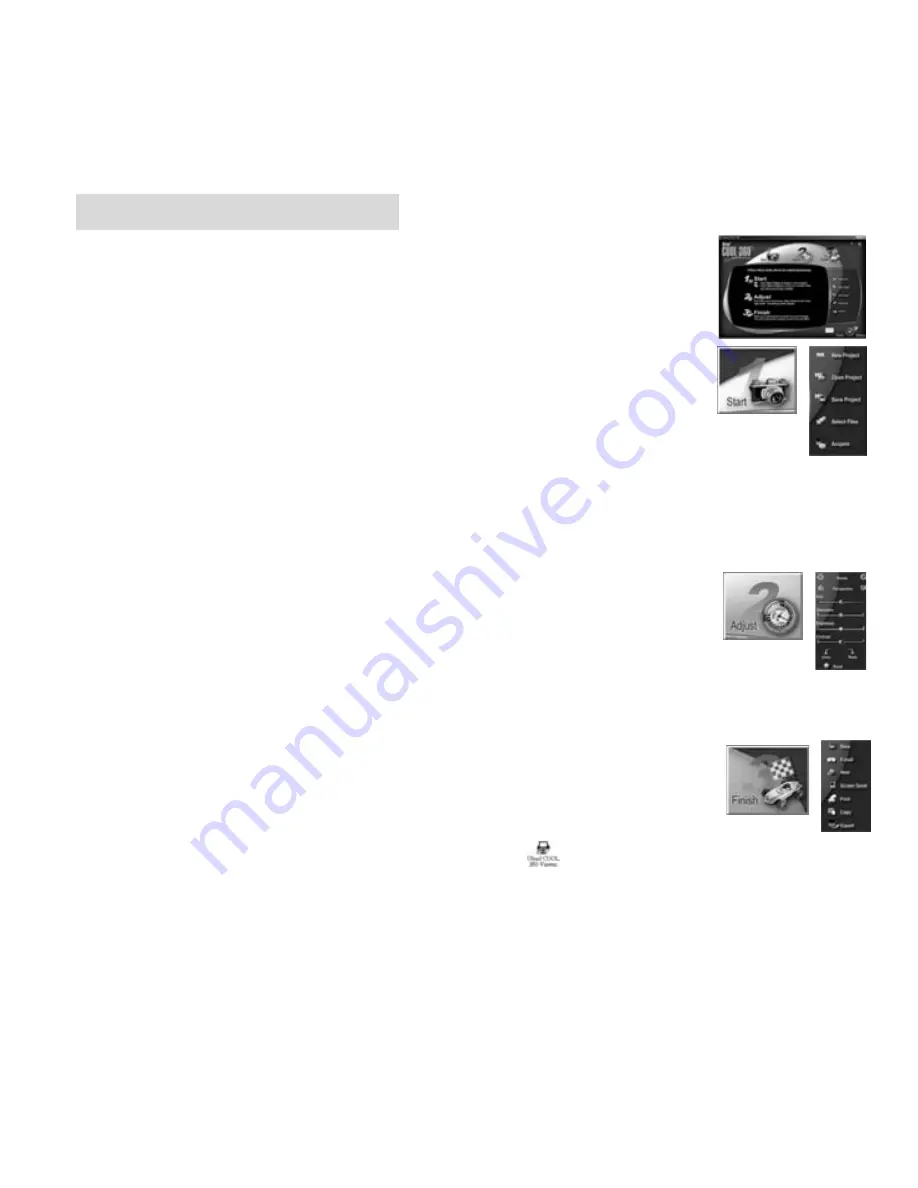
1. START- Starting a Project
Click the "New Project" icon from the options panel, the
“New Project Wizard” will direct you through project setup.
• Organize your panorama project by selecting a project
type, name, location and enter a short project description.
• Search, select and sort files with visual previews in a single dialog
box. Panorama setup is simple.
• Choosing correct camera lens and stitching options is important in making
a high quality panorama. (Click
Finish
when you are ready to continue)
2. ADJUST - Perfecting your photos
Unique adjustment tools give you superior control over the
appearance of individual images in the Adjust Step.
• Correct differences in color balance, camera tilt and camera angle
to perfect your panorama.
• Align images manually via drag and drop or keyboard nudging.
3. FINISH - Sharing Panoramas
Sharing options provide many possibilities for displaying
panoramas
:
• Save, E-mail, Web, Screen Saver, Print and Copy.
• Double click the COOL 360 Viewer icon to open the program. The
COOL 360 Viewer can display and navigate the viewer around the 360
o
panorama view.
Note: For detailed operation procedures, please refer to the program
Help.
Содержание C 3.1 Li
Страница 1: ...JD JENDIGITAL C 3 1 LI...
Страница 2: ...nicht im Lieferumfang Indexbilder Bilder vergr ssern SD Karte...
Страница 5: ...Li ion Akku...
Страница 6: ......
Страница 7: ...Halten Sie die Kamera ruhig und bet tigen Sie den Ausl ser...
Страница 8: ...Kamerateile...
Страница 9: ......
Страница 10: ...Bildanzahl...
Страница 11: ...Polung richtig ein...
Страница 12: ...Karte Karte Karte Karte Schieben Sie die Karte wie dargestellt in den Kartenschacht...
Страница 13: ...Energiesparfunktion Netzsteckdose USB Kabel ACAdapter Kamera...
Страница 14: ...Halten Sie die Kamera ruhig und bet tigen Sie den Ausl ser...
Страница 15: ......
Страница 16: ...Bei Aufnahmen in der Nacht im Freien und in geschlossenen R umen sowie RoteAugen Reduzierung...
Страница 17: ......
Страница 18: ...Speichern L schen L schen Speichern...
Страница 19: ...Indexbilder...
Страница 20: ...Wiederholung Beenden Beenden Wiederholung Bilder vergr ssern...
Страница 21: ...Druck Karte Karte...
Страница 22: ...Einzelbild l schen Einzelbild l schen...
Страница 23: ...Karte...
Страница 24: ......
Страница 25: ...mittlere Dateigr sse...
Страница 26: ......
Страница 27: ...Englisch Standard Sprache...
Страница 28: ...Einzelbildl schen...
Страница 29: ...Einzelbilddrucken Wiederholung Beenden...
Страница 30: ......
Страница 31: ......
Страница 32: ......
Страница 33: ......
Страница 34: ...1 2...
Страница 35: ...4 3...
Страница 36: ......
Страница 37: ...das Hilfemen dieses Programmes...
Страница 38: ......
Страница 39: ......
Страница 53: ...5 4 Name of Parts The following illustrations show the names of each component button and switch on the camera...
Страница 55: ...7 5 Display Information...
Страница 92: ...583063 00...


