JCM KFC 2.0, Руководство пользователя
JCM KFC 2.0 - Описание продукта
Бесплатное скачивание руководства пользователя для JCM KFC 2.0 теперь доступно на нашем веб-сайте. Получите всю необходимую информацию о продукте и его функциях, просто скачав руководство. Посетите manualshive.com, чтобы скачать.
Поделиться
Скачать


Отзывы:
Нет отзывов
Похожие инструкции для KFC 2.0

NI 9231
Бренд: National Instruments Страницы: 9

001G4040EZT
Бренд: CAME Страницы: 128

18092
Бренд: FISCHER Страницы: 100

Copperloy EDGE-OF-DOCK SEL Series
Бренд: JH Industries Страницы: 42
NL4-LBM Series
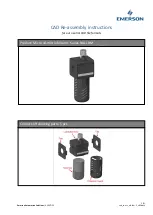
Бренд: Emerson Страницы: 3
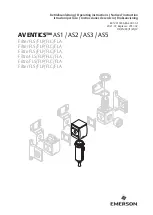
AVENTICS AS1
Бренд: Emerson Страницы: 47

E-7000 Series
Бренд: BRONKHORST Страницы: 33

SCS 660
Бренд: Raven Страницы: 60

SWACE
Бренд: Suzuki Страницы: 150

XL-DH330PH
Бренд: Sharp Страницы: 33

SfAR-S-16RO
Бренд: iSMA CONTROLLI Страницы: 19

MEGAKICK Daytona 800
Бренд: ETT Страницы: 6

CD-C1800
Бренд: Sharp Страницы: 16

CD-C491H
Бренд: Sharp Страницы: 48

CD-C462
Бренд: Sharp Страницы: 44

CD-C500Z
Бренд: Sharp Страницы: 56

CD-BK3100W
Бренд: Sharp Страницы: 34

CD-BH20
Бренд: Sharp Страницы: 20


