background image

EVOi.net

15

L I V E   O P E R A T I O N

ANTI FEEDBACK CONTROL EQ SELECT

SETTINGS

FIXED AFC SET

FILTERS FREE  1

2
3

LIVE AFC ON

MUSIC I

MUSIC II
SPEECH

NEUTRAL

LOCKED

TEST

FIXED SETUP

HOLD TO CLEAR FIXED

HOLD TO CLEAR LIVE

ANTI FEEDBACK CONTROL

Two different types of Anti Feedback Control engines can
be initiated and set up via EVOi.net: Live Anti Feedback
Control
 and Fixed Anti Feedback Control.

Live Anti Feedback Control is designed to be used during
a performance. Once initiated, six dynamic filters are set
into action, instructed to search for and eliminate feedback
once found. When feedback is detected, a filter is placed to
eliminate it before it “runs away”. If additional feedback is
found, another filter is used. The 

FILTERS FREE

indicators tell you how many of the six filters are left.

Fixed Anti Feedback Control is designed to eliminate
feedback before a performance begins, a routine possibly
done during a soundcheck. For a fixed stage setup of
microphones, once initiated, six filters are available to
eliminate feedback. The 

FILTERS FREE

 indicators also

tell you how many filters have been used.

Note: There should be no feedback with a correctly set up
and operated sound reinforcement system. The general idea
of the 

FILTERS FREE

 indicators is as a guide to the

operator. If all the Anti Feedback Filters have been used,
this is a strong indication that the whole system needs
adjustment. Typically this is confined to the mix.

SELECTING SYSTEM EQ

The total EVO System can be optimized for an individual
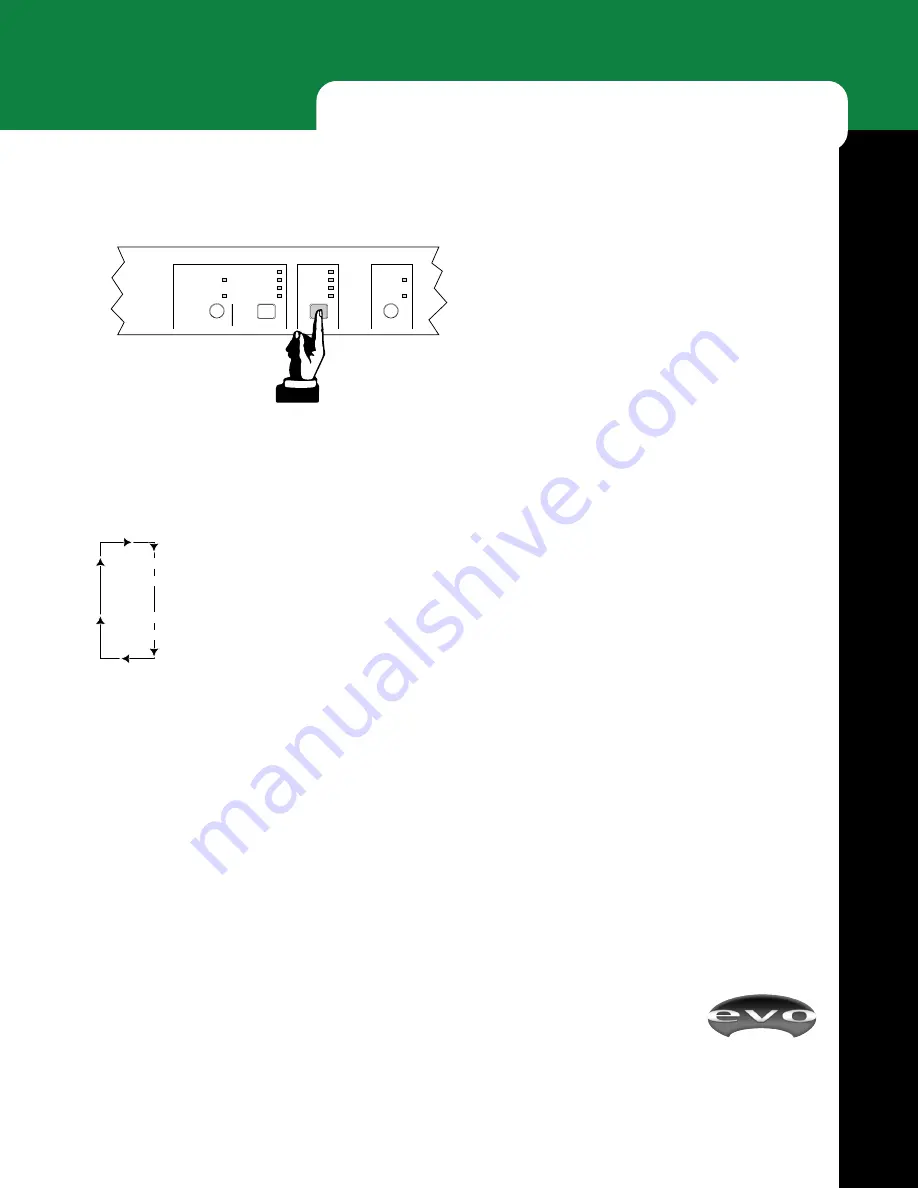
program using the EQ SELECT button (Figure 21). Each
press of the button will apply a different EQ curve to the
entire system, very much like the way a domestic HiFi or
car stereo EQ is used to optimize the system for different
types of music. The settings scroll through as follows:

NEUTRAL

The default start-up EQ or last set Auto EQ.

SPEECH

An EQ curve that optimizes the system
performance for SPEECH.

MUSIC I

Ideal for LIVE music performance.

MUSIC II

Recommended for the enhancement of
RECORDED MUSIC playback.

Figure 21: EQ Select Button

Содержание EVOi.net

Страница 1: ...User s Guide Introducing The Next Generation of Installed Sound A Loudspeaker With Intelligence...

Страница 2: ...Rear 6 Installation Setup 7 Measurement Microphone 8 Starting Up 9 Testing the System 10 Auto EQ 11 Delay Setting 14 Live Operation Selecting System EQ 15 Applications 17 Rectangular Rooms 17 Fan Sha...

Страница 3: ...ng walked on or pinched particularly at plugs convenience recepticals and the point where they exit from the apparatus Only use attachments accessories specified by the manufacturer Unplug this appara...

Страница 4: ...x JBL Measurement Microphone with clip and case 1 x 100 XLR Balanced Signal Microphone Cable 1 x EVO User s Guide Thank you for purchasing an EVOi net Speaker System Controller or if you have been re...

Страница 5: ...kers Therefore the EVOi net simply provides a more convenient remote control of the functions in the EVO Intelligent Loudspeaker Systems The control is presented in two sections one for installation a...

Страница 6: ...ection consists of two mode buttons FIXED SETUP and LIVE AFC ON and associated LED indicators for state confirmation For detailed operation see Anti Feedback Control on page 15 The LEDs FILTERS FREE 4...

Страница 7: ...ator will confirm your selection 7 DELAY SETTING Press DELAY SETTING to initiate delay setup on auxiliary outputs AUX OUT 3A left and AUX OUT 4B right For detailed operation refer to Delay Setting on...

Страница 8: ...to change settings press this recessed button once again F E A T U R E S REAR PANEL 15 OUTPUTS 4B 3A Auxiliary Two 3 pin male XLR connectors for right 4B and left 3A connection to auxiliary EVOi 324 l...

Страница 9: ...f high quality shielded audio cables for connection to the mixer and EVO loudspeakers Connecting The System Use Figure 4 below as an aid for interconnecting EVOi net to up to four EVOi 324 loudspeaker...

Страница 10: ...it in a safe place for future use Use the supplied 100 XLR signal cable to hookup the Measurement Microphone as shown in Figure 5 below JBL Measurement Microphone EVOi net Rear 100 XLR Cable Included...

Страница 11: ...on page 10 2 See Speaker Status Error Codes on page 26 Factory Settings After shipping from Factory the power up defaults will be as follows Settings Power Up State Delay Setup Off AEQ On Off Aux Auto...

Страница 12: ...resses of the TEST button will 1 Move the Pink Noise to the next EVO loudspeaker 2 Indicate the New Transmitting EVO loudspeaker by flashing the relevant Speaker Status Green OKAY LED When all attache...

Страница 13: ...that the Measurement Microphone remains on the central axis of the room or listener area equidistant from each loudspeaker See Figures 11 a b c A rough rule of thumb is that the Measurement Microphon...

Страница 14: ...also illuminates indicating that Auto EQ is on Testing Auto EQ 1 Pass program signal to EVOi net and listen to the result of Auto EQ 2 Press the AUTO EQ button the LED will illuminate when Auto EQ is...

Страница 15: ...t Microphone for AUX EVO Loudspeakers For applications of more than two EVO loudspeakers hooked up to outputs 3A and 4B the AUX OUT outputs optimum placement of the Measurement Microphone is illustrat...

Страница 16: ...ettings do not have to be cleared first Press and hold this button and all previous Delay settings will clear and the DELAY SET indicator will go out Locking the Settings After each SETTING routine th...

Страница 17: ...heck For a fixed stage setup of microphones once initiated six filters are available to eliminate feedback The FILTERS FREE indicators also tell you how many filters have been used Note There should b...

Страница 18: ...CT and AEQ ON buttons simultaneously This will restore the factory default settings It is possible to reset the settings in the EVO loudspeakers using data stored in EVOi net see Power Up Operation on...

Страница 19: ...venues Typically the program of events are quite varied and high quality reinforcement is required for speech live music and recorded music playback This section refers to typical applications identif...

Страница 20: ...agram also show the order of Measurement Microphone placements when setting Auto EQ on MAIN and AUX Delay also DELAY SETUP Microphone position Remember to engage the MONO SUM switch Approximate measur...

Страница 21: ...forming Auto EQ setup for accurate placement details see Placing Measurement Microphone for MAIN EVO Loudspeakers page11 EVOi net Rear NOTE For clarity power connections are not shown Speaker Placemen...

Страница 22: ...e page 13 and the Measurement Microphone placement and order of positioning is shown EVOi net Rear NOTE For clarity power connections are not shown Speaker Placement In Room EVOi 324 Input EVOi 324 In...

Страница 23: ...net Rear NOTE For clarity power connections are not shown Speaker Placement In Room EVOi 324 Input EVOi 324 Input EVOi 324 Delay Mono 2 EVOi 324 Main Mono 2 XLR Signal Cables XLR Signal Cables EVOi 3...

Страница 24: ...below The setup is identical to EVOi net in a Small Rectangular Room EVOi net Rear NOTE For clarity power connections are not shown Speaker Placement In Room XLR Signal Cable EVOi 324 Input Audio Outp...

Страница 25: ...strated below also approximate position of the Measurement Microphone see Placing Measurement Microphone for MAIN EVO Loudspeak ers page11 EVOi net Rear NOTE For clarity power connections are not show...

Страница 26: ...te positions and placement sequence of the Measurement Microphone are illustrated on the inset diagram EVOi net Rear NOTE For clarity power connections are not shown Speaker Placement In Room EVOi 324...

Страница 27: ...AKER STATUS indicators will signify power up disagreement error Audio will not be allowed to pass at this time 2 The EVOi net will backup the data that came from the speakers to preserve it 3 The EVOi...

Страница 28: ...status code is being reported when the green OKAY LEDs begin flashing Take note of the green LED s flashing code and its most likely cause using the chart on page 27 After the error code is noted the...

Страница 29: ...a restored User restored defaults by pressing 3 large keys on front panel output see Appendix Power Up Operation page 25 3 7 Speaker Muted by user Feature for future development 4 1 Speaker DSP Failur...

Страница 30: ...e Ratio 110dB 22Hz 22kHz THD 0 01 20Hz 20kHz 10dBu Front Panel Controls Auto EQ Setting Delay Setting Test Function User EQ Select User Anti Feedback Control Front Panel Indicators Input signal monito...

Страница 31: ...next section of this warranty How to Obtain Warranty Performance If your JBL product ever needs service write or telephone us at JBL Incorporated Attn Customer Service Depart ment 8500 Balboa Bouleva...

Страница 32: ...EVOi net 30 N O T E S...

Страница 33: ...EVOi net 31...

Страница 34: ...EVOi net EVOi net 32...

Страница 35: ...24 Features 4 EVOi net Front Panel 4 5 EVOi net Rear Panel 6 Front Panel 4 5 Fuse 6 FILTERS FREE LED 4 15 Initial Settings 9 Input Signal Indicators 4 Inputs 6 Interface Connectors 6 Introduction 2 L...

Страница 36: ...A Harman International Company JBL Professional 8500 Balboa Boulevard Northridge CA 91329 www jblpro com Part 337540 001 Copyright 2001 JBL Professional Printed in the USA...

Отзывы: