background image

ENGLISH  

USER 

MANUAL 


JB SYSTEMS® 

5/48 

CD570   


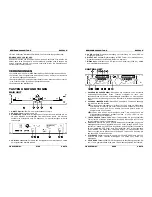
the “– button” is pressed and returns to the original pitch when the button is 
released. These buttons can be used to synchronize the beats of 2 tracks. 

7. PITCH button:

 This button is used to turn the Pitch function on and off. If you 

want to change the speed adjustment range (+/- 8%, +/- 12%, +/- 16%), press 
and hold PITCH button then press the PITCH BEND+ to select. 

8. PITCH slider: 

Press the PITCH button, the PITCH LED is on. The speed can be 

changed up to +/-16% by moving the sliding fader. The speed will not change if 
the PITCH LED is off.  

9. OPEN/CLOSE button

: press this button to open and close the disc tray in the 

front of the main unit. This button is disabled during playback. If the tray is not 
closed after 60sec. It will close automatically to prevent mechanical damage. 

10. TIME  Button: 

The TIME button switches between elapsed playing time, 

remaining time in a selection and total remaining time of the disc. (standard = 
remaining/track) 

11. SGL/CTN  Button: 

with this button you can choose between “single track mode” 

and “continuous play”. 


Continuous play:

 the complete CD will be played without interruption. 

(mostly used in pubs) 


Single track:

 player stops at the end of each track and waits at the beginning 

of the next track. The player will wait at the first music note of each track.  

12. PROGRAM Button: 

It is possible to program up to 20 tracks on each deck. After 

programming the tracks will be played in the order you programmed. You can 
also use the relay function to make a preprogrammed sequence on the 2 decks. 
Follow the steps below for programming:


Press the PROGRAM button once, the led next to it turns on and the display 
shows “-- P-01 00”. 


Choose the first track in your sequence and press the PROGRAM button. 
The first track is programmed, the display shows “-- P-02 01” 


Choose the second track in your sequence and press the PROGRAM button. 
The second track is programmed, the display shows “-- P-03 02” 


Continue these steps until you are finished. 


Now simply press the “play/pause button” to start the sequence. The first 
track in your sequence starts playing while the display shows”** P-01” 

The programmed sequence plays in an endless loop until you stop the program 
mode by pressing the PROGRAM button for about 2 seconds”. The led next to 
the PROGRAM button turns off and the program memory is cleared. 

13. LCD  DISPLAY:

 Shows all important information needed during playback. Refer 

to the next chapter for more information. 

14. LOOP Button:

 Used to make the music play in a loop, follow the steps below to 

create a loop: 


Make sure that the track is playing. 


Press the LOOP button to set the beginning of the loop: led starts flashing. 


Press the LOOP button again to set the end of the loop: led is on and the 
music starts playing in loop mode. 


Press the LOOP button again to stop the loop mode: the led turns off. 

Note:

 the loop is not seamless so when the loop starts again, you will hear a small pause. This is 

normal while this CD-player doesn’t use a buffer memory. 


ENGLISH  

USER 

MANUAL 


JB SYSTEMS® 

6/48 

CD570   


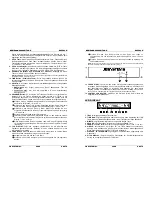
15. FADERSTART  sockets: 

If you are using a mixer with fader start function, use 

the supplied mono mini jack/jack cable to connect the player with the fader start 
of the mixer. Please note that this socket must never be connected with any 
voltage.  

Attention: 

This remote control is only compatible with (Synq® or Pioneer® compatible) mixers. 

16.

 CONTROL connector:

 Connect the main unit here, using the supplied mini-DIN8 

cable.


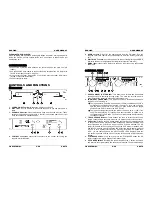
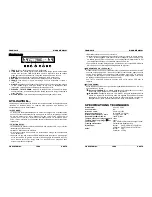
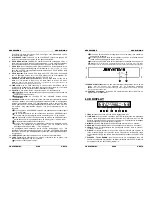
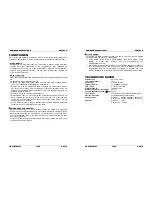
LCD DISPLAY 


1. TRACK: 

Shows current track number. 

2. TIME BAR: 

shows either time remaining or elapsed depending on the setting of 

the TIME button. Starts flashing at the end of each track to alert the user to take 
action.


3. MINUTE:

 Shows “minutes” time information of current track. 

4. SECOND: 

Shows “seconds” time information of current track. 

5. FRAME: 

Shows “frame” time information of current track. (1 frame = 1/75

th

 sec.) 

6. SINGLE/CONTINUE: 

“single” appears when the unit is set to play just one track 

at a time. Otherwise the CD will play continuously through all tracks. This function 
is controlled by the SGL/CTN button. 

7. ELAPSED, TOTAL REMAIN: 

indicates that the time shown on the display is the 

track elapsed, remaining or total remaining time. 

8. PITCH DISPLAY: 

Shows the percentage change in pitch (speed) of the song.  


Содержание CD 570

Страница 1: ...ication of the content in any manner without express permission of the publisher is prohibited Version 1 1 The Power Source for DJ s Operation Manual Mode d emploi Gebruiksaanwijzing Bedienungsanleitung Manual de instrucciones Manual do utilizador EN FR NL DU ES PT ...

Страница 2: ...spositions légales de votre pays VERWIJDEREN VAN HET APPARAAT Verwijder het toestel en de gebruikte batterijen op een milieuvriendelijke manier conform de in uw land geldende voorschriften ENTSORGUNG DES GERÄTS Entsorgen Sie das Gerät und die Batterien auf umweltfreundliche Art und Weise gemäß den Vorschriften Ihres Landes DESHACERSE DEL APARATO Reciclar el aparato y pilas usadas de forma ecologic...

Страница 3: ...de the unit Electric shock or malfunction may result INSTALLATION GUIDELINES Placing and using the unit for long periods near heat generating sources such as amplifiers spotlights etc will affect its performance and may even damage the unit Take care to minimize shocks and vibrations during transport When installed in a booth or flight case please make sure to have good ventilation to improve heat...

Страница 4: ... speed positions for searching through songs The more you turn the wheel in either direction the faster you will search through the music 2 JOG WHEEL INNER RING This jog wheel serves 2 functions depending on the mode you are working in The jog wheel acts as a slow frame search 1 75sec control when the CD is not playing but either paused or set to a cue point To set a new cue point spin the wheel a...

Страница 5: ... sequence The first track in your sequence starts playing while the display shows P 01 The programmed sequence plays in an endless loop until you stop the program mode by pressing the PROGRAM button for about 2 seconds The led next to the PROGRAM button turns off and the program memory is cleared 13 LCD DISPLAY Shows all important information needed during playback Refer to the next chapter for mo...

Страница 6: ...n press the PROGRAM and SGL buttons again until the track information stops flashing STORING A CUE POINT Put the player in pause and use the jog shuttle wheel to search the exact location for the cue point Once this location is found press the PLAY PAUSE button to set the new cue point the cue led flashes 2 times to indicate that the new cue point is set and the track starts playing from this new ...

Страница 7: ...tte application Pour éviter des risques d incendie ou d électrocution n exposez jamais cet appareil à la pluie ou à l humidité N insérez jamais d objets métalliques et ne renversez jamais de liquide dans l appareil L électrocution ou le mal fonctionnement peuvent en résulter CONSEILS D INSTALLATION Placer ou utiliser l appareil pendant de longues périodes à proximité de sources de chaleur tel des ...

Страница 8: ...i le chargeur CD n est pas refermé après 60sec il se fermera automatiquement afin de ne pas s abîmer FRANCAIS MODE D EMPLOI JB SYSTEMS 12 48 CD570 4 Connecteur CONTROL reliez ce connecteur à l unité de contrôle en utilisant le câble mini DIN8 fourni avec l appareil 5 SORTIES AUDIO Connectez ces sorties audio aux entrées line CD de votre table de mixage en utilisant les câbles cinch fournis avec l ...

Страница 9: ...a lecture s arrête à la fin de la plage et attends au début de la plage suivante Le lecteur attendra à la première note musicale de la plage Ceci est une caractéristique très utile pour les deejays 12 Touche PROGRAM il est possible de programmer jusqu à 20 plages par lecteur Une fois programmés les plages seront lues selon l ordre dans lesquels vous les avez programmés Vous pouvez également utilis...

Страница 10: ...elle ci afin d engager la fonction Relay Les deux lecteurs seront en single mode et les numéros de plage des deux écrans commencent à clignoter FRANCAIS MODE D EMPLOI JB SYSTEMS 16 48 CD570 Démarrez la lecture d un des deux lecteurs Alternativement une plage de chaque lecteur sera lue jusqu à ce que la fonction relay soit désengagée Vous pouvez toujours changer le CD du lecteur qui est en attente ...

Страница 11: ...offen in het toestel Elektrocutie en een slechte werking kunnen hieruit resulteren INSTALLATIEAANWIJZINGEN Het plaatsen en het gebruiken van het toestel tijdens lange periodes in de nabijheid van warmtebronnen zoals versterkers spot s enz zullen de prestaties van het toestel negatief beïnvloeden en kunnen het toestel zelfs beschadigen Wanneer het toestel ingebouwd is in een cabine of een flight ca...

Страница 12: ...aansluiting Gebruik deze aansluiting om het digitale signaal S PDIF formaat naar een digitale versterker of digitale recorder bvb Mini disc te sturen 7 NETAANSLUITING verbind het toestel met het net 220V AC door middel van de bijgeleverde voedingskabel CONTROL UNIT 1 SEARCH WHEEL BUITENRING dit wiel heeft 4 voorwaartse en 4 achterwaartse zoeksnelheden Hoe meer U het wiel in een richting draait hoe...

Страница 13: ...weer Ga verder met deze stappen tot u klaar bent Druk nu eenvoudigweg op de play pauze toets om de weergave van de sequentie te starten Het eerste nummer van uw sequentie wordt weergegeven terwijl de display P 01 weergeeft De geprogrammeerde sequentie wordt continu weergegeven tot u het programma stopt door gedurende ongeveer 2 seconden op de PROGRAM toets te drukken De Led bij de PROGRAM toets ga...

Страница 14: ...s enz Om de relay functie te stoppen moet u terug op de PROGRAM en SGL toetsen drukken tot de informatie van de nummers stopt met flitsen OPSLAAN VAN EEN CUE PUNT Zet de CD speler in pauze stand en gebruik het jog shuttle wiel om de exacte plaats van het Cue punt te bepalen Eenmaal u dit gevonden hebt druk op de PLAY PAUZE toets om het nieuwe Cue punt te programmeren de led boven de CUE toets zal ...

Страница 15: ... Feuchtigkeit aus Stellen Sie keine Behälter mit Flüssigkeiten in der Nähe des Gerätes ab Es ist nicht wasserdicht und könnte beschädigt werden INSTALLATIONSANLEITUNG Plazieren und benutzen Sie das Gerät für eine längere Zeit neben sehr warmen Geräten wie Verstärker Lampen etc könnte die Funktion des Gerätes beeinträchtigt oder sogar zerstört werden Sollte das Gerät in einem Flightcase betrieben w...

Страница 16: ...tz 220V AC mittels dem mitgelieferten Stromkabel CONTROL UNIT 1 SUCHRAD ÄUSSERER RING Dieses Rad hat 4 Vorwärts und 4 Rückwärts Geschwindigkeits Positionen Diese Funktion ermöglicht es Ihnen eine bestimmte Stelle auf der CD schnellstmöglich aufzufinden Je mehr das Rad nach links oder rechts bewegt wird umso schneller wird die Geschwindigkeit der Suche 2 SUCHRAD INNERER RING Dieses Rad beinhaltet 2...

Страница 17: ...er erste Track in Ihrem Ablauf beginnt zu spielen währenddessen Ihnen das Display P 01 anzeigt Diese Sequenz spielt in einem endlosen Loop bis Sie den Programm Knopf für 2 sekunden gedrückt halten Die Led erlischt und die Programm Funktion ist gelöscht 13 LCD DISPLAY Zeigt alle wichtigen Informationen an die während des Playbacks gebraucht werden Beachten Sie das nächste Kapitel um mehr Informatio...

Страница 18: ... Knöpfe erneut bis die Track Information das blinken stopt SETZEN EINES CUE PUNKTES Befindet sich der Player im Pause Modus können Sie mittels des Jog shuttle Wheel die genaue Startposition des CUE Punktes bestimmen Ist diese Position genau bestimmt einfach die PAUSE PLAY Taste betätigen um den neuen CUE Punkt zu bestätigen die Cue led blinkt 2 mal auf um anzudeuten das der neue Cue Punkt gesetzt ...

Страница 19: ...tos metálicos o que contengan líquidos dentro de la unidad Un choque eléctrico o problemas con el aparato pueden ser el resultado de hacerlo GUIA DE INSTALACIÓN Poner y usar la unidad por largos períodos de tiempo cerca de fuentes que emanen calor tales cómo amplificadores luces etc podrían afectar el buen funcionamiento pudiendo por ello dañar la unidad Cuando lo instale en una cabina o rack móvi...

Страница 20: ...más se gire la rueda más rápida se hace la busqueda 2 Rueda JOG interior Esta rueda integra 2 funciones según el modo En modo Pause o sobre un punto CUE permite una busqueda lenta frame 1 75seg Para seleccionar un nuevo punto cue girar la rueda y pulsar PLAY en la posición deseada Pulsar CUE para volver al punto CUE Durante la reproducción la rueda permite cambiar la velocidad hasta 16 girandola h...

Страница 21: ...n desaparecerá 13 Pantalla LCD Permite visualizar todas las funciones 14 Botón de LOOP Utilizado para realizar bucles de repetición en la música siga los siguientes pasos para crearlo Asegúrese de que la pista se está reproduciendo Presione el botón LOOP para ajustar el comienzo del bucle Un led empezará a parpadear Presione el botón LOOP de nuevo para ajustar el final del bucle El led se activará...

Страница 22: ...ma sin fín siendo perfecto para pubs etc Para detener la función relay presione los botones PROGRAM y SGL de nuevo hasta que la pantalla deje de parpadear ALMACENANDO UN PUNTO DE CUE Ponga el reproductor en pausa y utilice la rueda jog para buscar el lugar exacto para su punto de cue Una vez que lo ha encontrado presione el botón PLAY PAUSE para ajustar un nuevo punto de CUE El led del cue parpade...

Страница 23: ... o produto GUIA DE INSTALAÇÃO Colocar ou utilizar a unidade durante longos períodos de tempo perto de fontes de calor tais como amplificadores holofotes etc irá afectar o desempenho da unidade e poderá até danificá la Reduza ao mínimo o perigo de pancadas e vibrações durante o transporte da unidade Quando colocar a unidade numa cabine ou numa mala certifique se que há ventilação de modo a permitir...

Страница 24: ...LO 1 SEARCH WHEEL ANEL EXTERIOR Este controlo tem 4 posições para a frente e para trás de velocidade de busca nas músicas Quanto mais rodar o controlo para a frente ou para trás mais depressa irá avançar ou recuar na música 2 JOG WHEEL ANEL INTERIOR O jog wheel tem 2 funções dependendo do modo que estiver a utilizar O jog wheel funciona como um controlo de busca de frame 1 75 seg quando o CD não e...

Страница 25: ...seguida pressione simplesmente o botão PLAY PAUSE para iniciar a sequência A primeira faixa da sua sequência começa a ser reproduzida e o display mostra a mensagem P 01 A sequência programada será reproduzida repetidamente até que o modo de programação seja cancelado tendo para isso de pressionar o botão PROGRAM durante dois segundos O LED ao lado do botão PROGRAM desliga se e a programação é apag...

Страница 26: ... Para parar a função Relay pressione novamente os botões PROGRAM e SGL até que a informação sobre as faixas pare de piscar GUARDAR UM PONTO CUE Coloque o leitor no modo pausa e utilize o jog shuttle wheel para procurar o sítio exacto para o ponto cue Após encontrar o sitio pretendido pressione o botão PLAY PAUSE para definir o novo ponto cue o LED do Cue pisca duas vezes indicando que o novo ponto...

Отзывы: