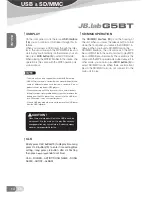
10) DEMO(ON/OFF)
The unit has screen save function. You can set screen save mode
in this menu. If there is no operation for about 10 seconds, the unit
will enter screen save mode automatically.
11) 24HOUR
24 hour/12 hour To change the time display mode between
24 hour or 12 hour.
12) Area
USA/EUROPE/ASIA/LATIN Use the volume knob (7) to select
(USA/EUROPE/ASIA/LATIN)
13) Auto Answer
rotate vol knob, it will be switching “ON/OFF”
14) Auto Connect
rotate vol knob, it will be switching “ON/OFF”
15) Speakers
rotate vol knob, it will be switching “FRONT/ALL”
16) STEERING WHEEL CALIBRATION
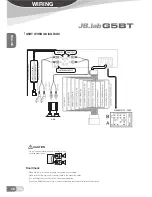
A. Finish wiring connection by referencing the vehicle type&wiring
diagram.
B. Locate your car key on “ACC”
C. Press the volume dial and the “ ” button. And select “STEER
ING WHEEL CALIBRATION”
D. Spin the volume dial and select the menu what you wanna set.
(You can see “PRESS SW BUTTON” on the LCD display)
E. Press the steering remote control button while 3 seconds what
you wanna use.
F. If You see “BUTTON STORED” on the LCD display, the setting
is finished.
- Most of the cars use “KEY 1” wiring, but some cars use “KEY
2” wiring.
lOuDneSS
Press
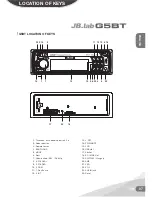
BND button (4)
for several seconds to rein-
force the bass output. Press it for several seconds
again to release this function.
DiSplaY inFOrMatiOn
Press
DISP button (19)
to change the display
mode.
eQualiZatiOn
Press
EQ button (22)
to turn on equalization func-
tion and to select desired audio mode. There are
five different modes as below:
ㅇ FLATㅇ CLASSICㅇ POP ROCK USER SET
- If EQ function is on, Bass &Treble modes do not available.
Mute
Shortly press
button (14)
will mute the sound, press
it again will resume the sound.
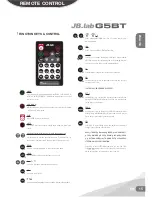
reMOte SenSOr
Point the remote control handset to the
remote
sensor (3).
Press the function keys on the handset
to control the system.
eSp FunCtiOn
The unit can be shockproof about 30 seconds.
auXiliarY input(auX1/auX2)
The unit can be connected to a portable audio
player through the auxiliary input jack
AUX IN (23)
on the front panel or AUX IN jack on the back of
the unit. After finishing the connection, you can
press
MOD button (5)
on the front panel to switch
the mode to AUX IN mode.
(AUX1 = Front / AUX2 = Rear)
reSet FunCtiOn
Reset button (24)
must be activated with either a
ballpoint pen or thin metal object. The reset but-
ton is to be activated for the following reasons:
- Initial installation of the unit when all wiring is completed.
- All the function buttons do not operate.
- Error symbol on the display.
If the unit doesn’t work after pressing the
reset button (24)
, please use a cotton swab
soaked in isopropyl alcohol to clean the
socket on the front panel.
ENGLISH
09
EN
BaSiC
Содержание G5BT
Страница 1: ...ENGLISH KOREA Operation Manual http www jbshop kr...
Страница 19: ...KOREA 19 KO...
Страница 20: ...KOREA 20 KO...
Страница 21: ...21 KO KOREA G7...
Страница 22: ...KOREA 22 KO...
Страница 23: ...23 KO KOREA...
Страница 24: ...KOREA 24 KO G5 G5...
Страница 25: ...25 KO KOREA...
Страница 26: ...KOREA 26 KO...
Страница 27: ...27 KO KOREA...
Страница 28: ...KOREA 28 KO...
Страница 29: ...29 KO KOREA 1 2 3 1 1 2 3 4 5 6 7...
Страница 30: ...KOREA 30 KO G5BT WHEEL GROUND BLACK WHEEL KEY2 BROWN WHEEL KEY1 GREY AUTO ANTENNA PINK AMP...
Страница 36: ...36 KO KOREA MP3 WMA...
Страница 43: ...43 KO KOREA S s 0000 CAR KIT S CAR KIT...
Страница 49: ...41 KO KO KOREA 49 KO KO KOREA...
Страница 50: ...50 KO KOREA G7 G7BT...
Страница 51: ...51 KO KO KOREA...


