9
10:
MENU switch
This switch starts/stops receiver status setting mode.
Pressing the MENU switch allows you to set the receiver status to select the receiving station and
message type in accordance to the operational instructions printed by the printer.
Press the switch again to end the setting operations.
11:
ENT (enter) switch
Sets the receiver status for selection of the receiving station and message type. To select the
setting, press this switch in accordance to the operational instructions printed by the printer.
12:
CLR (clear) switch
Clears the current receiver status setting of receiving station/message type. To de-select a setting,
press the switch in accordance to the operational instructions printed by the printer.
13:
STATE switch
Pressing this switch prints out the currently set receiver status settings.
14:
∆
switch
Displays receiving station and message type status in ascending alphabetical order.
15:
∇
switch
Displays receiving station and message type status in descending alphabetical order.
16:
Symbol Alphabet indicator
Indicates the selected letter(B1 or B2).
17:
Printer paper
Messages are printed out on paper. When the paper runs short, a red line will appear at both
edges of the paper.
18:
Printer
This unit prints out messages.
Содержание NCR-330
Страница 1: ...NCR 330 NAVTEX RECEIVER INSTRUCTION MANUAL...
Страница 7: ...vi EXTERNAL VIEW OF EQUIPMENT...
Страница 14: ...3 1 4 STRUCTURE Unit mm External diagram of the NCR 330 NAVTEX Receiver...
Страница 15: ...4 External diagram of the NAW 330 NAVTEX Antenna approx 610 approx 4 5 approx 190 approx 400 MAST 30 90...
Страница 16: ...5 1 5 OVERALL FLOW CHART DIAGRAM Overall Flow Chart Diagram of the NCR 330 NAVTEX Receiver...
Страница 17: ...6 Overall Flow Chart Diagram of the NAW 330 NAVTEX Antenna...
Страница 21: ...10 2 2 REAR PANEL View of the equipment with rear cover removed...
Страница 23: ...12...
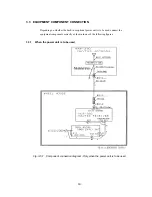
Страница 31: ...20 Fig 3 5 2 Wiring the rear terminal board Only when the power unit is to be used...
Страница 33: ...22 Fig 3 6 2 Wiring the rear terminal board Only when battery power is to be used...
Страница 66: ...55 Fig 6 3 Removing the casing...
Страница 72: ...61...


