48
q
q
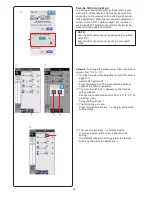
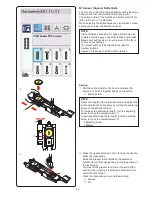
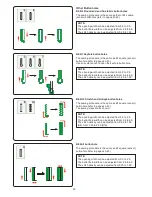
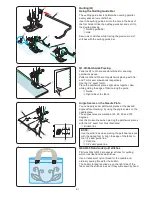
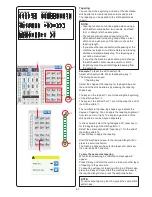
B2 Automatic (square) Buttonhole
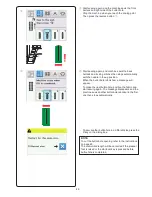
Pull the button holder all the way out.
Mark the buttonhole position on the fabric.
Place the fabric under the foot, and lower the needle at
the starting point.
Lower the foot and start sewing while pulling the needle
thread lightly to the left. After sewing a few stitches, free
the thread and continue sewing.
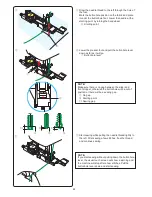
NOTE:
You do not need to pull down the buttonhole lever.
If you wish to sew a buttonhole longer than the size
permitted by the automatic buttonhole foot R, use
satin stitch foot F.
NOTE:
The opening width can be adjusted from 0.2 to 2.0.
The buttonhole width can be adjusted from 2.6 to 9.0.
The stitch density can be adjusted from 0.20 to 1.00.
z
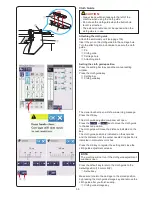
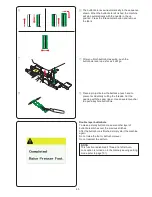
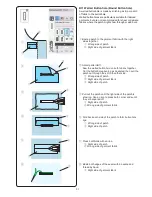
Sew the left side up to the required buttonhole length
and stop the machine. Then press the reverse button
q
.
x
Start sewing again, and the machine sews back with
a straight stitch.
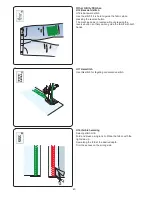
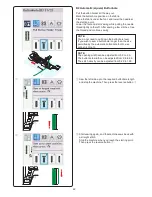
Stop the machine when you reach the starting point.
Then press the reverse button
q
.
z
x
Содержание Skyline S9
Страница 1: ...Instruction Book ...
Страница 2: ......
Страница 168: ...166 STITCH CHART Ordinary Sewing Block Script Broadway Block 9 mm ...
Страница 169: ...167 STITCH CHART Ordinary Sewing Cyrillic Mincho 9mm Symbol Marumoji 9mm ...
Страница 175: ...173 SQ14a RE20a SQ14a DESIGN CHART Embroidery Pattern images are not to scale KANJI Designs Calibration Pattern ...
Страница 176: ...174 DESIGN CHART Embroidery Gothic Script Cheltenham Bauhaus Galant Typist ...
Страница 177: ...175 DESIGN CHART Embroidery Brush First Grade Hollowblock Jupiter Micro Gothic ...
Страница 178: ...176 DESIGN CHART Embroidery Cyrillic 1 Cyrillic 2 Cyrillic 3 Mincho Marumoji ...
Страница 179: ...177 DESIGN CHART Embroidery 2 letters 3 letters Border Normal Sew ...
Страница 180: ......
Страница 181: ......
Страница 182: ...862 460 008 EN ...


