34
NOTE:
1. Be sure to disconnect the machine from the power supply when replacing parts.
2. The language on the LCD is English only.
Preparation
1. Shift the bobbin winder spindle to the right.
2. Turn the drop feed lever to the right (away from you) to raise the feed dog.
3. Slide the speed adjusting lever to the left.
4. Remove the presser foot and raise the presser bar lifter (at normal up position).
5. Set the needle bar at its highest position.
Before starting the diagnosis test.
Check or replace the following part(s) if nothing happens when the power switch is turned on:
1. Be sure that the machine is plugged in.
2. Be sure that the connectors are connected to the printed circuit board A (refer to page 7).
3. Replace the printed circuit board A (refer to page 7)
4. Replace the power supply cord.
5. Replace the switching power supply.
When replacing the sewing lamps or the printed circuit boards, do not turn on the machine.
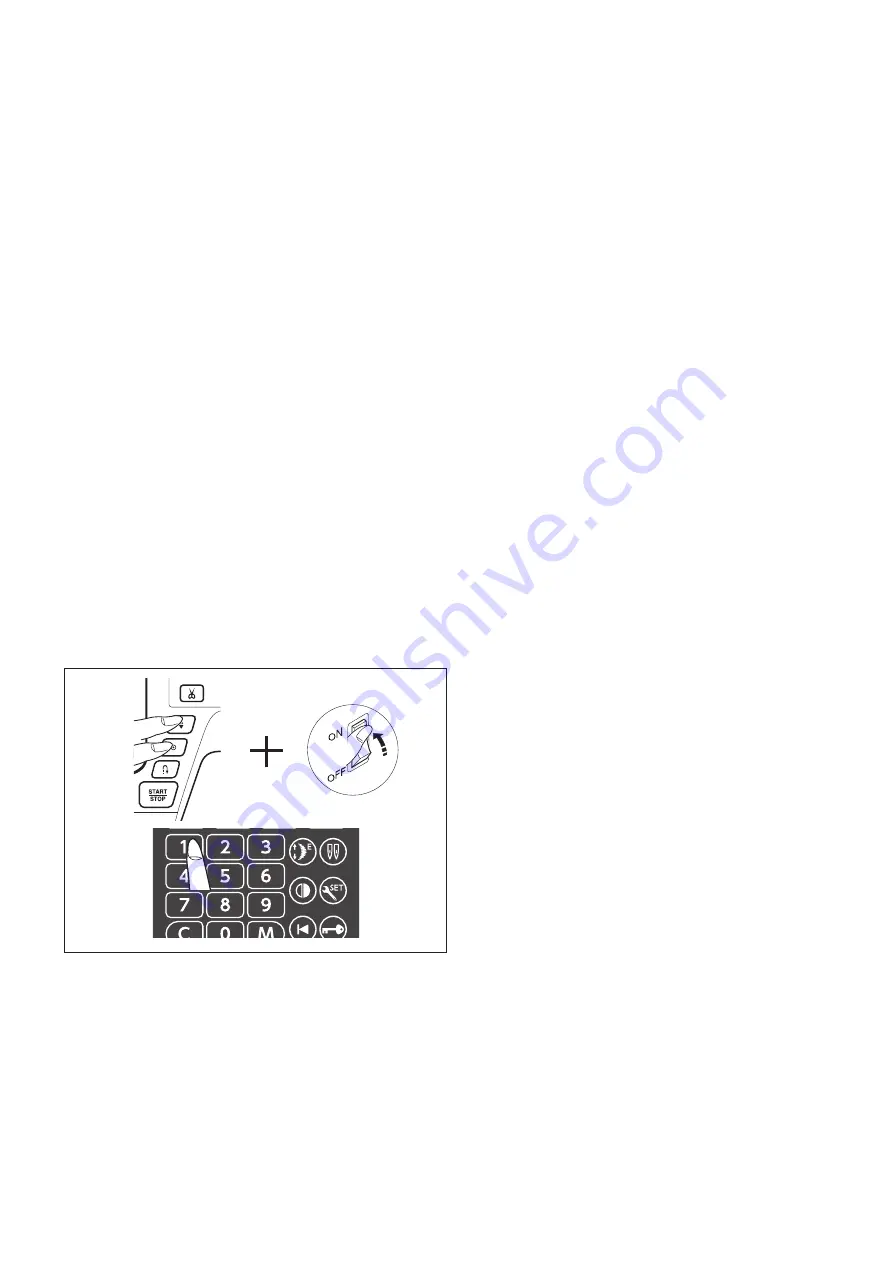
To start the diagnosis test:
1. While pressing the needle up/down and aut-lock stitch
buttons, turn the power switch on.
The LCD screens display "----".
2. Press "1" key to enter the self-diagnostic mode.
1
2
Diagnosis test


