25
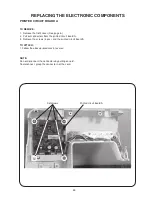
PRiNTED CiRCuiT BOARD A
TO REMOVE:
1. Remove the front cover. (See page 6.)
2. Pull out connectors from the printed circuit board A.
3. Remove the screws (4 pcs.) and the printed circuit board A.
TO ATTACH:
1. Follow the above procedures in reverse.
NOTE:
Do not disconnect the connectors by pulling on cord.
To disconnect, grasp the connector, not the cord.
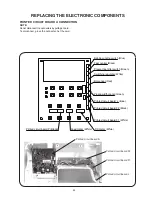
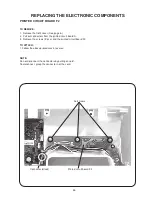
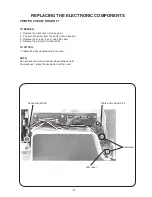
REPlACiNg THE ElECTRONiC COMPONENTs
Printed circuit board A
Setscrews

