13
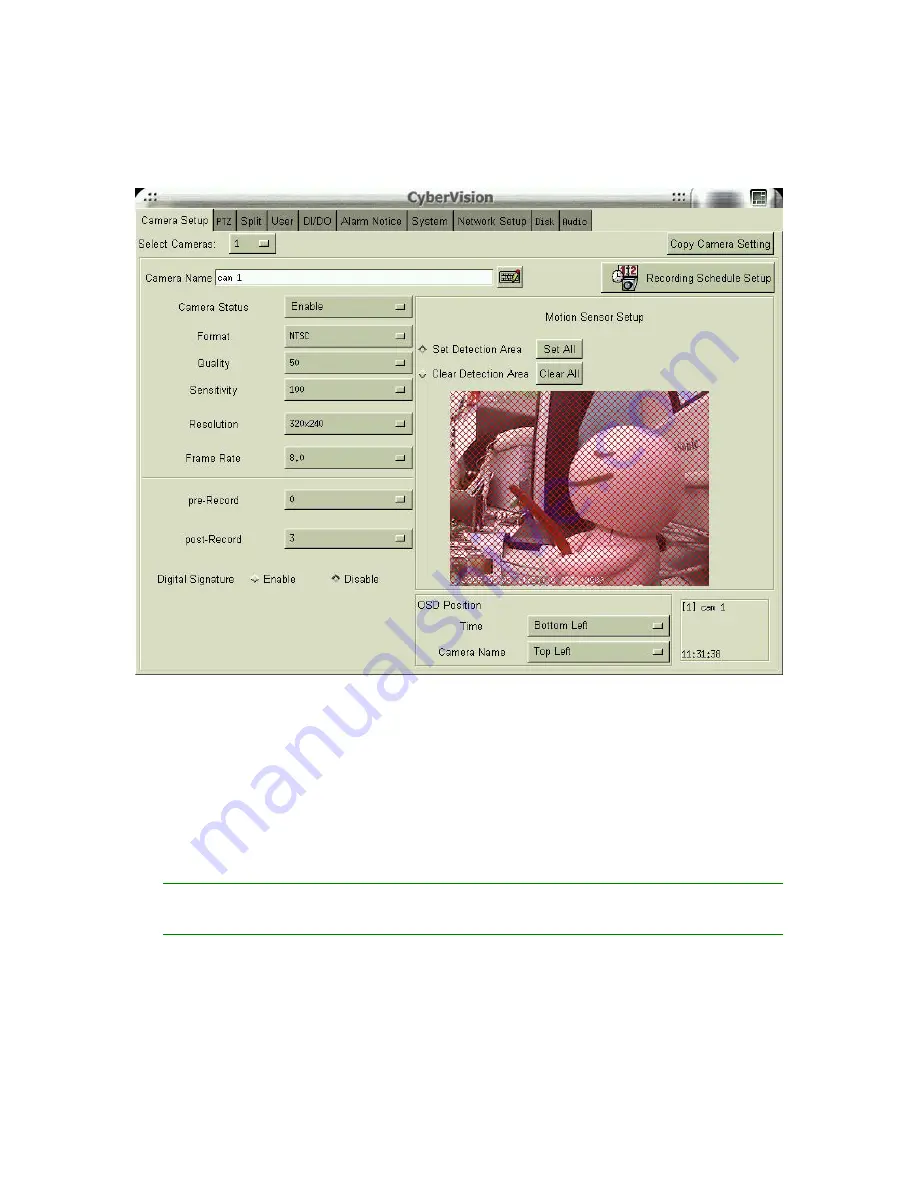
4-1 Camera Setup
1.
Select the desired camera for setup.
2.
Camera Name
: Use the “keyboard figure” on the right of “Camera Name” field to enter
the description for the camera.
3.
Camera Status
(Disable/Enable/Hide): If the channel is not connected to a camera, set
“Disable”. If it is connected, set “Enable”. If you do not want the camera image to be
showed on the main screen, set “Hide”.
4.
B/W Camera
: If “black&white” camera is used, please click the “B/W Camera” icon.
5.
Video Format
(NTSC/PAL/SECAM): The video format of 16 cameras must be the same.
Therefore, if you change the video format of any camera, all the rest cameras will be
changed to the same format automatically.
✍
If a camera is “hidden”, the video is still recorded in the hard disk.
Содержание Hyper Vision DHV-1640 series
Страница 33: ...21 Click OK if you would like to delete this user account Notes The preset user admin cannot be deleted...
Страница 47: ...35 Step 3 In the Welcome to the Network Connection Wizard window click Next...
Страница 54: ...42 Step 3 In the Welcome to the Network Connection Wizard window click Next...
Страница 60: ...48 4 9 Disk This function allows you to check disk status easily and precisely through pressing the S M A R T...
Страница 66: ...54 Zoom In Zoom Out Focus Far Focus Near Auto Focus PTZ Speed...


