7
9
6
6
9
9
10
10
9
9
9
9
10
10
13
13
13
13
7
7
12
12
DE
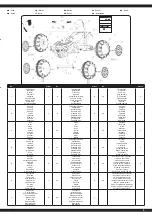
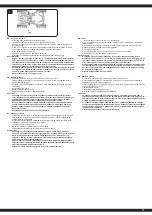
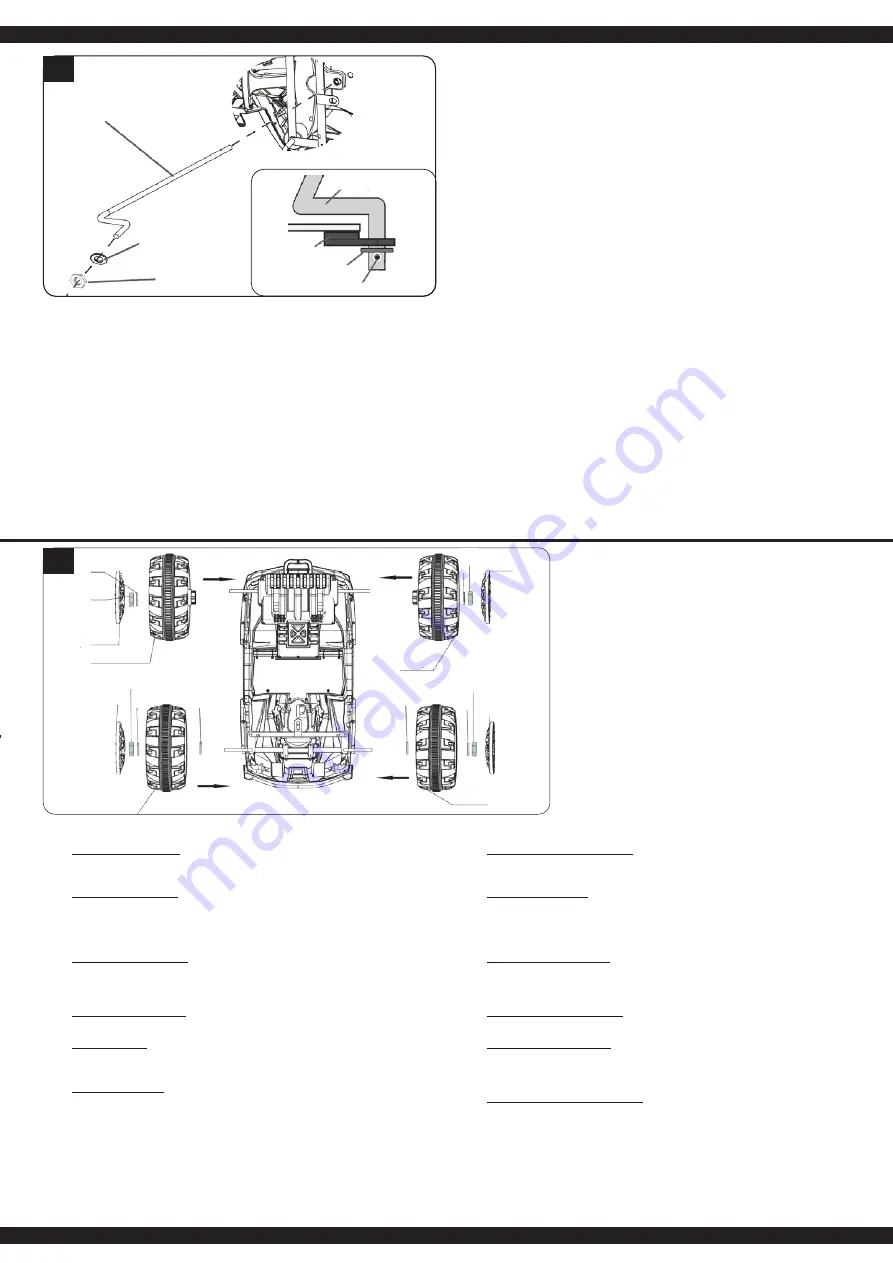
3. Montieren der Räder
●
Montieren des Antriebrads
Befestigen Sie das Antriebsrad (7) an der hinteren Achse (6). Passen Sie es der Getriebe-
aufnahme an. Von außen wird eine Unterlegscheibe (9) aufgesteckt und mit einer Schraube
(10) gesichert.
●
Montieren der Vorderräder
Für die Montage der Vorderräder (12) schieben Sie eine Unterlegscheibe (9) auf die Vorder-
achse. Nun können Sie das Rad (12) aufstecken. Von außen wird eine Unterlegscheibe (9)
aufgesteckt und mit einer Schraube (10) gesichert. (Sollte das Rad zu viel Spiel haben,
nehmen Sie das Rad ab und stecken weitere Unterlegscheiben auf die Achse). Das Rad
sollte sich leicht ohne Wiederstand drehen lassen.
●
Montage der Radabdeckung
Drücken Sie die Radabdeckungen (13) auf bis Sie einrasten.
GB
3. Install wheels
●
Mounting the driving wheels
Fit the driving wheel (7) onto the rear axle (6). Make it match with the gear box. Put a gasket
(9) outside the wheel and use the nut (10) to lock it.
●
Install front wheels
First install gasket (9) on front axle, then install the wheel (12), put a gasket (9) outside the
wheel and use the nut (10) to lock it. (You can install more gasket if the wheel is not firm
enough.)
●
Install the wheel cover
Put the wheel cover (13) on the wheel, press it till a sound „click“ been heard is done.
FR
3. Montage des roues
●
Montage des roues d’entraînements
Fixez le pignon d’entraînement (7) sur l’axe arrière (6). Adaptez-le au système d’entrainement.
De l’extérieur placez une rondelle (9) sur l’axe ainsi qu’un ecrou (10) pour sécuriser
l’ensemble.
●
Montage des roues avant
Pour le montage des roues avant (12), engagez une rondelle (9) sur l’axe avant. Maintenant
vous pouvez engager la roue (12). De l’extérieur placez une rondelle (9) sur l’axe ainsi qu’un
ecrou (10) pour sécuriser l’ensemble. (Si la roue devait avoir trop de jeu, enlevez celleci et
placez une autre rondelle sur l’axe). La roue doit bougée librement sans rencontrer de
résistance.
●
Montage du carénage de roue
Engagez le carénage de roue (13) jusqu’à ce qu’il soit sécurisé.
IT
3. Montaggio del asse anteriore e posteriore
●
Montaggio ruote di trascinamento
Fissare la ruota motrice (7) sull’asse posteriore (6). Adattare l´inserimento del ingranaggio.
Dall’esterno viene inserito una rondella (9) e fissata con un dado (10).
●
Montaggio delle ruote anteriorir
Per il montaggio delle ruote anteriori (12) spingete una rondella (9) sul asse anteriore.
Adesso potete inserire la ruota (12). Dall’esterno viene inserito una rondella (9) e fissata con
un dado(10). Se con tutto ciò la ruota ha troppo gioco, togliete ancora la ruota e inserite
un´altra rondella sul asse. La ruota si deve girare facilmente senza resistenza.
●
Montaggio della carenatura della ruota
I copriruota (13) sono difficili da fissare e da togliere, pertanto vi consigliamo di applicarli alla
fine.
DE
2. Montage der Lenksäule
● Schieben Sie das gebogene Ende der Lenkachse (14)
durch das Loch in der vorderen Achsplatte (15). Jetzt
eine M10 Unterlegscheibe (11) auf die Lenkachse
schieben und mit einer Mutter (10) an der Lenkachse
sichern.
GB
2. Steering shaft assembly
● Insert the bent end of the steering shaft (14) through the
hole in the front axle plate (15). Fit a M10 washer (11)
onto the steering shaft and secure to the steering axle
with a nut (10)
FR
2. Montage de la console de direction
● Engagez la partie courbée de l’axe directionnel (14) dans
le trou de la platine d’axe avant (15). Placez maintenant
ne rondelle M10 (11) sur l’axe directionnel et le fixer sur
l‘essieu directeur à l‘aide d‘un écrou (10).
IT
2. Montaggio della colonna di guida
● Spingere la parte finale piegato della asse volante (14)
nell buco della piastra asse anteriore (15). Spingere una
rondella M10 (11) sull asse volante e fissare con un dado
(10) dell’asse volante.
ES
2. Montaje de la columna de dirección
● Deslice la parte final acodado del eje de dirección (14) a
través del agujero en la placa de eje delantero (15).
Ahora deslice una arandela M10 (11) en el eje de
dirección y fíjela con una tuerca (10) del eje de dirección.
CZ
2. Montáž sloupku řízení
● Posuňte ohnutý konec nápravy řízení (14) skrz otvor v
plechu přední nápravy (15). Nyní podložku M10 (11) na
řízenou nápravu šoupátkem a maticí (10) na řízené
nápravě zálohovat.
PL
2. Montaż kolumny kierownicy
● Wsuń wygięty koniec osi skrętnej (14) przez otwór w
płyta przedniej osi (15). Teraz podkładka M10 (11)
włączona oś kierowana z suwakiem i nakrętką (10) do
kierowania zaradzić kopii zapasowej.
DE
2. Stuurkolom monteren
● Schuif het gebogen uiteinde van de stuuras (14) door het
gat in voorasplaat (15). Nu de M10 ring (11) aan
gestuurde as met schuif en moer (10) om te sturen een
back-up maken.
SK
2. Montáž stĺpika riadenia
● Posuňte ohnutý koniec nápravy riadenia (14) cez otvor v
plechu prednej nápravy (15). Teraz podložku M10 (11) na
riadenú nápravu šupátkom a maticou (10) na riadené
náprave zálohovať.
2
10
10
14
15
11
11
14
3
Hinten | Rear
Vorne |
Front
Содержание just play 460248
Страница 19: ...19...


