background image

14 

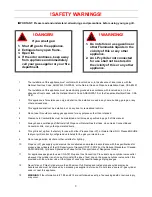
To prevent propane from entering the regulator valve & causing a potential hazard, please ensure that the 
propane cylinder is at a lower level than the regulator when in use. 


15 

Please note that propane (LP) is explosive under pressure, heavier than air, and settles and pools in low areas, 
which can create an explosion hazard. 
 

16 

When configured for Natural Gas, please ensure that the supply pressure matches the required specifications in 
this manual. 


17 

The outdoor cooking gas appliance and its individual shutoff valve must be disconnected from the gas supply 
piping system during any pressure testing of that system at test pressures in excess of 0.5 psi (3.5 kPa). 


18 

The outdoor cooking gas appliance must be isolated from the gas supply piping system by closing its individual 
manual shutoff valve during any pressure testing of the gas supply piping system at test pressures equal to or 
less than 0.5 psi (3.5 kPa). 


19 

When connecting the electric cord, first connect the plug to the outdoor cooking gas appliance, and then plug 
the appliance into the outlet. 


20 

Use only a Ground Fault Interrupter (GFI) protected circuit with this outdoor cooking gas appliance. 


21 

Keep any electrical supply cord and the fuel supply hose away from any heated surfaces. 


22 

Inspect fuel supply hose for damage before each use. If excessive wear, abrasion, or cracks are present, the 
hose MUST be replaced with a genuine Jackson Grills replacement part, prior to using this outdoor cooking gas 
appliance (Contact your nearest dealer for assistance). 


23 

Do not let the cord hang over the edge of a table or touch hot surfaces. 


24 

To protect against electric shock, do not immerse cord or plugs in water or other liquid 


25 

Unplug electrical equipment from the outlet when not in use, and before cleaning. Allow appliance to cool before 
putting on or taking off parts. 


26 

Do not operate any outdoor cooking gas appliance with a damaged cord, plug, or after the appliance 
malfunctions or has been damaged in any manner. Contact the manufacturer for repair. 
 

27 

Never remove the grounding plug or use with an adapter of 2 prongs, and; 


28 

Use only extension cords with a 3 prong grounding plug, rated for the power of the electrical equipment, and 
approved for outdoor use with a W-A marking. 


29 

Do not use this grill until it is COMPLETELY assembled, all parts are securely installed, and leak testing has 
been completed. 


30 

Before using this outdoor cooking gas appliance, inspect the burners to ensure that they are correctly inserted 
over the orifices. Inspect by using a flashlight to view the burner inlets from underneath the front console. When 
correctly positioned, the gas valves outlets (with the orifices) will be inserted into the burner inlets. If necessary, 
remove and reinstall burner(s) correctly. (See Assembly Section, p.7 for more details). 


31 

Do not attempt to move this grill while lit. Always position your grill on a hard level surface away from any 
combustible materials, including wood, flammable liquids or vapors, plastics, etc. 


32 

Do not leave a lit grill unattended. Keep children and pets away from this grill at all times. 


33 

Always open the grill lid slowly & carefully as heat and steam in the grill can cause severe burns. 


34 

Do not touch any metal surfaces on this grill until it has completely cooled to avoid burns, unless wearing 
protective gear. (Pot holders, gloves, BBQ mittens, etc.) 


35 

It is essential to keep the grill clean and free of obstructions and debris. Check burner/Venturi tubes regularly for 
insects and insect nests; a clogged burner tube can lead to a fire beneath the grill. 


36 

Do not alter this grill in any manner. 


Содержание JLS700BI-NG

Страница 1: ... Liquid Propane JLS700BI NG Natural Gas OWNER S MANUAL for LUX700BI Important Notice Please read ALL safety notices on Pg 2 3 before assembling or operating this grill FIRE IT UP WITH JACKSON GRILLS www jacksongrills com Version JUL15 ...

Страница 2: ... you intend to use 9 Do not use gasoline alcohol or other volatiles for lighting 10 Propane LP gas supply cylinders must be constructed and marked in accordance with the specifications for propane gas cylinders of the US Department of transport DOT CFR 49 or the National Standards of Canada CAN CSA B339 Cylinders Spheres and Tubes for the Transportation of Dangerous Goods 11 For appliances designe...

Страница 3: ...ug electrical equipment from the outlet when not in use and before cleaning Allow appliance to cool before putting on or taking off parts 26 Do not operate any outdoor cooking gas appliance with a damaged cord plug or after the appliance malfunctions or has been damaged in any manner Contact the manufacturer for repair 27 Never remove the grounding plug or use with an adapter of 2 prongs and 28 Us...

Страница 4: ...your Grill 7 8 Cutout Framing Dimensions 8 Clearance to Combustibles 9 Propane Gas Connection 9 11 Natural Gas Connection 12 Leak Testing 13 Installer Final Checklist 14 Fuel Conversion 15 Lighting Instructions 15 16 Grilling and Rotisserie Cooking 16 18 Cleaning Maintenance 18 20 Storing your Grill 20 Trouble Shooting 21 Exploded Parts View 22 Parts List 23 Warranty 24 ...

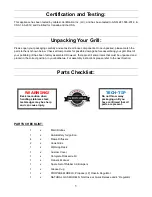
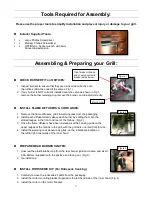
Страница 5: ... some items that must be unpacked and placed in the correct position in your barbecue For assembly instructions please refer to the next Section Parts Checklist PARTS CHECKLIST 1 x Main Firebox 1 x AAA Battery for Ignition 4 x Flame Diffusers 2 x Cook Grids 1 x Warming Rack 1 x Custom Cover 1 x Complete Rotisserie Kit 1 x Owner s Manual 1 x Spare Set of Rubber Lid Bumpers 1 x Grease Cup 1 x PROPAN...

Страница 6: ... call us anytime at the number below Please have your model and serial number at hand Grill Model JLS700BI LP or JLS700BI NG Serial Number ___________________ Write your serial number here for future reference OWNER REGISTRATION Please take the time to fill out and return a Warranty Registration Card or on line at www jacksongrills com or simply fill in the form below and mail or fax to Thank you ...

Страница 7: ...er directly above each burner by setting them into the slotted ledges in the front and rear of the firebox Fig 2 3 Once the flame diffusers have been installed set the cooking grids on the upper ledges of the firebox in the grill with the grill bars oriented front to rear 4 Install the warming rack above cook grids on the 2 brackets located on the left right inner walls of the inner hood PREPARE R...

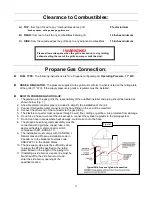
Страница 8: ... no support underneath is required NOTE please ensure that fuel line openings provide adequate space for the lines CABINET FRAMING DIMENSIONS NOTE Rear cabinet back splash if applicable must be non combustible Built In Grill Cutout Dimensions Cabinets with Non Combustible Materials Eg metal studs cement board tiles marble MODEL A Width B Depth C Height D E Lux JLS 700Bi 33 18 10 5 36 B Depth is me...

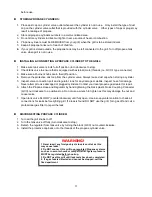
Страница 9: ...ld 4 Connect the other end of the connector to the gas piping 5 The Flexible connector must not pass through a wall floor ceiling or partition is protected from damage 6 Do not use a hose to connect the unit except to connect the cylinder regulator to the piping system 7 Do not run hose in areas where heat damage could melt or burn the hose 8 The propane hose regulator assembly must be connected w...

Страница 10: ...rdance with the Specifications for LP Propane Gas Cylinders of the US Department of Transportation D O T Refer to your propane cylinder collar for markings 9 CANADA All propane cylinders used with this grill must be constructed and marked in accordance with the National Standard of Canada CAN CSA B339 Cylinders Spheres and Tubes for the Transportation of Dangerous Goods and Commission Refer to you...

Страница 11: ... valve connection port and regulator look for any damage or debris Inspect hose for damage Never attempt to use damaged or plugged cylinders Contact your local propane gas dealer for repair 6 Attach the Propane Hose and Regulator by hand tightening the black plastic Quick Coupling Connecter QCC nut clockwise to a positive stop Do not use a wrench to tighten as this may damage the nut and cause lea...

Страница 12: ... The connector must not pass through a wall floor ceiling or partition and is protected from damage 6 Do not use a hose to connect the unit except to connect the cylinder regulator to the piping system 7 The gas supply pipe must be sufficiently sized to supply the BTU h specified on the rating plate based on the length of the piping run 8 If installing a side burner a spate line must be branched o...

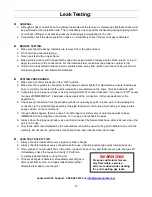
Страница 13: ...MMEDIATELY it indicates a heavy leak at the connection Call your gas dealer or fire department 4 Check every connection from the propane cylinder or natural gas quick release up to and including the connection to the manifold pipe assembly the pipe that goes to the burner by brushing or spraying the soapy solution on the connections 5 If soap bubbles appear there is a leak Turn off propane cylinde...

Страница 14: ...nd of the valves Pg 7 Check grill label to confirm that the gas configuration matches the fuel being supplied When using natural gas ensure that incoming pressure is at 4 WC For propane grills confirm that inlet pressure is at 11 WC NOTE that the original Jackson regulator and hose are preset to 11 WC Ensure that all the gas knobs turn freely Leak test grill and all gas connections Grill test fire...

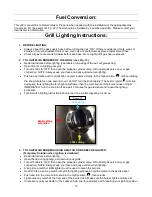
Страница 15: ...ating the knob rotate for a two second count do NOT turn the knob rapidly The built in igniter will click and spark thus lighting the torch light pilot flame then the main burner If the burner does not light IMMEDIATELY turn the knob to off and wait 5 minutes for gas to dispel and repeat the lighting procedure Follow match lighting instructions if burner can t be lit after repeating 3 4 times 3 TO...

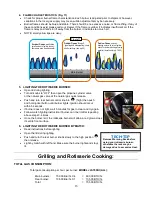
Страница 16: ...urner lights Ignition should occur within 5 seconds If burner does not light wait 5 minutes for gas to clear and try again Follow match lighting instruction if burner can t be lit after repeating above steps 3 4 times Once the burner is lit the rotisserie burner will attain a red glow across its entire front surface 6 LIGHTING THE ROTISSERIE BURNER BY MATCH Read instructions before lighting Open t...

Страница 17: ...ary to turn the heat to a lower setting after the initial searing This allows the food to cook through without burning the outside Foods cooked for a long time or basted with a sugary marinade may need a lower heat setting near the end of the cooking time Turn the control knob s to high and preheat the grill for 8 minutes Time may vary based on climate Note Keep the grill closed during preheating ...

Страница 18: ...in the center of the thigh muscle next to the body Close lid while cooking Cleaning and Maintenance CAUTION Keep the grill area clear and free from combustible materials gasoline and other flammable vapors and liquids Do not obstruct the flow of combustion and ventilation air Keep the ventilation openings of the cylinder enclosure free and clear of debris Ensure that the grill is completely cold b...

Страница 19: ...hot parts in water For final cleaning the cooking surface can be washed with hot soapy water utilizing a Scotch Brite scouring pad for stubborn deposits 4 EXTERIOR CLEANING Use mild dish soap and hot water to clean the outside of the grill Do not use any abrasive cleaners scouring pads strong degreasers etc on the exterior of this grill this will scratch the stainless finish If using the Jackson S...

Страница 20: ...FLAME DIFFUSER MAINTENANCE Remove residue and larger pieces of food using a brush scraper and or cleaning pad after each use If desired cleaners can be used for the final cleaning then rinse with clean hot water This will reduce flare ups and prevent premature break down Grill Storage Clean your grill thoroughly before storage as this will result in greater longevity When propane cylinder is left ...

Страница 21: ...d misaligned with valve orifice Re install burner s correctly so that the orifice is centered in the burner s inlet Defective Gas Valve s Replace gas valves as needed No Spark at rear rotisserie burner Dead battery in rear burner ignition switch Replace battery by unscrewing switch cap Defective ignition switch module Replace ignition switch module Contaminated rotiss burner electrode Use an old t...

Страница 22: ...22 Exploded View LUX JLS700Bi ...

Страница 23: ...03 09 Rotisserie Burner JB 15 47 Grease Pan w Handle JH 47 10 Rotisserie Burner Electrode JE 19 48 Grease Pan Handle JC 60 11 Rotiss Electrode Collector JH 26 54 Rotisserie Electrode Cover JH 69 12 Hood Spacer see 6 above n a 55a Conversion Kit Natural Gas JF 110 13 Cooking Grid JG 53 2 55b Conversion Kit Propane JF 113 14 Flame Diffusers JD 06 4 56 Fuel Regulator Natural Gas JF 99 15 Main Burners...

Страница 24: ...ostile environments accident alterations abuse or neglect including scratches dents corrosion discoloring by heat discoloring is normal abrasive or chemical damage resulting from use of harsh cleaners Should deterioration occur to the point of non performance within the duration of the warranted coverage a replacement will be provided in the first year only This warranty extends to the repair or r...

Отзывы: