background image


27

 
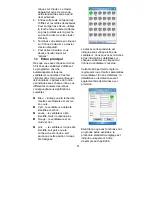
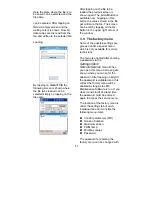
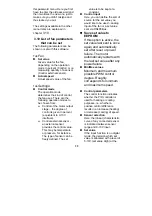
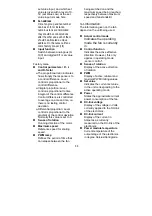
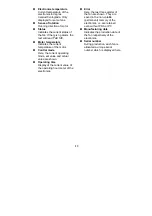
Onglet 

Information 

L’information indiquée sur l’onglet 
dépend de l’unité utilisée. 
 

„


Mode de commande actuel


Il s’agit du mode opérationnel 
sous lequel fonctionne le 
ventilateur actuellement.  

„


Fonction de commande


Il s’agit de la direction effective 
active. Toutefois, ceci s’applique 
uniquement en mode 
opérationnel „commande du 
capteur“. 


„


Sens de rotation


Il s’agit du sens de rotation actif.  

„


PWM (MLI)


Il s’agit des valeurs limites 
minimales et maximales PWM 
(MLI). 

„


Valeur de consigne


Il s’agit de la valeur de consigne 
actuelle de l’unité correspondant 
au mode opérationnel actif.  

„


Puissance


Il s’agit de la puissance 
absorbée approximative actuelle 
du ventilateur. 

„


Voltage du lien CC


Il s’agit du voltage appliqué 
actuellement au lien CC du 
dispositif électronique.  

„


Courant du lien CC


Il s’agit du courant en ampères 
tel que mesuré actuellement sur 
le lien CC du dispositif 
électronique.  

„


Température du module 
d’alimentation


Température actuelle de l’étage 
de sortie du dispositif 
électronique en degrés Celsius. 

„


Température du dispositif 
électronique 


Il s’agit de la température 
actuelle du dispositif électronique 
en degrés Celsius. Seulement 
indiquée pour certains 
ventilateurs. 

„


Sens de rotation


Il s'agit de la direction dans 
laquelle tourne le moteur. 

„


Etat


Il s’agit de l’état actuel dans 
lequel se trouve le ventilateur. 
S’il n’y a pas d’alarme, le texte 
affiché est 

Ventilateur ok

„


Température du moteur


Il s’agit de la température 
actuelle du moteur.  

„


Mode commande


Le mode opérationnel actuel, la 
valeur de consigne et la valeur 
actuelle sont affichés ici.  

„


Durée d’exploitation


Il s’agit de la valeur actuelle du 
compteur des heures de service 
du dispositif électronique. 

„


Erreur


Les trois dernières alarmes du 
ventilateur sont indiquées ici. 
Celles-ci sont enregistrées dans 
la mémoire permanente du 
dispositif électronique, ce qui 
signifie qu’elles sont conservées 
même sans PDA ou PC.  

„


Date de fabrication


Il s’agit respectivement de la 
date de fabrication du ventilateur 
et du dispositif électronique.  

Numéro de série


Lors de la fabrication, un numéro de 
série unique est attribué à chaque 
ventilateur. Celui-ci est indiqué ici.  


Содержание MX

Страница 1: ...MX Maintenance Software Handleiding Mode d emploi Manual Bedienungsanleitung ...

Страница 2: ...2 ...

Страница 3: ... 3 Werken met MX Maintenance 7 3 1 Voorbereiding 7 3 2 Tekst in de invoervelden invoeren 8 3 3 Het hoofdscherm 8 3 4 Ventilatorgroepen voor zoeken instellen 9 3 5 Een centrale inbedrijfstellen 9 3 6 Parameters ventilator instellen 10 3 7 Regelmenu 10 3 8 Parameterbestanden opslaan en laden 11 3 9 Het fabrieksmenu 11 3 10 Lijst met instelbare parameters voor ventilator 12 Wijzigingshistorie Datum V...

Страница 4: ...ndleiding kan ook op uw Pocket PC worden weergegeven In de hoofdstukken 2 2 en 2 3 staat beschreven hoe de installatie in zijn werk gaat Wij raden aan de handleiding in zijn geheel te lezen alvorens te beginnen met de installatie 1 3 Veiligheidsinstructies Lees dit deel van de installatie instructies evenals de handleiding PDF bestand zorgvuldig door alvorens werkzaamheden te verrichten aan deze u...

Страница 5: ...s ca 3 MB zonder Adobe Reader Een vrije seriële of USB interface USB 1 1 of hoger De bij de PDA meegeleverde synchronisatiekabel De Microsoft ActiveSync software meegeleverd met de PDA Ten minste lokale beheerrechten voor de installatie van ActiveSync 2 2 MX Maintenance installeren Let op volg de instructies op in de aangegeven volgorde 1 Schakel de PDA volgens de specifieke instructies in Tijdens...

Страница 6: ...start Indien u dit niet hebt geselecteerd is de set up procedure succesvol voltooid Het programma blijft permanent op de PDA geïnstalleerd zelfs als de accu helemaal leeg is 10 Klik in de installatiewizard van Adobe Reader op Volgende Lees de licentievoorwaarden en klik op Ja Klik vervolgens op Volgende ook als het aangegeven pad de harde schijf van de PC is Het programma wordt eerst op de harde s...

Страница 7: ...e volgende programma s zijn gekoppeld aan MX Maintenance Software en kunnen probleemloos worden verwijderd als ze niet elders worden gebruikt MX Maintenance Software Adobe Reader voor Pocket PC Handleiding MX Maintenance Software Ga als volgt te werk om de software óók van uw PC te verwijderen 1 Open Start Instellingen Configuratiescherm Programma s toevoegen of verwijderen 2 Selecteer MX Maintena...

Страница 8: ...tte naar links wijzende pijl in de rechter bovenhoek van uw schermtoetsenbord 5 Klik op het toetsenbordpictogram indien u klaar bent met invoeren Het schermtoetsenbord wordt afgesloten 6 Klik vervolgens op instellen om de instelling te activeren 3 3 Het hoofdscherm Zodra u op Inloggen hebt geklikt worden 30 ventilatorpictogrammen weergegeven Het programma zoekt automatisch naar verbonden ventilato...

Страница 9: ...er Zolang u in het hoofdscherm bent zoekt MX Maintenance automatisch naar bestaande ventilatoren binnen een willekeurig ingestelde groep Uw invoer in Ventilator Initialisatie bepaald naar welke groep wordt gezocht De screenshot geeft een mogelijke instelling weer Met deze instelling wordt exclusief gezocht naar groepen 1 t m 3 groep 7 en 35 en alle groepen tussen de 200 en 255 3 5 Een centrale inb...

Страница 10: ...rt de MX Maintenance Software Klik op Inloggen Stel bij het eerste gebruik het adres in volgens hoofdstuk 3 5 Klik op het betreffende ventilatorsymbool Klik op het tabblad Instellingen Open de tak Basisinstellingen door op het pictogram te klikken Open het menu item Min Max waarden door hierop te klikken Zodra op Instellen wordt geklikt zijn de huidige parameterwaarden bepaald en kunt u de nieuwe ...

Страница 11: ...weergegeven De gegevens van de ventilator worden uitgelezen en in het geselecteerde bestand opgeslagen Het laden Door op Selecteer bestand te klikken verschijnt het volgende scherm Hier kunt u het gewenste bestand selecteren door op de bestandsnaam te klikken Daarna verschijnt opnieuw het vorige scherm De knop Laden is nu beschikbaar Door hier op te klikken worden de opgeslagen waarden overgeschre...

Страница 12: ...lgende parameters kunnen met deze software worden weergegeven of ingesteld Tabblad Ventilator Ingestelde waarde Vaste waarde voor de ventilator afhankelijk van de functie in percentages Regelen of op capaciteit van een sensor Externe sensor regelen Werkelijk toerental Werkelijke toerentalwaarde van de ventilator Tabblad Instellingen Regeling De functie bepaalt de regeling van de ventilator Kies ui...

Страница 13: ...n in de fabriek ingesteld 1 1 Ingang functie Schakelen tussen analoge 0 10V en digitale 0 1 ingang Fabrieksmenu Regelparameters P I en D factor De proportionele verhouding geeft aan hoe sterk wordt gereageerd op een regelverschil Niveauregeling is evenredig aan het regelverschil Integrale verhouding Niveauregeling is evenredig aan het tijdsintegraal van het regelverschil Het regelverschil wordt op...

Страница 14: ...a in graden Celsius Slechts voor enkele ventilatoren weergegeven Draairichting Draairichting van de motor Status Geeft de huidige status van de ventilator aan De tekst Ventilator OK verschijnt indien er geen sprake van alarm is Motortemperatuur Geeft de huidige temperatuur van de motor aan Regeling De huidige functie ingestelde waarde en werkelijke waarde worden hier weergegeven Bedrijfstijd Weerg...

Страница 15: ...aintenance MX 20 3 1 Préparatifs 20 3 2 Saisie de texte dans les boîtes de dialogue 20 3 3 Ecran principal 21 3 4 Détermination des groupes de ventilateurs à parcourir 22 3 5 Mise en opération d une installation 22 3 6 Réglage des paramètres de ventilateur 23 3 7 Menu mode commande 23 3 8 Enregistrement et chargement des fichiers de paramètres 23 3 9 Menu usine 24 3 10 Liste des paramètres de vent...

Страница 16: ... manuel peut également être visualisé sur l écran de votre ordinateur de poche La procédure d installation est décrite au chapitres 2 2 et 2 3 Nous vous recommandons de commencer par lire le manuel dans sa totalité avant d effectuer toute opération d installation 1 3 Consignes de sécurité Veuillez lire attentivement et entièrement cette partie des consignes d installation ainsi que le manuel fichi...

Страница 17: ...n du logiciel de maintenance MX seulement environ 3 Mo sans Adobe Reader une interface sérielle libre ou USB USB 1 1 ou version plus récente le câble de synchronisation fourni avec le PDA le logiciel Microsoft ActiveSync fourni avec le PDA au minimum de droits locaux d administration pour l installation d ActiveSync 2 2 Installation du Logiciel de maintenance MX Assurez vous de suivre les consigne...

Страница 18: ... Suivant puis cliquez sur Installez pour lancer le copiage de tous les fichiers nécessaires Cette procédure peut prendre un moment Si votre PDA affiche un message annonçant que l auteur du logiciel est inconnu confirmez avec Oui lors de la procédure d installation Une fois que l installation est achevée votre ordinateur de poche affichera un écran de message Confirmez en cliquant sur Ok en haut à ...

Страница 19: ...en cliquant sur le X situé en haut à droite Remarque Adobe Reader demeure dans la mémoire interne de votre ordinateur de poche même après avoir quitté le programme Pour supprimer Adobe Reader de votre mémoire interne il vous suffit de cliquez sur Démarrez Paramètres Système Mémoire Programmes actifs Ici cliquez sur manual_pda pdf puis allez sur Terminez 2 4 Désinstallation du logiciel Pour désinst...

Страница 20: ... câble sériel de connexion au PDA 8 Connectez le connecteur de l interface CIS au câble de connexion 9 Connectez l interface CIS au ventilateur MX 10 Allumez votre ordinateur de poche 11 Cliquez sur Démarrez Logiciel de maintenance MX Si le Logiciel de maintenance MX ne figure pas dans la liste vous pouvez le trouver dans Démarrez Programmes Logiciel de maintenance MX 12 Cliquez sur Accès 3 2 Sais...

Страница 21: ... Les différentes couleurs des icônes correspondent aux significations suivantes Bleu indique que la recherche d autres ventilateurs est encore en cours Vert le ventilateur a déjà été identifié et est bon Jaune le ventilateur a été identifié mais ne répond plus Rouge le ventilateur est en mode échec Gris le ventilateur n a pas été identifié soit parce que la connexion est erronée soit parce que cet...

Страница 22: ...ion Lors de la mise en opération d une installation avec plusieurs ventilateurs en réseau la procédure suivante est recommandée 1 Connectez le premier ventilateur à votre PDA et démarrez le Logiciel de maintenance MX 2 Ce ventilateur doit être identifié comme Groupe 1 Ventilateur 1 réglage d usine Cliquez sur ce ventilateur 3 Allez à l élément du menu Réglages Réglages de base Adresse du ventilate...

Страница 23: ...éterminées et vous pouvez maintenant saisir les nouvelles valeurs désirées dans les boîtes de dialogue en utilisant le clavier d écran tel qu indiqué au chapitre 3 2 9 Après avoir réglé les nouvelles valeurs cliquez sur Activez pour activer les réglages Il est également possible de quitter directement le menu par l étape 10 sans modifier les valeurs 10 Quittez l élément du menu en cliquant sur Ok ...

Страница 24: ...ier à charger l écran précédent s affiche de nouveau Le bouton Charger est désormais accessible Lorsque vous cliquez sur ce bouton les valeurs stockées dans le fichier sont écrites dans le ventilateur Vous pouvez quitter l écran en cliquant sur le bouton OK dans le coin supérieur droit de la fenêtre 3 9 Menu usine Certaines possibilités de réglage sont regroupées sous un menu spécial qui est acces...

Страница 25: ...eur externe Régime actuel Il s agit du régime actuel du ventilateur Onglet Ventilateur Mode commande Ce mode d opération détermine le type de commande utilisé par le ventilateur Il est possible de choisir entre les modes d opération suivants Commande de l étage de sortie du moteur le degré de commande est indiqué en pourcentage équivalent à une interface 0 10 V Commande de capteur externe la valeu...

Страница 26: ...les uns après les autres et chacun doit recevoir une adresse unique Tous les ventilateurs disposent d un préréglage d usine 1 1 Fonction entrée Passage entre valeur de consigne d entrée analogue 0 10 V et numérique 0 1 Menu usine Paramètres de commande Facteurs P I et D Le rapport proportionnel indique le degré de réaction relatif à un écart de commande Le niveau de commande est proportionnel à l ...

Страница 27: ... du dispositif électronique en degrés Celsius Température du dispositif électronique Il s agit de la température actuelle du dispositif électronique en degrés Celsius Seulement indiquée pour certains ventilateurs Sens de rotation Il s agit de la direction dans laquelle tourne le moteur Etat Il s agit de l état actuel dans lequel se trouve le ventilateur S il n y a pas d alarme le texte affiché est...

Страница 28: ...e 32 3 Working with MX Maintenance 33 3 1 Preparatory work 33 3 2 How to enter text in the input boxes 33 3 3 Your main screen 34 3 4 Setting the fan groups to be browsed 35 3 5 Putting a plant into operation 35 3 6 Setting of fan parameters 35 3 7 Control Mode Menu 36 3 8 Saving and Loading of parameter files 36 3 9 The factory menu 37 3 10 List of fan parameters that can be set 38 History of cha...

Страница 29: ...ayed on your Pocket PC too How the installation works is described in chapters 2 2 and 2 3 We recommend reading your way through the complete manual prior to any installation work being carried out 1 4 Safety instructions Please read through this part of the ins tallation instruction as well as the manual PDF file carefully before starting to work on this unit Not complying with and not paying att...

Страница 30: ...nstallation and up to 17 MB free temporary storage space on the hard disk for MX Maintenance installation only about 3 MB without Adobe Reader One free serial or USB interface USB 1 1 or higher The synchronisation cable provided with the PDA The Microsoft ActiveSync software supplied together with the PDA At least local administration rights for the installation of ActiveSync 2 2 How to install MX...

Страница 31: ... view it 6 Click on Next and repeat clicking Next then click on Install to initiate the copying of all necessary files This process may take some time Should your PDA display a message saying the author of the software is unknown please confirm with Yes during the set up procedure Once the installation is finished your Pocket PC will display a message screen Please confirm by clicking Ok in the to...

Страница 32: ...e you have finished reading the manual close the Adobe Reader by tapping on the X in the top right corner Note The Adobe Reader stays in the internal memory of your Pocket PC even after being closed In order to delete the Reader from your internal memory simply tap on Start Settings System Memory Running programs There tap on manual_pda pdf and then go to Finish 2 4 How to de install the software ...

Страница 33: ...n cable with the PDA 2 Connect the Computer Interface Connector CIS with the connection cable 3 Connect the CIS to the MX fan 4 Switch on your Pocket PC 5 Tap on Start MX Maintenance Software Should MX Maintenance Software not be listed there you can find it in Start Programs MX Maintenance Software 6 Tap on Login 3 2 How to enter text in the input boxes In order to enter text in a input box of yo...

Страница 34: ... in the sequence they are located Underneath each symbol the unit address is given The different colours of the symbols have the following meaning Blue indicates that the search for further fans is still going on Green the fan has already been identified and is ok Yellow the fan has been identified but does no longer respond Red the fan is in failure mode Grey the fan is unidentified either it is ...

Страница 35: ...peration the following procedure is recommended 1 Connect the first fan with your PDA and start MX Maintenance Software 2 This fan should be identified as Group 1 Fan 1 factory setting Tap on this fan 3 Go to the menu item Settings Basic settings Fan address 4 Now set another free address not identical with Group1 Fan1 5 Confirm the new address by clicking Set 6 Quit all menu items until you are o...

Страница 36: ...tap Set to activate the settings Alternatively you can directly quit the menu via step 10 without changing or modifying the values 10 Quit the menu item by tapping Ok 3 7 Control Mode Menu This menu item allows you to select and enter the operation mode and the control input of the fan Activating the button Save set value in EEPROM allows you to set automatic re start after a voltage failure 3 8 S...

Страница 37: ...rner of the window 3 9 The factory menu Some of the possible settings are grouped under a special menu which is only available for service technicians The menu is enabled after entering a password via the Settings Stork Service Service menu When you open this menu a screen gets shown where you can enter the password After tapping on Login the password is validated and if its correct the factory me...

Страница 38: ...ature or pressure for instance The type of sensor can be freely defined The set value is to be kept at a constant Control input Here you can define the sort of source for the set value you would like to be used analog input of the fan or a set value sent via RS485 Bus Save set value to EEPROM If this option is active the set value last sent is once again and automatically set after reset or power ...

Страница 39: ...o 0 Sense of rotation Running direction of the motor Maximum speed Reference speed for scaling speed PWM ramp Defines the period of time that can elapse between the fan being switched on and the maximum speed being reached respectively between maximum speed and fan standstill Tab Information The information given on the tab depend on the unit being used Actual control mode Indicates the operating ...

Страница 40: ...Control mode Here the current operating mode set value and actual value are shown Operating time Display of the current value of the operating hour meter of the electronics Error Here the last three alarms of the fan are shown They are saved in the non volatile permanent memory of the electronics i e are retained even without PDA or PC Manufacturing date Indicates the production date of the fan re...

Страница 41: ...ten mit MX Maintenance 46 3 1 Vorbereiten der Benutzung 46 3 2 Eingeben von Text in Eingabefelder 46 3 3 Der Hauptbildschirm 47 3 4 Einstellen der zu durch suchenden Lüftergruppen 48 3 5 Inbetriebnahme einer Anlage 48 3 6 Einstellen von Ventilator parametern 49 3 7 Das Menü Betriebsart 49 3 8 Speichern und Laden von Parameterdateien 50 3 9 Das Factory Menü 51 3 10 Liste der einstellbaren Ventilato...

Страница 42: ...g der Software Dieses Handbuch kann auch auf dem Pocket PC angezeigt werden Die Funktionsweise der Installation wird in den Kapiteln 2 2 und 2 3 beschrieben Wir empfehlen jedoch das Handbuch zuerst komplett zu lesen 1 3 Sicherheitshinweise Lesen Sie diese Installationsanleitung sowie das Handbuch PDF Datei sorgfältig durch bevor Sie mit den Arbeiten beginnen Es kann zu Störun gen führen wenn die f...

Страница 43: ... die Installation von Fan Control ohne Adobe Reader nur ca 3 MB Eine freie serielle oder USB Schnitt stelle USB 1 1 oder höher Das mit dem PDA gelieferte Synchro nisationskabel Die mit dem PDA gelieferte Software Microsoft ActiveSync Mindestens lokale Administrator Rechte für die Installation von ActiveSync 2 2 MX Maintenance installieren Führen Sie die folgenden Schritte bitte in der hier beschri...

Страница 44: ...en zu starten Dieser Vorgang wird etwas dauern Sollten auf dem PDA während der Installation Meldungen erscheinen dass der Herausgeber der Software nicht bekannt ist bestätigen Sie diese bitte mit Ja Nach Abschluss der Installation wird auf dem Pocket PC noch ein Hinweisbildschirm angezeigt Dieser ist mit Ok in der rechten oberen Display Ecke zu bestätigen Fahren Sie auf der PC Seite erst nach dies...

Страница 45: ... Hauptansicht 5 Nach dem Lesen des Handbuchs kann der Adobe Reader durch Antippen des X rechts oben ge schlossen werden Achtung der Adobe Reader verbleibt auch nach Schließen im Arbeitsspeicher des Pocket PC Um den Reader aus dem Arbeitsspeicher zu entfernen tippen Sie bitte auf Start Einstellungen System Speicher Ausgeführte Programme Dort tippen Sie handbuch_pda pdf an und danach auf Beenden 2 4...

Страница 46: ...sen Sie folgende Schritte durchführen 1 Schließen Sie das serielle Verbin dungskabel an den PDA 2 Stecken Sie das Computer Interface CIS an das Verbindungskabel an 3 Verbinden Sie das CIS mit dem MX Ventilator 4 Schalten Sie den Pocket PC an 5 Tippen Sie auf Start MX Maintenance Software Sollte MX Maintenance Software dort nicht gelistet sein ist es unter Start Programme MX Maintenance Software zu...

Страница 47: ...et Das Programm sucht automatisch nach verbundenen Ventilatoren und blendet diese in der Reihenfolge wie diese gefunden wurden ein Unter dem jeweiligen Symbol wird die Geräteadresse ange zeigt Die unterschiedlichen Symbolfarben haben die folgenden Bedeutungen Blau zeigt an dass die Suche nach weiteren Ventilatoren läuft Grün der Ventilator wurde bereits identifiziert und ist in Ordnung Gelb der Ve...

Страница 48: ... kann unter Ventilator Initialisierung eingestellt werden Die Abbildung zeigt eine mögliche Einstellung Bei dieser Einstellung werden die Grup pen 1 bis 3 die Gruppen 7 und 35 sowie alle Gruppen zwischen 200 und 255 einschließlich durchsucht 3 5 Inbetriebnahme einer Anlage Bei Inbetriebnahme einer Anlage mit mehreren verbundenen Ventilatoren empfiehlt sich folgende Vorgehensweise 1 Schließen Sie d...

Страница 49: ...urchführen 4 Tippen Sie auf das betreffende Ventilatorsymbol 5 Tippen Sie den Reiter Einstellungen an 6 Klappen Sie den Zweig Grundein stellungen durch Antippen des Icons auf 7 Öffnen Sie den Menüpunkt Min Max Vorgaben durch Antippen 8 Sobald der Setzen Button aktiv wird sind die momentanen Parameter werte abgefragt worden und Sie können die neuen gewünschten Werte in die Eingabefelder über die Bi...

Страница 50: ...ichern befindet man sich auf einem leeren Bildschirm und der Warte Cursor wird angezeigt Jetzt werden alle zu speichernden Daten ermittelt und in die gewählte Datei geschrieben Laden Durch Tippen auf Datei auswählen gelangt man auf den folgenden Bildschirm auf dem die zu ladende Datei durch einfaches Antippen aufgewählt werden kann Nach dem Antippen der zu ladenden Datei wird wieder der vorhergehe...

Страница 51: ...uerst das alte Passwort und danach zweimal das neue Passwort eingegeben werden Dies verhindert versehentliche Falscheingaben die zum kompletten Sperren des Service Menüs führen würden Die in den anderen Menüs verfügbaren Einstellungen werden in Kapitel 3 9 erklärt 3 10 Liste der einstellbaren Ventilatorparameter Folgende Parameter können mit der Software angezeigt oder eingestellt werden Reiter Lü...

Страница 52: ... festgelegt welcher Sollwert bei einem am Sollwerteingang anliegenden Pegel von 5 10V Sollwert High und welcher bei einem Pegel von 0 5V Sollwert Low gesetzt wird Lüfteradresse Hier können Lüftergruppe und Lüfternummer eingestellt werden Werden z B mehrere Ventilatoren vernetzt sollten diese nacheinander angeschlossen und jeweils auf eine eindeutige Adresse eingestellt werden Zu Beginn haben alle ...

Страница 53: ...Spannung in Volt an Zwischenkreisstrom Anzeige des aktuell am Zwischen kreis der Elektronik gemessenen Stroms in Ampère Endstufentemperatur Aktuelle Temperatur der Elektronik endstufe in Grad Celsius Elektroniktemperatur Aktuelle Temperatur der Elektronik in Grad Celsius Drehrichtung Anzeige der aktiven Drehrichtung nach ebm papst Standard auf Rotor gesehen Fehlerstatus Gibt den aktuellen Zustand ...

Страница 54: ......

Страница 55: ......

Страница 56: ...storkair nl www brightenupyourlife nl E mail helpdesk jestorkair nl J E Stork Ventilatoren NV SA Vriesenrot 26 Industriepark Hoogveld 9200 Dendermonde België Telefoon 32 0 52 25 87 80 Telefax 32 0 52 25 87 98 Internet www ventilatie com E mail info ventilatie com J E Stork Ventilatoren B V 849050460 0607 ...

Отзывы: