


Support: 1-855-473-7449 or 1-408-943-4100
Page 6
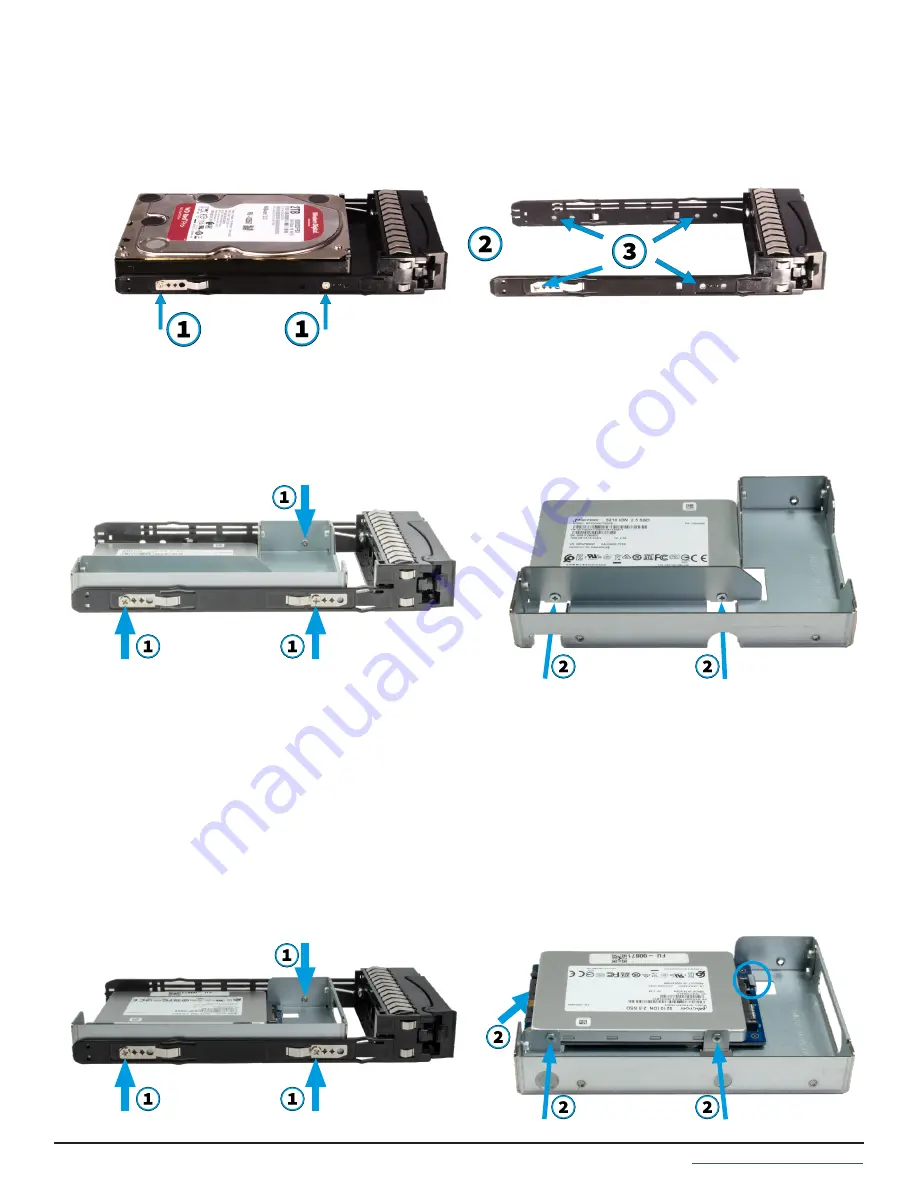
Place the tray on a flat surface and remove the four screws holding the drive to the tray, two on each side (1). Place
the new drive in the tray with the drive connector to the rear of the tray (2), and secure the hard drive in the tray
with four screws, two on each side. (3).
4.1.1 3.5” Drive Replacement
4.1.2 2.5” Drive Replacement
4.1.3 2.5” Read Intensive Drive Replacement
Place the tray on a flat surface and remove the three screws holding the adapter to the tray, two on one side and
one on the other (
1
). Remove the adapter from the tray and remove the two screws that hold the 2.5” drive to the
adapter (
2
). Follow this process in reverse to add the new 2.5” drive to an adapter and attach to the drive tray.
Warning:
the interposer is considered part of the 2.5” drive and must be removed with it. Attempting to reuse an
interposer can result in a system malfunction or data loss!
Place the tray on a flat surface and remove the three screws holding the adapter in place, two from one side and
one on the other (
1
). Remove the adapter from the tray and remove the three screws that hold the 2.5” drive and
interposer in place, two from the side and one underneath the adapter (
2
). Gently lift the 2.5” drive and interposer
free from the adapter.
When installing the new drive, follow the previous procedure in reverse, but make sure the edge of the new inter
-
poser slides under the retention tab (circled) on the adapter.


