background image

Support: 1-855-473-7449 or 1-408-943-4100                                     

                           Email: 

[email protected]

Page 5

4  Drive Tray Installation

Do not install the drives until the chassis has been installed in the rack.

4.1  Remove Top Cover

Slide the unit out on the rails. Unscrew the cover screws to unlock the top cover 

(1)

. Slide the top cover forwards, 

then lift it off 

(2)

.

4.2  Install Drive Trays

TrueNAS systems only support qualified HDs and SSDs. Contact the Sales Team for more drives or replacements. 

Adding unqualified drives to the system voids the warranty. Call Support if drives are improperly installed in trays.

To add a new drive into an empty tray, place the tray on a flat surface (

1

) and push the hard drive into the tray (

2

). 

Make sure the connector is at the rear of the tray.

Содержание TrueNAS ES60

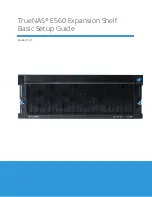
Страница 1: ...TrueNAS ES60 Expansion Shelf Basic Setup Guide Version 1 91...

Страница 2: ...Rack Rails 3 3 2 Mount Cabinet Rails 3 3 3 Mount the Rack Rails 3 3 4 Mount the Unit in the Rack 4 4 Drive Tray Installation 5 4 1 Remove Top Cover 5 4 2 Install Drive Trays 5 5 ES60 Cable Management...

Страница 3: ...to 60 drive trays with installed hard drives shipped separately Two 3 meter Mini SAS HD to Mini SAS HD cables 1 Unpacking the Unit ES60 Bezel TrueNAS units are carefully packed and shipped with truste...

Страница 4: ...and locate ID The fault indicator is on during the initial power on self test POST or when the TrueNAS software has issued an alert 1 Power indicator 2 Alarm indicator 3 Locate ID 4 Management port n...

Страница 5: ...other side 3 2 Mount Cabinet Rails The ES60 occupies 4U of rack space The rails are mounted in the center 2U of that space Cage nuts for racks with square and round holes are included Install four cag...

Страница 6: ...sis from the rack Lift the ES60 with attached cabinet rails and align the cabinet rails with the inside front of the rack rails Carefully slide the ES60 forwards into the rack rails until the unit sto...

Страница 7: ...top cover 1 Slide the top cover forwards then lift it o 2 4 2 Install Drive Trays TrueNAS systems only support qualified HDs and SSDs Contact the Sales Team for more drives or replacements Adding unqu...

Страница 8: ...start again with the left bay A label on the front left of the lid shows the preferred order of drives Slide the tray button left to open the latch Carefully lower the drive tray into a drive bay unt...

Страница 9: ...ft rear side of the ES60 for the CMA Pulling the units lightly out of the rack can make these posts more accessible Align the holes on the CMA chassis bracket with the posts Slide the cable management...

Страница 10: ...of the ex housing with exposed holes Un clip and open the two tabs closest to the end allowing the ex housing to expand enough to t over the bracket pins Press the ex housing rmly into the bracket un...

Страница 11: ...in place Repeat the process for the second power supply and cord Plug both power cords into outlets The ES60 will turn on Wait two minutes for the drives to start If you turned off the TrueNAS system...

Страница 12: ...the first port on the first TrueNAS Controller to the first port on the first Expansion Shelf Controller High Availability systems require another cable from the first port on the second TrueNAS Cont...

Страница 13: ...Support 1 855 473 7449 or 1 408 943 4100 Email support ixsystems com Page 11 7 2 R Series 7 2 1 R20 R20 with two ES60 Expansion Shelves R20 with a single ES60 Expansion Shelf...

Страница 14: ...Support 1 855 473 7449 or 1 408 943 4100 Email support ixsystems com Page 12 7 2 2 R40 R40 with a single ES60 Expansion Shelf R40 with two ES60 Expansion Shelves...

Страница 15: ...Support 1 855 473 7449 or 1 408 943 4100 Email support ixsystems com Page 13 7 2 3 R50 R50 with a single ES60 Expansion Shelf R50 with two ES60 Expansion Shelves...

Страница 16: ...Support 1 855 473 7449 or 1 408 943 4100 Email support ixsystems com Page 14 7 3 M Series M40 with a single ES60 Expansion Shelf M40 with two ES60 Expansion Shelves 7 3 1 M40...

Страница 17: ...Expansion Shelves The M50 can support up to 8 total Expansion Shelves with the use of additional SAS cards The M60 can support up to 12 total Expansion Shelves with the use of additional SAS cards M50...

Страница 18: ...he TrueNAS web interface or go directly to https www truenas com docs Additional hardware guides and articles are in the Documentation Hub s Hardware section https www truenas com docs hardware The Tr...

Страница 19: ...Support 1 855 473 7449 or 1 408 943 4100 Email support ixsystems com Page 17...

Страница 20: ...Support 1 855 473 7449 or 1 408 943 4100 Email support ixsystems com Page 18...

Отзывы: