d.
e.
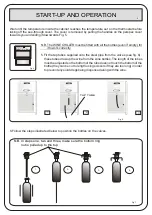
Support the bottom of the bottle with your left hand and grasp the top ring nut on
the valve with your right hand and push it down (you should feel the resistance of
the counter spring). (Fig. 7-3)
Slide your hand along the clamp until it meets the bottom ring nut and press it
down as shown in fig.7-4: this locks the clamp shut.
f. Once all the bottles are in place, open the pressure gauge's secondary valve and
replace the see-through cover by inserting it at the bottom and sliding it upwards
until it clicks onto the magnets. As it closes, the micro switch activates the solenoid
shut-off valve for the NITROGEN, so this can enter the circuit and bring the bottles
up to pressure
.
0
1
0
1
Magnets
Micro switch
Top ring nut
Bottom ring nut
Tap tube
START-UP AND OPERATION
Fig.8
Fig.9
.5
NOTE:
Empty bottles are replaced as follows: press the sample measure button (n°1) 4 or 5 times
with a glass underneath the dispenser tap to drain the circuit completely. Now remove the see-
through cover, remove the empty bottle and replace it with a full bottle, as described in step 6.1.
a. Check the bottom ring nut is pulled up to the top,
as shown in Fig. 8
b. Slide the bottle up so that all the tube is inside it.
(Fig.7-1)
c. Support the bottom of the bottle with your left hand
and push it upwards until the valve cap is inserted
inside the neck of the bottle. ( Fig.7-2)
6.1
THE BOTTLES ON THE VALVES


