Chapter 10 PROGRAM MODE
5.
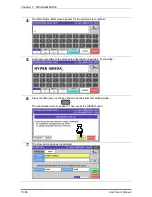
Edit a text according to the procedures described in Appendix “Text Editing”.
6.
Press the [ESC] key on the key sheet to escape from text editing mode.
The confirmation screen appears. Then, press the [SAVE] button.
7.
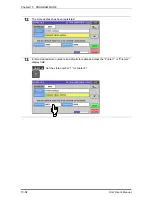
The edited text has been registered.
8.
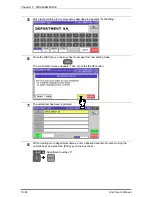
Repeat steps 3 through 7 for more registrations.
Uni-7 User’s Manual
10-63
Содержание UNI-7
Страница 56: ...Chapter 3 RECEIPT ISSUE 8 Press the PRINT key on the key sheet to issue the receipt Uni 7 User s Manual 3 9 ...
Страница 57: ...Chapter 3 RECEIPT ISSUE 9 The Subtotal screen appears for the settlement 3 10 Uni 7 User s Manual ...
Страница 70: ...Chapter 3 RECEIPT ISSUE 14 The Subtotal screen appears for the settlement Uni 7 User s Manual 3 23 ...
Страница 73: ...Chapter 3 RECEIPT ISSUE 7 The Subtotal screen appears for the settlement 3 26 Uni 7 User s Manual ...
Страница 83: ...Chapter 5 TEMPORARY CHANGE OPERATIONS Fixed Unit Price Products 5 2 Uni 7 User s Manual ...
Страница 85: ...Chapter 5 TEMPORARY CHANGE OPERATIONS Weighing Fixed Price Products 5 4 Uni 7 User s Manual ...
Страница 87: ...Chapter 5 TEMPORARY CHANGE OPERATIONS Fixed Unit Price Products 5 6 Uni 7 User s Manual ...
Страница 89: ...Chapter 5 TEMPORARY CHANGE OPERATIONS Fixed Unit Price Products 5 8 Uni 7 User s Manual ...
Страница 91: ...Chapter 5 TEMPORARY CHANGE OPERATIONS Weighing Fixed Price Products 5 10 Uni 7 User s Manual ...
Страница 93: ...Chapter 5 TEMPORARY CHANGE OPERATIONS Weighing Fixed Price Products 5 12 Uni 7 User s Manual ...
Страница 104: ...Chapter 7 ACCUMULATOR MODE 6 Remove the product from the weigh platter Uni 7 User s Manual 7 5 ...
Страница 107: ...Chapter 7 ACCUMULATOR MODE 6 The registration has been completed 7 8 Uni 7 User s Manual ...
Страница 110: ...Chapter 7 ACCUMULATOR MODE 6 Remove the product from the weigh platter Uni 7 User s Manual 7 11 ...
Страница 115: ...Chapter 8 TOTAL ADJUST MODE 6 Remove the product from the weigh platter Uni 7 User s Manual 8 5 ...
Страница 118: ...Chapter 8 TOTAL ADJUST MODE 6 The registration has been completed 8 8 Uni 7 User s Manual ...
Страница 121: ...Chapter 8 TOTAL ADJUST MODE 6 Remove the product from the weigh platter Uni 7 User s Manual 8 11 ...
Страница 126: ...Chapter 9 TOTAL MODE Uni 7 User s Manual 9 5 ...
Страница 134: ...Chapter 10 PROGRAM MODE 10 2 Uni 7 User s Manual ...
Страница 173: ...Chapter 10 PROGRAM MODE 8 The selected PLU has been assigned to the selected membrane key Uni 7 User s Manual 10 41 ...
Страница 253: ...Chapter 10 PROGRAM MODE 4 Press the STRAT button to print the labels Uni 7 User s Manual 10 121 ...
Страница 255: ...Chapter 11 SETUP MODE 11 2 Uni 7 User s Manual ...
Страница 260: ...Chapter 11 SETUP MODE Uni 7 User s Manual 11 7 ...
Страница 264: ...Chapter 11 SETUP MODE Uni 7 User s Manual 11 11 ...
Страница 265: ...Chapter 11 SETUP MODE 11 12 Uni 7 User s Manual ...
Страница 269: ...Chapter 11 SETUP MODE 3 Press the WEEKLY tab to display the Preset Report Weekly screen 11 16 Uni 7 User s Manual ...
Страница 283: ...Chapter 11 SETUP MODE 11 30 Uni 7 User s Manual ...
Страница 284: ...Chapter 11 SETUP MODE Uni 7 User s Manual 11 31 ...
Страница 290: ...Chapter 11 SETUP MODE 9 The edited logo image has been registered Uni 7 User s Manual 11 37 ...
Страница 295: ...Chapter 12 ADJUSTMENT MODE 5 Press the SET button to confirm calibration Uni 7 User s Manual 12 5 ...


