background image

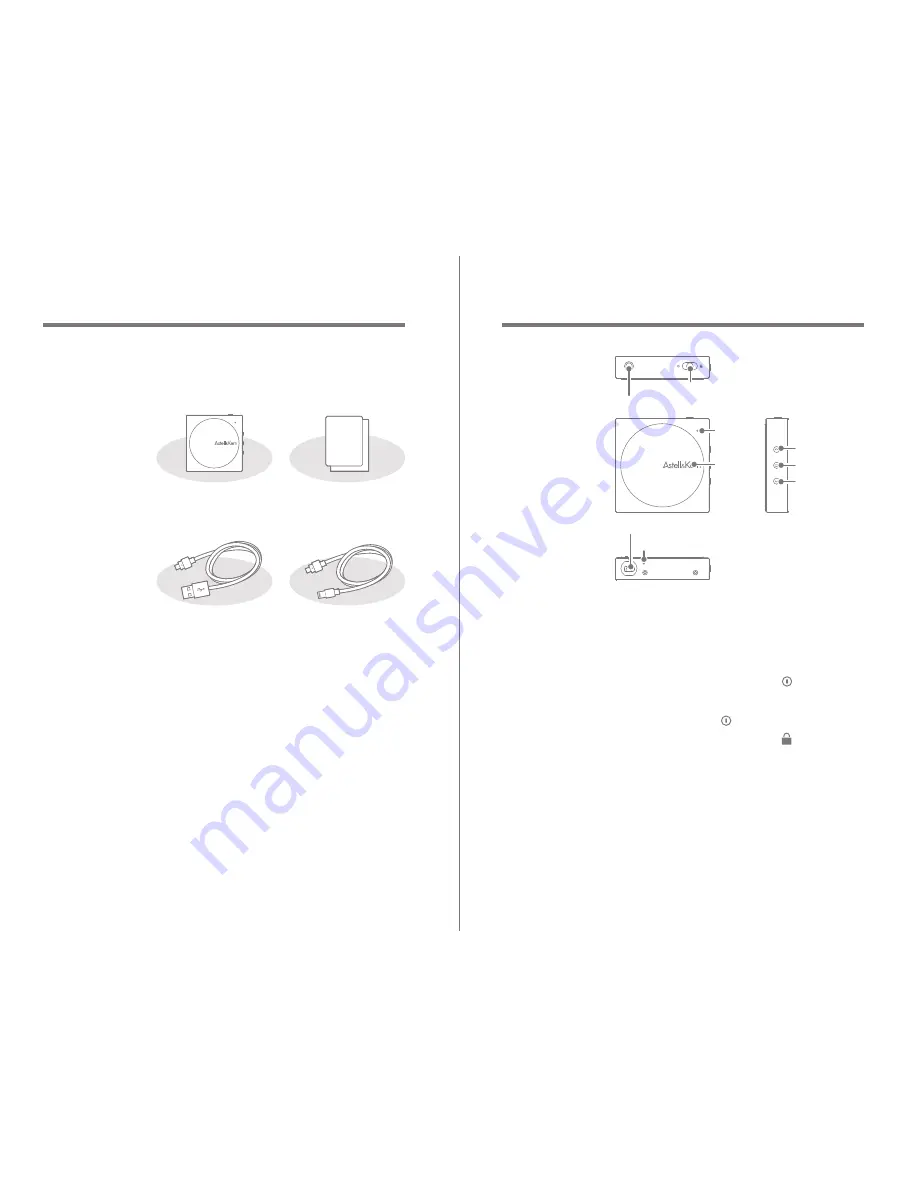
Earphone terminal: 

Connect the earphone

/speaker and output sound.

Power / lock:

Push the power key in the [     ] direction 
to turn the product on. Push and hold the 
power key in the [     ] direction to turn it off.
Push the power key in the [     ] direction 
to set up the lock function.

Status LED:

 Displays the product’s name.

Volume:

 Turn wheel to adjust volume.

Previous music:

 Play previous music.

Play/Pause:

 Play/Pause

Next music:

 Play next music.

Names of 
parts

Previous 

music
Play/Pause

Volume

Status 

LED

Next music

AK10 USB terminal

Charging LED

Power /lock

Earphone terminal

Getting started   

03

User Guide

AK10

 Lightning cable

AK10

 USB cable

Quick Start Guide:

This information describes the basic 
method of using the product.
Warranty Card: The WARRANTY CARD is 
necessary when applying for warranty 
work (A/S) so keep it in a safe place.

AK10 USB cable:

Connect product to a computer and 
charge the battery.

AK10 Lightning cable:

Connect product to iPhone 5/iPod Touch 5.

Components may be changed without a 
previous notice to improve the performance 
or quality of the product

Components

Quick Start Guide

 & Warranty Card

02


Getting Started

AK10

Содержание Astell&Kern AK10

Страница 1: ...INSTRUCTION BOOK INSTRUCTION MANUAL AK10...

Страница 2: ...etting started _01 Connecting iPhone iPod and listening to music Using the USB DAC function Listening to music 08 09 11 Using _02 Safety Problem Solving Copyright Certification Registered trademark Es...

Страница 3: ...ause Volume Status LED Next music AK10 USB terminal Charging LED Power lock Earphone terminal Getting started 03 User Guide AK10 Lightning cable AK10 USB cable Quick Start Guide This information descr...

Страница 4: ...ring firmware update Blue Red Blue Red Blue Purple Purple Getting started 05 User Guide Do not use the reset function while the product is in use Doing so may seriously damage the product s memory Usi...

Страница 5: ...nce the computer goes into standby mode the iriver device may not be charged The charging time is about 3 hours and 30 minutes Fully discharged Charge the product while it is turned off When charging...

Страница 6: ...dio device Vista 7 8 Select AK10 USB DAC in Control panel sound and audio device and right click mouse to select set as default device How to use it on PC USB DAC Using 09 To play high quality audio d...

Страница 7: ...dows default volume but can be adjusted with volume wheel or other available program Depending on PC application volume and key may not function normally User Guide 10 Using Macintosh OS X Select Outp...

Страница 8: ...or stickers attached to the screen may dim the image User Guide 12 Other information Safety Related to the iriver device Failure to change the screen image may result in permanent discoloration Do not...

Страница 9: ...ght Act 1999 2013 iriver Limited All rights reserved Certification KCC FCC CE Class B device broadcasting and communication equipment for homes This device is EMC equipment for homes class B It can be...

Страница 10: ...nt damage including injury or other damage due to improper use and operation of this iriver device The information contained in this instruction book is based on the current iriver device specificatio...

Отзывы: