


3
TOP PANEL OVERVIEW
2
5
1
6
4
3
7
8
11
12
13
10
9
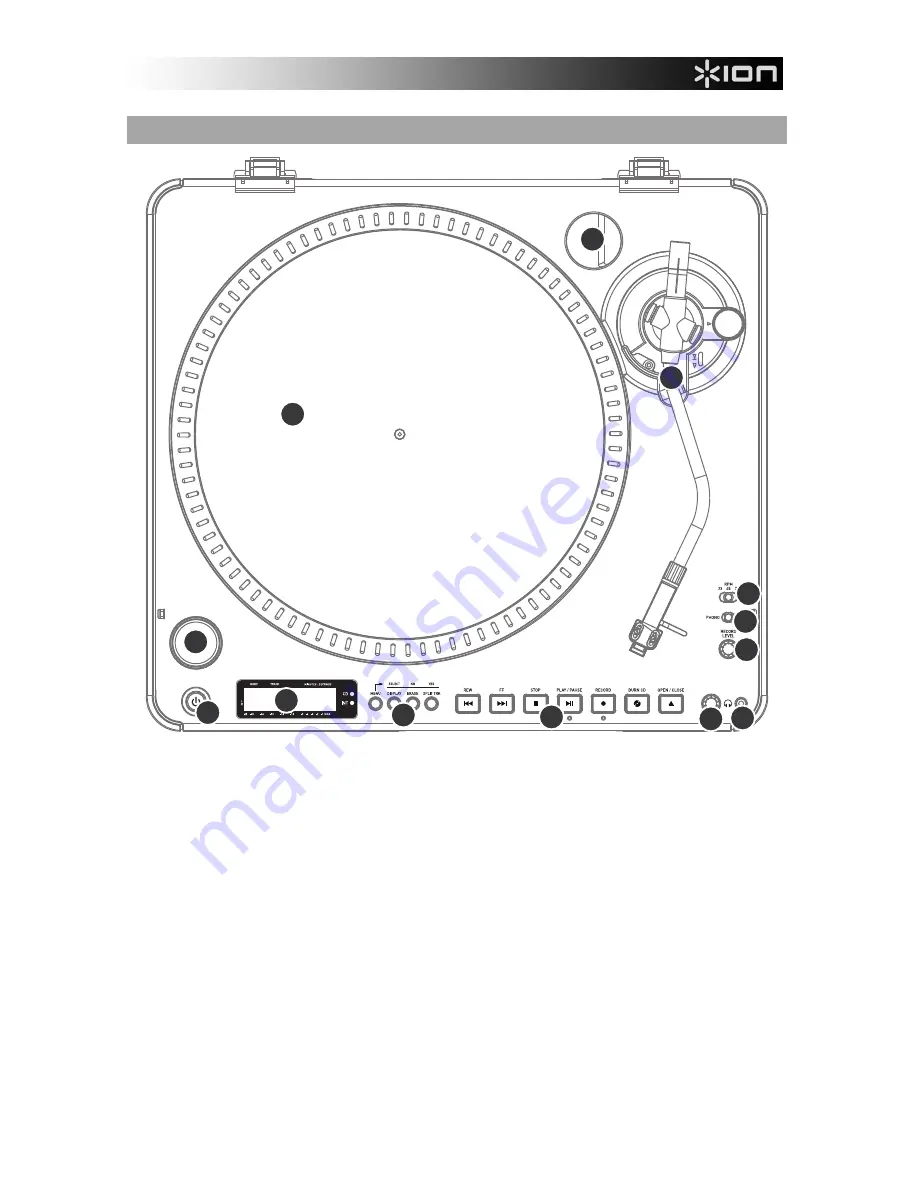
1.
POWER BUTTON:
Press this button to turn the unit on and off.
2.
PLATTER:
This platter must be securely fastened to the turntable prior to operation. The Motor Drive Belt can
be found on the drive ring underneath the platter. See “Platter Setup” section for detailed information on
installing the Motor Drive Belt.
3.
TONEARM ASSEMBLY:
See “Tonearm Overview” section for a detailed description of the tonearm.
4.
45 RPM ADAPTER HOLDER:
You may place the 45 adapter here when it is not in use.
5.
START/STOP BUTTON:
This button starts and stops the turntable motor. If the button doesn’t seem to be
functioning, check to make sure that the Motor Drive Belt is properly installed, as described in the “Platter
Setup” section. Please note that the tonearm needs to be moved away from resting position (arm clip) for the
turntable motor to activate.
6.
DISPLAY:
The display helps you access menu options and information relevant to the operation of the unit.
7.
MENU AND FUNCTION BUTTONS:
See “Menu and Function Buttons” section for a detailed description of
these buttons.
8.
CD CONTROL BUTTONS:
See “CD Control Buttons” section for detailed information.
9.
HEADPHONE VOLUME:
Adjust the volume of the headphone signal with this knob.
10.
1/8” HEADPHONE OUTPUT:
Connect your 1/8” headphones to this output.
11.
RECORD LEVEL:
This knob adjusts the level of the audio signal from the turntable or from audio sources
connected to the Line In inputs on the rear panel.
12.
PHONO / LINE SWITCH:
This switch selects the input audio signal. Set this switch to Phono when playing
and transferring your vinyl records to CD or to your computer. Set this switch to Line if you would like to
transfer or listen to music from external audio sources connected to the Line In inputs on the rear panel.
13.
33 / 45 / 78 RPM SELECTOR SWITCH:
Set this switch to the appropriate position when playing back records.
If the music plays at a strange or unusual pitch, this may be a good indication that the wrong RPM setting has
been selected.
Содержание LP2CD
Страница 2: ......
Страница 18: ......
Страница 19: ......
Страница 20: ......
Страница 21: ...www ion audio com...


