


12
Configure your IX66 Internet Gate!
IX66 Internet Gate is delivered with factory settings that suit most users. In some situations however,
you need to change your IX66 Internet Gate’s configurations.
To access the built-in pages inside your IX66 Internet Gate, do the following:
1. Open a web browser, such as Internet Explorer or Netscape Navigator, on your PC.
2. Write the IP address of your IX66 Internet Gate,
192.168.0.1
, in the address field of the
browser. The first built-in page should appear.
3. Klick
on
Log in
.
4. Enter
User name
and
Password
.
(At delivery is User name=
admin
, Password=
admin
. You should change them at once!)
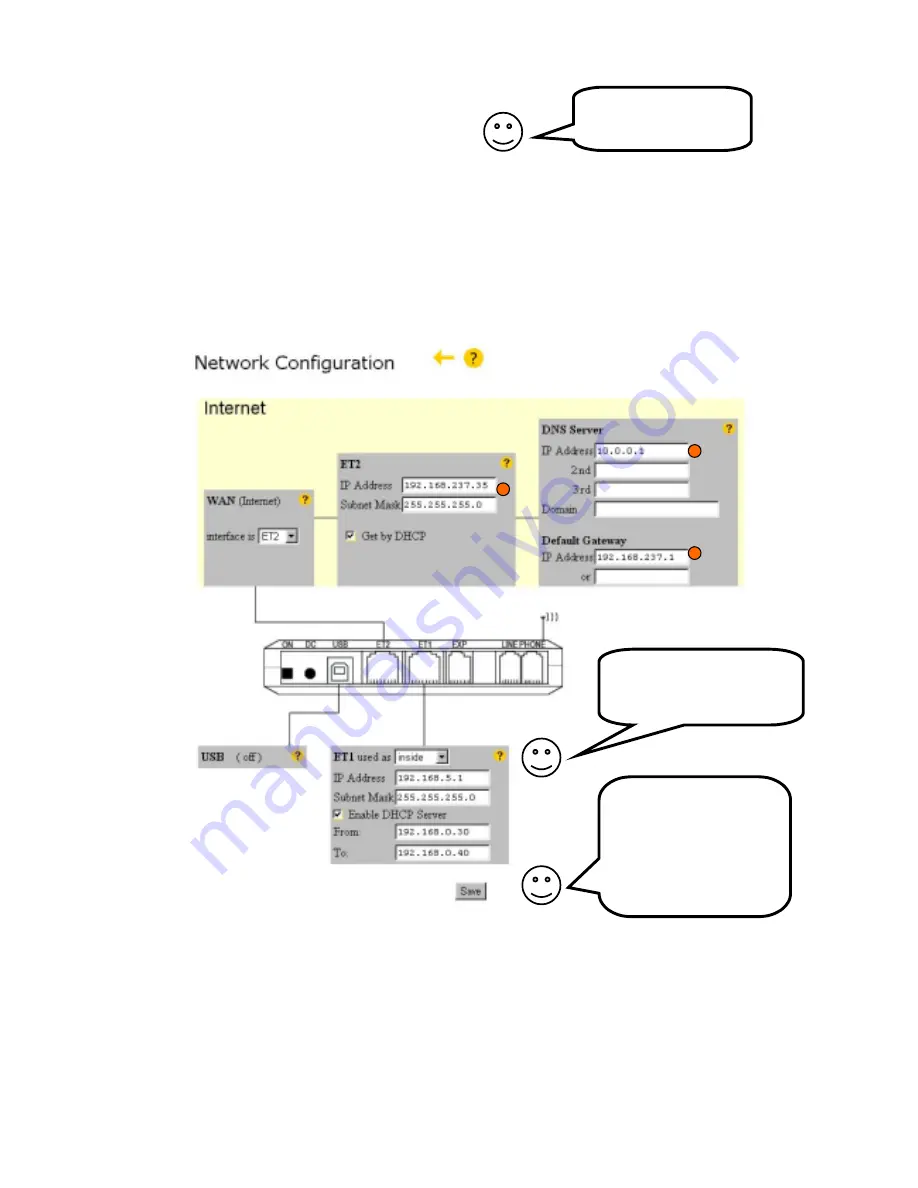
5. Select
Network
in the main menu that appears.
6. Select
ET2
as WAN interface. Klick on ”Change”.
7. Enter your Internet settings:
a. If your Internet Service Provider (ISP) uses dynamic IP addressing, check “
Get by
DHCP
”. Then the fields marked in the above picture will be filled in automatically, the
next time you turn on your IX66 Internet Gate.
b. If your Internet Service Provider (ISP) have given you your own static IP address,
enter it. Fill also in the fields DNS server, Domain name and Gateway.
8. Klick on ”
Save
”. Reboot first your IX66 Internet Gate, then your PC.
Get in contact with
your Internet Gate!
Just surf into it!
How do I configure ET1
(the LAN-connection)?
Read on pages 8 - 11!
Don’t foget to save the
settings after you have
made any changes!
Always click on the
”
Save
” button after you
have changed anything
on any page!


