


9
Set Up the Hitachi OEM Monitor
The hardware kit used to install the Hitachi monitor onto an ErgoAct stand contains the following
items (not including packaging and documentation):
u
One monitor adapter bracket (CFAB334)
u
Four shoulder screws (CFAB507)
u
Two M6x12mm Phillips screws (CPHM044)
u
Three M4x8mm Phillips screws (CPMH022)
Removing the Swivel Base
WARNING
The monitor is heavy and could cause serious personal injury if dropped. Two persons are
required to lift and carry the monitor.
1.
Unpack the monitor from its shipping carton.
2.
Verify that the monitor power cord is supplied.
3.
Turn the monitor onto its side.
WARNING
Do not set the monitor on its display screen. Damage may result.
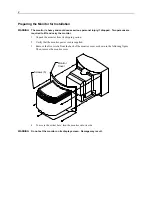
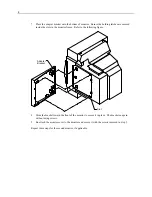
4.
Two screws are located just inside the circular area of the bottom of the base. Remove and retain
these two screws.
5.
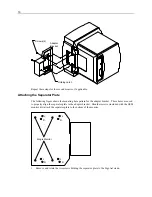
Slide the base to the back of the monitor and set the base aside.
Repeat these steps for the second monitor, if applicable.
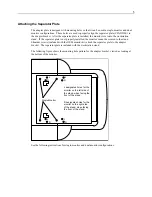
Attaching the Adapter Bracket
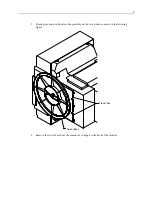
1.
While monitor is still on its side, place the adapter bracket onto the bottom of monitor. Ensure
the holding latches are secured inside the slots in the monitor frame. Refer to the following
figure.
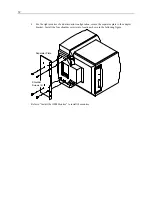
2.
Using a No. 2 Phillips screwdriver, secure the adapter bracket to the monitor using the two
M4x8mm screws.
Содержание ErgoAct OEM Monitor
Страница 1: ...ErgoAct OEM Monitor Installation Guide February 1997 DHAF00720...
Страница 4: ......
Страница 18: ...14...


