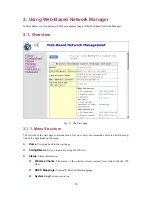
Ethernet switching and printer sharing are available only on the wireless broadband switch
router.
2. First-Time Installation and Configuration
2.1. Inserting the Accompanying PCMCIA WLAN
Card
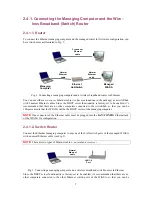
For some models, the wireless interface of a WIASA is a WLAN PCMCIA card inserted into the
PCMCIA socket labeled
Wireless LAN Card
. Since a WIASA and its accompanying WLAN
PCMCIA card are placed separately within a package, you have to insert the PCMCIA card to the
socket of the WIASA after they are taken out of the package. And then, plug the connector of the
power adapter to the power jack of the WIASA to power it on.
NOTE:
Unless a WIASA is to be packed and moved to a distant place, don’t pluck out the PCMCIA
card from the socket.
2.2. Selecting a Power Supply Method
Optionally, the wireless broadband router can be powered by the supplied power adapter or PoE
(Power over Ethernet). The wireless broadband router automatically selects the suitable one depend-
ing on your decision.
To power the wireless broadband (switch) router by the supplied power adapter:
1.
Plug the power adapter to an AC socket.
2. Plug the connector of the power adapter to the power jack of the wireless broadband (switch)
router.
NOTE:
This product is intended to be power-supplied by a Listed Power Unit, marked “Class 2” or
“LPS” and output rated “5V DC, 1 A minimum” or equivalent statement.
To power the wireless broadband router by PoE:
1.
Plug one connector of an Ethernet cable to an available port of a PoE hub.
2.
Plug the other connector of the Ethernet cable to the
LAN/CONFIG
port of the wireless broad-
band router.
NOTE:
The PoE capability of the bridge is PowerDsine-compatible. Please visit the Web site of Pow-
erDsine for more information (
http://www.powerdsine.com
).
2.3. Mounting the Wireless Broadband Router on a
Wall
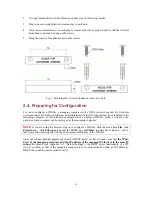
If necessary, the wireless broadband router can be mounted on a wall.
1.
Stick the accessorial sticker for wall-mounting.
5


