10/30/2018
Tetrapad 2.0 Manual - Google Docs
https://docs.google.com/document/d/18AFrtwTCpaE5_dPILqmrodOXnIIEmdZGws2Kx_eEC4M/edit#heading=h.akbpz6132fpo
1/63
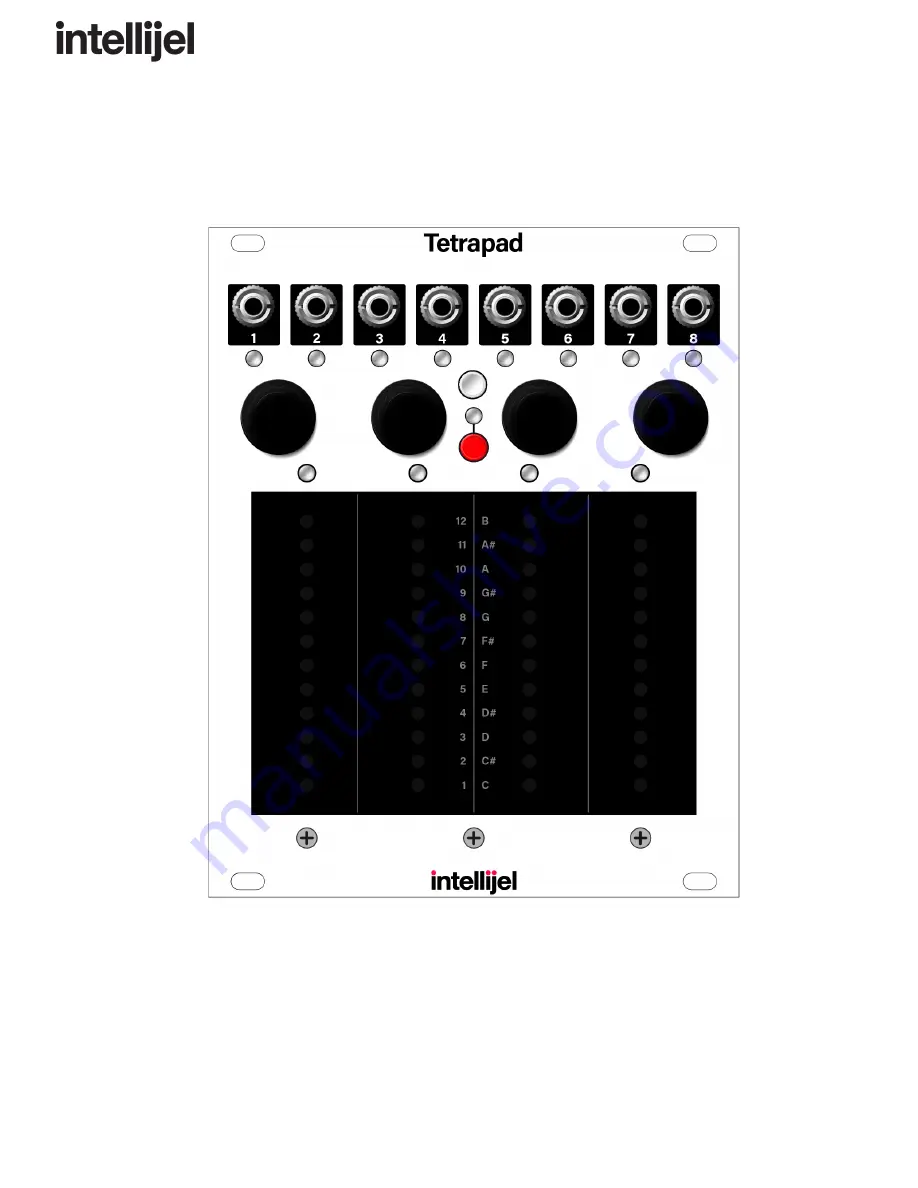
Tetrapad Manual
Tetrapad
Multi-Dimensional Performance Touch Controller
Firmware: 2.0
Manual Revision: 2018.10.25


