


- 37 -
5.
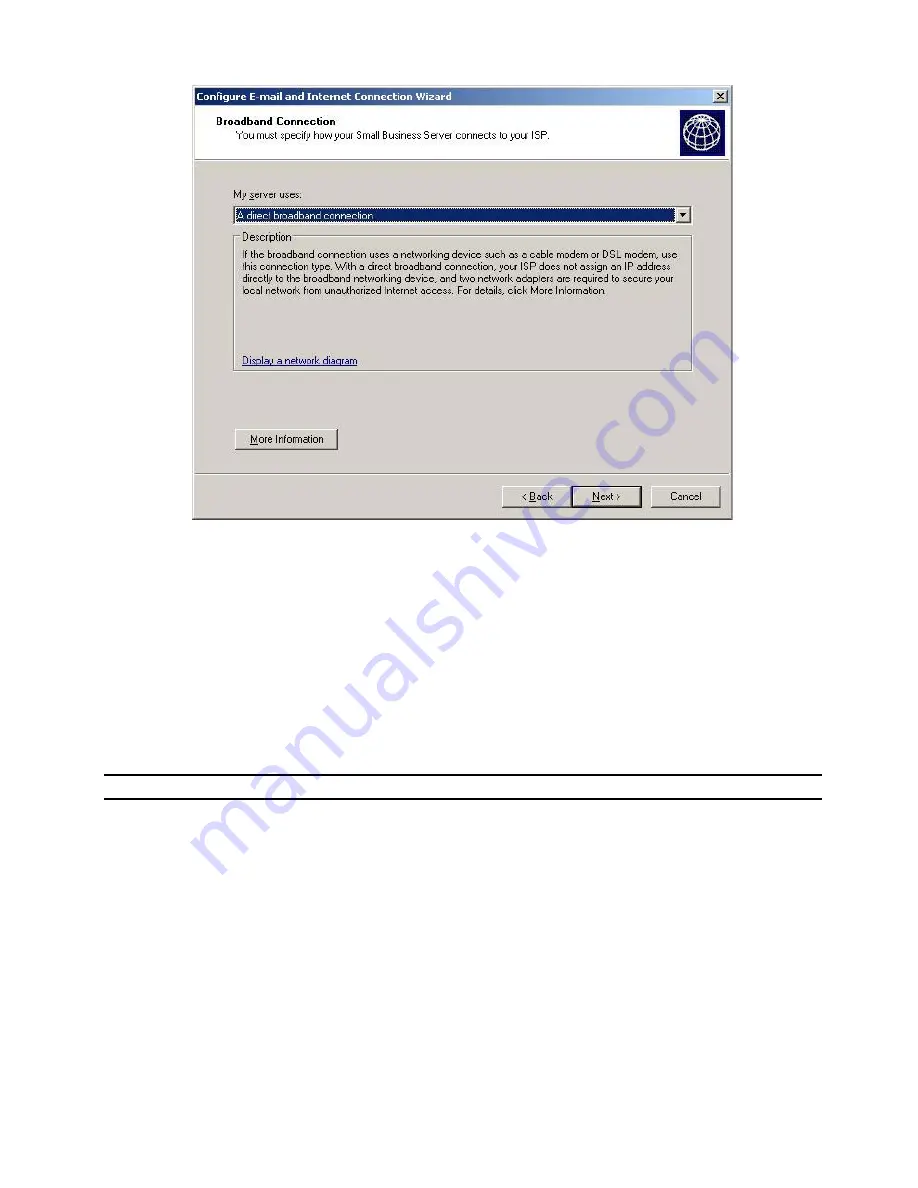
At the
Broadband
Connection screen select
A direct broadband
connection and click
Next
6.
At the
Network Connection
screen select
Use the following IP address
and fill in the
details for your WAN subnet. An example configuration could be, assuming your router
has an IP address of 192.168.2.1
IP address: 192.168.2.2
Subnet mask: 255.255.255.0
Default gateway: 192.168.2.1
Click
Next
7.
At the next screen (still called
Network Connection
) ensure that the correct network
adaptors are configured for internal/external access, and click
Next
NOTE:
Always Choose Direct Broadband connection if you will be installing ISA
8.
At the
Direct Broadband Connection
fill in the internal IP address of the router for the
default gateway, in this instance 192.168.2.1, and provide the DNS server information
provided by your ISP. Click
Next
9.
At the
Firewall
screen check
Enable firewall
and click
Next
10.
At the
Services Configuration
screen, check all services apart from
FTP
and click
Next
11.
At the
Web Services Configuration
screen select
Allow access to only the following
Web site services from the Internet
and check all Web services with the exception of
Server performance & usage reports
and
Business Web Site.
Click
Next
12.
At the
Web Server Certificate
screen, select
Create a new Web server certificate
and
enter the certificate name. The certificate name should be the same as the url you type for
remote access: Usually remote.(company name).com. Click
Next
13.
At the
Internet E-mail
screen, select
Enable Internet e-mail
and click
Next
14.
At the
E-mail Delivery Method
screen select
Use DNS to route e-mail
and click
Next
Содержание SMALL BUSINESS SERVER
Страница 17: ... 17 ...
Страница 46: ... 46 11 At the Instance Name screen select Default instance and click Next ...
Страница 68: ... 68 ...


