


34
Intel
®
High Availability Storage User Guide
Creating Shared VDs with RWC2
Follow these steps to create VDs for data storage with RWC2. When you create the VDs, you assign the
Share Virtual Drive property to them so they are visible from both controller nodes. This example
assumes you are creating a RAID 5 redundant VD. Modify the instructions as needed for other RAID
levels.
NOTE: Not all versions of RWC2 support Intel® RAID High Availability Storage. Check the release
notes to determine if your version of RWC2 supports Intel® RAID High Availability Storage. Also, see
Section - Verifying Intel® RAID High Availability Storage Support in Tools and the OS Driver.
1. In the left panel of the RWC2 Logical pane, right-click the Intel
®
RAID High Availability Storage
controller and select
Create Virtual Drive
from the pop-up menu.
The Create Virtual Drive wizard appears.
2. Select the
Advanced
option and click
Next
.
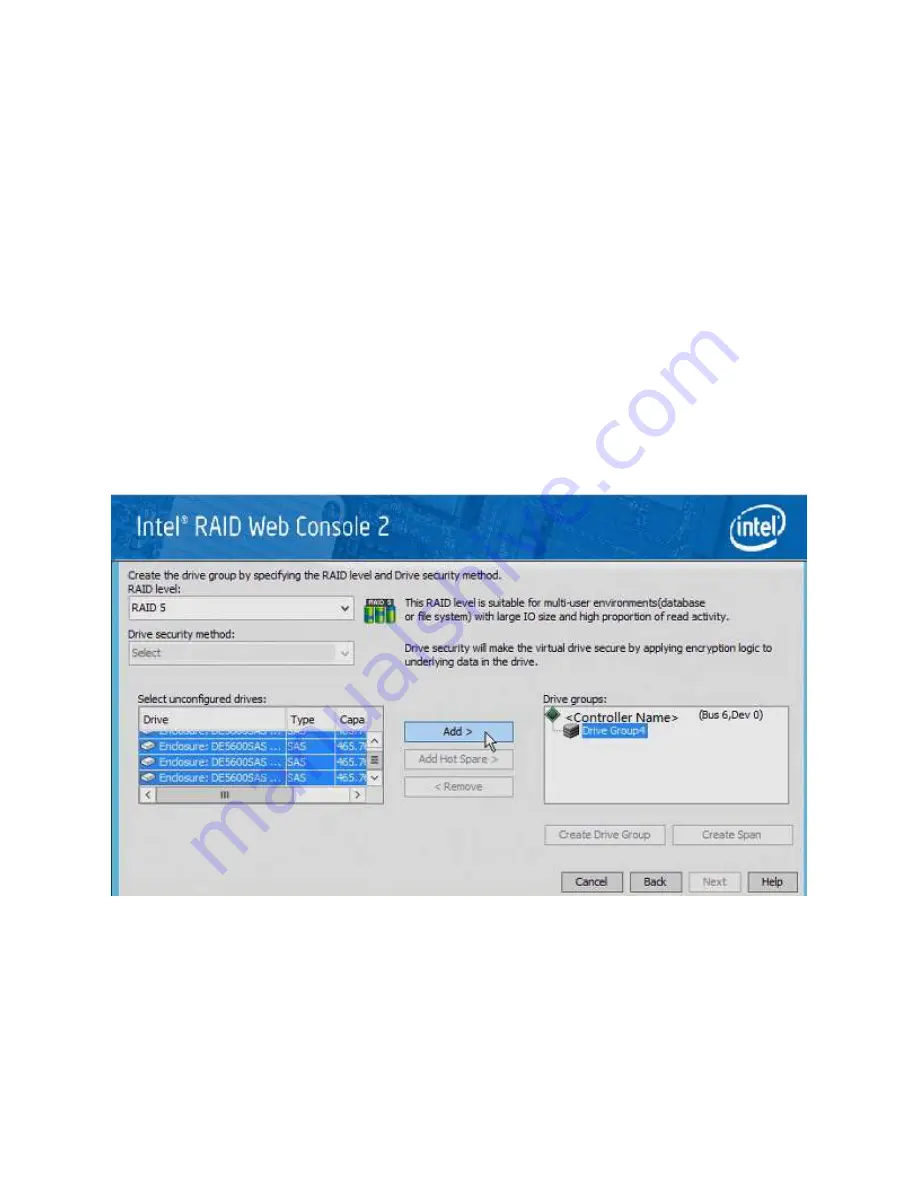
3. In the next wizard screen, select
RAID 5
as the RAID level, and select unconfigured drives for the VD,
as shown in the following figure.
Figure 24 Drive Group Settings
4. Click
Add
to add the VD to the drive group.
The selected drives appear in the Drive groups window on the right.
5. Click
Create Drive Group
. Then click
Next
to continue to the next window.
The Virtual Drive Settings window appears.


