


User’s Manual
i945G2-IQNAR User’s Manual
61
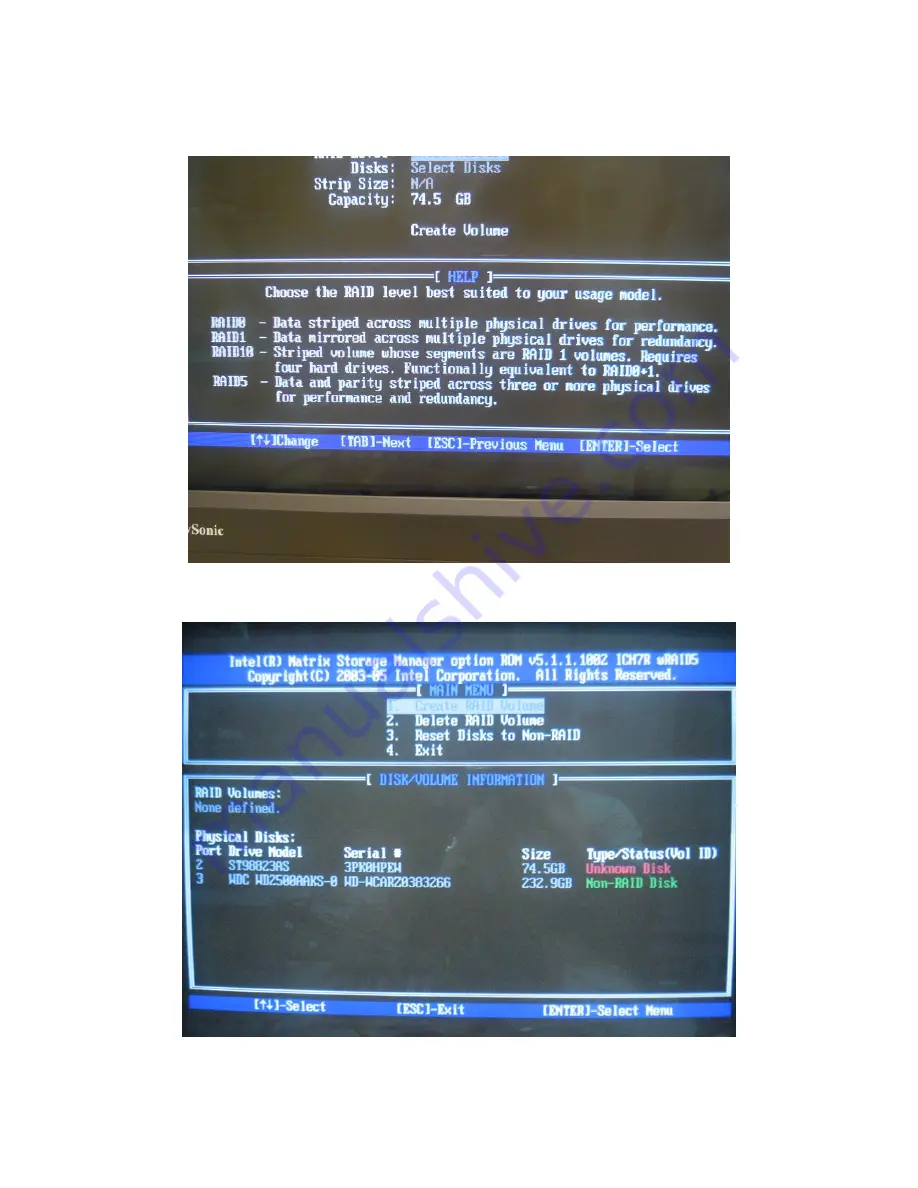
3. Go back to the main screen, when all SATA HDD status is “Non-RAID Disk”, then you
can start to set RAID 0/1/5/10. Please see the below diagram for RAID 0/1/5/10 detail
description.
Figure 2.13: Set RAID 0/1/5/10 Screen
4. In the main menu, use arrow keys to select “Create RAID Volume”, then press <Enter>.
Figure 2.14: Create RAID Volume Screen