3
Maintaining Your Server
Intel® Entry Server Chassis SC5275-E User Guide
32
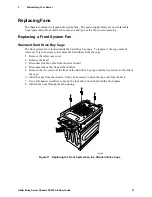
9. Slide the new fan in through the fan opening. Make sure the airflow is towards the server
board. This means the label should face the server board.
10. Replace the nylon rivets to attach the fan to the hard drive bay cage.
11. Replace the hard drive bay cage in the chassis. Make sure the fan opening faces the bottom of
the chassis.
12. Connect the fan cable to the server board and reconnect the hard drives.
13. Replace the bezel.
14. Replace the access cover.
Replacing a Rear System Fan
1. Remove the left access cover.
2. Disconnect the fan cable from the server board.
3. Remove the fan from the bracket. No tools are necessary; the fan snaps in and out of the
bracket.
4. Remove the finger guard from the fan by using a flathead screwdriver to pry the four nylon
rivets from the corners.
5. Attach the finger guard with the rivets to the side of the new fan that does not have the label on
it.
6. Place the new fan into the bracket. Make sure the airflow is out of the back of the chassis. This
means the label should face the back of the chassis and the finger guard should face the server
board.
7. Connect the fan cable to the server board.
8. Replace the access cover.
Содержание C50277-001
Страница 14: ...Preface Intel Entry Server Chassis SC5275 E User Guide xiv...
Страница 18: ...Contents Intel Entry Server Chassis SC5275 E User Guide xviii...
Страница 26: ...1 Chassis Description Intel Entry Server Chassis SC5275 E User Guide 8...
Страница 46: ......
Страница 55: ...3 Maintaining Your Server Intel Entry Server Chassis SC5275 E User Guide 37...
Страница 56: ......


