


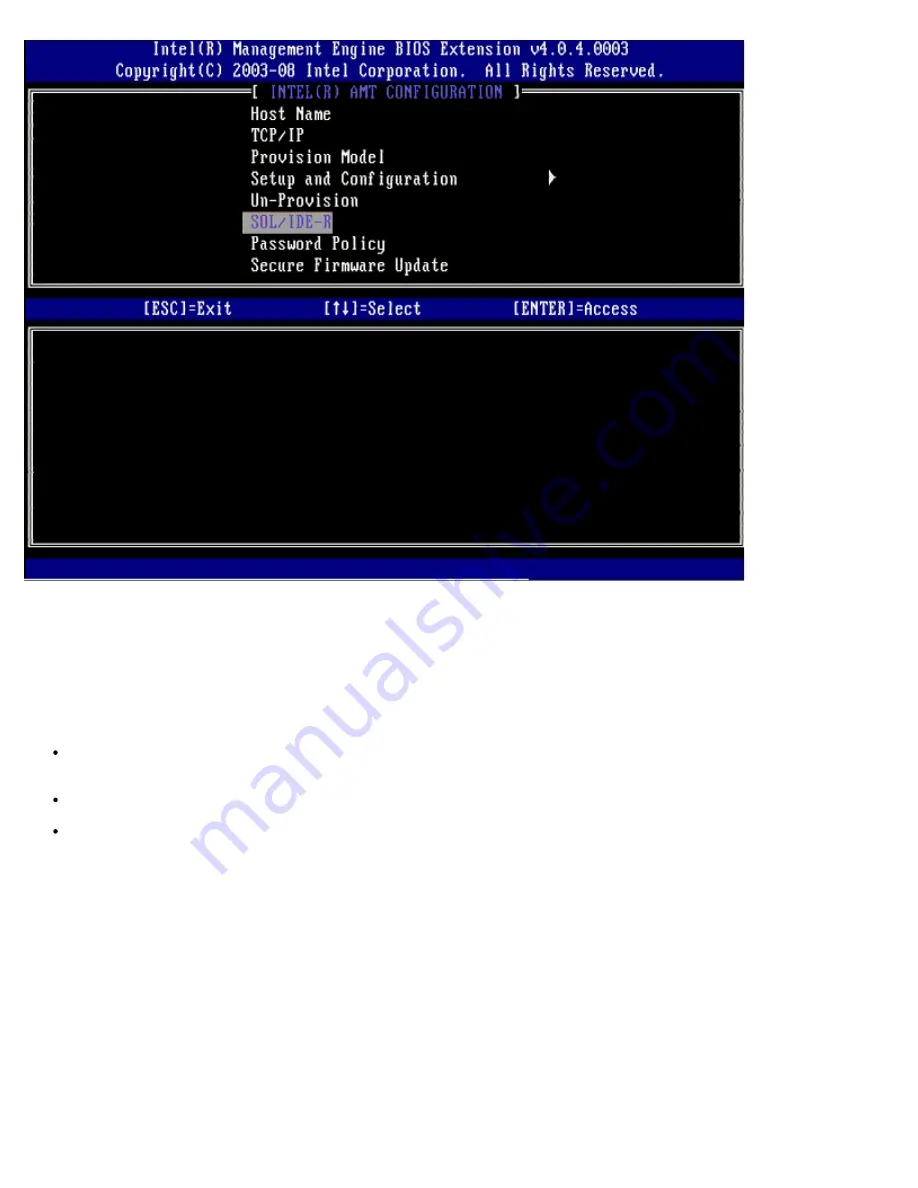
Password Policy
There are two passwords present for the firmware. The MEBX password is the password that is entered when a user is
physically at the system. The network password is the password that is entered when accessing an ME enabled system
through the network. This option determines when network password and the MEBX password will be synched. The MEBX
password can still be modified by users directly in front of the system. However, depending on the option selected below, the
network password and the MEBX password may be different. The settings are:
Default Password Only
– MEBX password and the network password will only be synched when the password is
changed from the default password. After the MEBX password is changed from the default value, the network password
and the MEBX password maybe different.
During Setup and Configuration
– MEBX password and the network password will be synched during the setup and
configuration state. After the setup and configuration process is complete, the passwords maybe different.
Anytime
– MEBX password and network password will be synched when either the MEBX password or the network
password is changed.
Содержание Active Management Technology v4.0
Страница 34: ...6 Press y when the following message appears System resets after configuration change Continue Y N ...
Страница 37: ...9 Select Intel ME Features Control and then press Enter ...
Страница 39: ...10 Select Return to Previous Menu and then press Enter ...
Страница 40: ...11 Select Intel ME Power Control and then press Enter ...
Страница 41: ...Intel ME ON in Host Sleep States is the next option The default setting is Mobile ON in S0 ...
Страница 42: ...12 Select Return to Previous Menu and then press Enter ...
Страница 43: ...13 Select Return to Previous Menu and then press Enter ...
Страница 46: ...6 Select TCP IP Press Enter 7 Press n when the following message appears DHCP Enable Disable DHCP Y N ...
Страница 47: ...8 Type the domain name into the Domain name field ...
Страница 49: ...11 Select Setup and Configuration from the menu and then press Enter ...
Страница 52: ...14 Select Provisioning Server from the menu and then press Enter ...
Страница 55: ...17 Select TLS PSK from the menu and then press Enter ...
Страница 58: ...20 Select TLS PKI from the menu and then press Enter ...
Страница 60: ...22 If Enabled refer to steps 19 through 21 If not Enabled skip to step 22 ...
Страница 64: ...27 Select Return to Previous Menu and press Enter ...
Страница 65: ...28 Select Return to Previous Menu and then press Enter This returns you to the Intel AMT Configuration menu ...
Страница 67: ...29 Select SOL IDE R and then press Enter ...
Страница 68: ...30 Press y when the following message appears Caution System resets after configuration changes Continue Y N ...
Страница 70: ...32 For Serial Over LAN SOL IDE R select Enabled and then press Enter ...
Страница 71: ...33 For IDE Redirection select Enabled and then press Enter ...
Страница 72: ...Secure Firmware Update is the next option The default setting is Enabled ...
Страница 73: ...Skip Set PRTC ...
Страница 75: ...34 Select Return to Previous Menu and then press Enter ...
Страница 76: ...35 Select Exit and then press Enter ...
Страница 77: ...36 Press y when the following message appears Are you sure you want to exit Y N ...
Страница 81: ...7 Press y when the following message appears System resets after configuration change Continue Y N ...
Страница 84: ...10 Select Intel ME Features Control and then press Enter ...
Страница 86: ...11 Select Return to Previous Menu and then press Enter ...
Страница 87: ...12 Select Intel ME Power Control and then press Enter ...
Страница 88: ...Intel ME ON in Host Sleep States is the next option The default setting is Mobile ON in S0 ...
Страница 89: ...13 Select Return to Previous Menu and then press Enter ...
Страница 90: ...14 Select Return to Previous Menu and then press Enter ...
Страница 93: ...6 Select TCP IP and then press Enter 7 Press n when the following message appears DHCP Enable Disable DHCP Y N ...
Страница 94: ...8 Type the domain name into the field ...
Страница 97: ...13 Press y when The following message appears Caution System resets after configuration changes Continue Y N ...
Страница 99: ...15 For Serial Over LAN select Enabled and then press Enter ...
Страница 100: ...16 For IDE Redirection select Enabled and then press Enter ...
Страница 101: ...Secure Firmware Update is the next option The default setting is Enabled ...
Страница 102: ...17 Skip Set PRTC ...
Страница 104: ...18 Select Return to Previous Menu and then press Enter ...
Страница 105: ...19 Select Exit and then press Enter ...
Страница 106: ...20 Press y when the following message appears Are you sure you want to exit Y N ...
Страница 115: ...Click the to expand the Intel AMT Getting Started section ...
Страница 116: ...Click the to expand the Section 1 Provisioning section ...
Страница 117: ...Click the to expand the Basic Provisioning without TLS section ...
Страница 120: ...The IP address for the ProvisionServer and Intel SCS are now visible ...
Страница 121: ...Select Step 2 Discovery Capabilities ...
Страница 122: ...Verify that the setting is Enabled If Disabled click the check box next to Disabled and click Apply ...
Страница 123: ...Select Step 3 View Intel AMT Capable Computers ...
Страница 124: ...Any Intel AMT capable computers on the network are visible in this list ...
Страница 125: ...Select Step 4 Create Profile ...
Страница 126: ...Click the plus symbol to add a new profile ...
Страница 130: ...Select the icon with the arrow pointing out to Export Security Keys to USB Key ...
Страница 131: ...Select the Generate keys before export radio button ...
Страница 138: ...Select Step 7 Monitor Provisioning Process ...
Страница 140: ...Select Step 8 Monitor Profile Assignments ...
Страница 142: ...Once the computers are provisioned they are visible under the Collections folder in All configured Intel AMT computers ...
Страница 143: ...Back to Contents Page ...