background image

Step 3:

  Playing Back

Step 3:

   Playing Back

En-17

Network Functions

You can enjoy sources such as Internet radio by connecting 

the unit to a network. For details on the operation, see the 

Advanced Manual.


OSDs (the feature to show information such as setting 

menus on the TV) are not displayed when the OSD 

language is set to Chinese. Operate by confirming the 

display on the main unit.

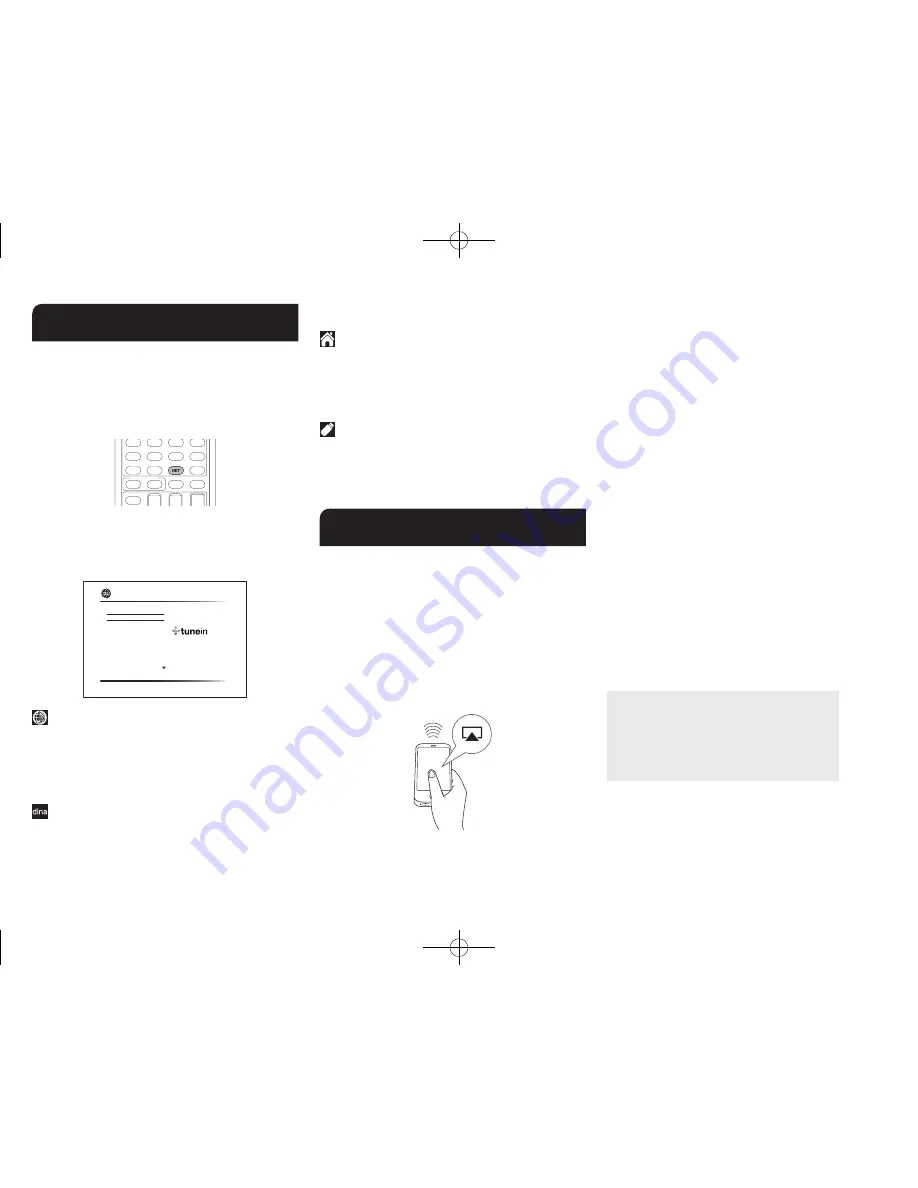
Press NET on the remote controller to display the NET TOP 

screen on the TV. Select the item with the cursors of the 

remote controller and press Enter to confirm your selection.

¼

To return to the previous screen, press Return.

¼

Available services may vary depending on your area of residence.

TuneIn Radio
Pandora
Spotify
SiriusXM Internet Radio
Slacker Personal Radio
Deezer
AirPlay

Network

 Internet radio services

The unit comes preset with Internet radio services such as 

TuneIn Radio. After selecting the desired service, follow 

the on-screen instructions, using the cursors to select radio 

stations and programs, then press Enter to play.


Network services or contents may become unavailable if 

the service provider terminates its service.

 DLNA

You can play music files stored in the computer or NAS 

device connected to the network. Select the server with the 

cursors, select the desired music file and press Enter to 

start playback.


This unit needs to be connected to the same router as a 

computer or NAS device.

 Home media

You can play music files in a shared folder on the computer 

or NAS device connected to the network. Select the server 

with the cursors, select the desired music file and press 

Enter to start playback.


This unit needs to be connected to the same router as a 

computer or NAS device.

 USB

You can play music files on a USB storage device. Connect 

the USB storage device to the USB port on the rear of the 

unit, select the desired folder or music file with the cursors, 

and press Enter to confirm and start playback.

AirPlay

®

You can enjoy the audio from iPhone

®

, iPod touch

®

, iPad

®


and PCs with iTunes.

Important

: This unit needs to be connected to the network 

through the same router as the iOS terminal or PC.

 Playing music files from an iPhone, iPod touch, or 

iPad

Update the OS version on your iOS device to the latest 

version before connecting it to this unit.


1�  Press NET on the remote controller�
2�  Tap the AirPlay icon, select this unit from the list of 

devices displayed, and click "Done"�


The AirPlay icon is displayed in the control center if you 

are using iOS 7 and later. To display the control center, 

swipe from the bottom of the screen of the iOS device.


If the AirPlay icon is not displayed, confirm that this unit 

and the iOS device are both connected to the router 

correctly.

3�  Play music files from an iPhone, iPod touch, or iPad�

 Playing music files from a computer


AirPlay is compatible with iTunes 10.2 or later.

1�  Press NET on the remote controller�
2�  Turn on your computer and start iTunes�
3�  Click the AirPlay icon of iTunes and select this unit 

from the list of devices displayed�

4�  Play iTunes music files�


If "6. Hardware"-"Power Management"-"Network 

Standby" is set to on in the Setup menu, then once 

AirPlay starts, this unit turns on automatically and the 

"NET" input source is selected. Even if this setting 

is "Off", if the unit is already on then the "NET" input 

source can be selected.


Due to the characteristics of AirPlay wireless technology, 

the sound produced on this unit may slightly be behind 

the sound played on the AirPlay-enabled device.


Information such as the name of the track is displayed 

on the unit's display during AirPlay playback.


There may be some differences in how operations are 

performed depending on the iOS or iTunes version.


The on-screen displays are not displayed when the 

OSD language is set to Chinese. Operate by confirming 

the display on the main unit.

Volume

: The volume of this unit and the AirPlay-

enabled device are linked. Take care that the 

volume does not become too loud when you adjust 

the volume on the AirPlay-enabled device. You may 

damage the unit or the speakers. Stop play on the 

AirPlay-enabled device immediately if the volume 

becomes too loud at any point.

DTR-20.7_BAS_En_SN29401992_150417.indd   17

2015/05/14   16:41:21

Содержание DTR-20.7

Страница 1: ...tions for frequently used operations The Advanced Manual is published on the web for ecological reasons and has more detailed information and advanced settings Advanced Manual found here http integraworldwide com manual dtr207 adv en html DTR 20 7_BAS_En_SN29401992_150417 indd 1 2015 05 14 16 41 15 ...

Страница 2: ...functions such as Internet Radio DLNA AirPlay etc Supports Wi Fi and Bluetooth Bi Amping capability A V Sync Function to correct deviation of audio and video Multi zone function which allows you to play a different source in another room from the main room 32 bit DSP Digital Signal Processor with excellent calculation performance Music Optimizer for compressed digital music files Phase Matching Ba...

Страница 3: ...uttons Tuningjl button Presetd c button and Enter button Move the cursor and confirms the selection When listening to AM FM broadcasting tune in to the station with Tuningjl or select the registered station with Presetd c I Return button Returns the display to the previous state J Master Volume Allows you to adjust the volume K Zone 2 button and Off button Controls the multi zone function L Zone 2...

Страница 4: ...ial devices or cable connections are necessary to use the control functions 7 to 9 Contact the specialized stores for more information F HDMI IN OUT jacks Digital video signals and audio signals are transmitted between the unit and the connected devices G Wireless antenna Used for Wi Fi connection or when using a Bluetooth enabled device Adjust their angles according to the connection status H SPE...

Страница 5: ...aying NET or USB 4 Lights according to the type of input digital audio signals and the listening mode 5 Stays lit when Music Optimizer is enabled 6 Lights in the following conditions AUTO Tuning mode is auto TUNED Receiving AM FM radio flashes while tuning is automatically performed FM STEREO Receiving FM stereo RDS Australian models Receiving RDS broadcasting 7 Flashes when muting is on 8 Lights ...

Страница 6: ...effects on a height plane This unit can perform optimal sound field processing for the type of height speakers actually installed and registered in Initial Setup Height speaker types Installing speakers in ceiling a b f e c d a b Top Front c d Top Middle e f Top Rear Ceiling speakers etc are used for maximizing effects in Dolby Atmos or Dolby Surround listening mode Install Top Front speakers so t...

Страница 7: ...h or i j on the unit For connection with the unit use the SPEAKERS BACK or HEIGHT terminals When playing Dolby Atmos the speakers required depend on how you have setup your back speakers or height speakers The following shows combinations of speakers for reproducing Dolby Atmos 1 Back 2 Front High 3 Rear High 4 Top Front 5 Top Middle 6 Top Rear 7 Dolby Enabled Speaker Front 8 Dolby Enabled Speaker...

Страница 8: ...djusting dial turn it to the maximum frequency If your subwoofer does not have built in power amplifier you can connect a power amplifier between the unit and the subwoofer The speaker setting is 7 1 channels at the time of purchase You can change it manually or by using automatic speaker setting Short circuiting the cable and cable or contacting the cable core to the rear panel of the unit may ca...

Страница 9: ...selector buttons For how to make settings see the Advanced Manual To connect the TV and the unit connect the HDMI OUT jack of the unit and the HDMI IN jack of the TV using a HDMI cable With this connection it becomes possible to display the setting screen of the unit on the TV or transmit video audio signals from the player to the TV If your TV supports ARC Audio Return Channel it is possible to p...

Страница 10: ...video cable 3 A player with a composite video output jack can be connected Composite video cable 4 A player with analog audio out jacks can be connected When using jacks 2 and 3 for video input connect to the audio input jacks corresponding to the jacks connected at 2 and 3 For example when video input connection is to the 2 BD DVD jack the audio input connection should also be to the 4 BD DVD jac...

Страница 11: ...thernet port See 4 Network Connection of Step 2 Initial Setup for Wi Fi settings Internet radio Router NAS Headphones connection Connect stereo headphones with a standard plug 1 4 inch or ø 6 3 mm to the Phones jack on the front panel Sound from the speakers will be off while you are using the headphones If you selected any other listening mode than Stereo Mono and Direct connecting headphones wil...

Страница 12: ...this screen and press Enter on the remote controller Welcome to initial setup Have you connected all the speakers and devices Before starting please connect speakers and sources Now would you like to start initial setup 1st Step AccuEQ Room Calibration 2nd Step Source Connection 3rd Step Remote Mode Setup 4th Step Network Connection Yes No Initial Setup Exit SETUP Re doing initial setup If you ter...

Страница 13: ...s displayed Press t u on the remote controller to check the settings Press Enter with Save selected To have the settings reflected for all the speakers select On All Channels in the next screen and press Enter on the remote controller Select On Except Front Left Right to disable just the front speakers If there is an error message follow the on screen instruction to remove the error cause If the s...

Страница 14: ...device and establish a Wi Fi connection with ease If you selected Scan Networks 2 Select the SSID of the access point to be connected with the cursor buttons and press Enter When the SSID of the access point appears on the TV screen select the desired access point If you changed the initial setting of the access point to skip password entry step 3 is unnecessary If you changed the initial setting ...

Страница 15: ...w we use it please review Onkyo s Privacy Policy at http www onkyo com privacy I have read Onkyo s Privacy Policy and agree to its terms Yes No ONKYO PRIVACY STATEMENT When connection is successful Successfully Connected is displayed on the screen MAC Address xxxxxxxxxxx IP Address Subnet Mask Gateway DNS Server Gateway Ping Internet Service Test Successfully connected Next Network Connection Exit...

Страница 16: ...on you can switch the remote control mode to operate other equipment by pressing that button Phono button can not be used with this unit 3 Receiver button Switches the remote controller to the mode for operating this unit 4 Cursor buttons and Enter button Move the cursor and confirms the selection 5 Setup button Displays the screen for making various settings for this unit 6 Listening mode buttons...

Страница 17: ...nes Important This unit needs to be connected to the network through the same router as the iOS terminal or PC Playing music files from an iPhone iPod touch or iPad Update the OS version on your iOS device to the latest version before connecting it to this unit 1 Press NET on the remote controller 2 Tap the AirPlay icon select this unit from the list of devices displayed and click Done The AirPlay...

Страница 18: ...he main unit 5 AM FM Radio The Basic Manual explains the method using automatic tuning For manual tuning see the Advanced Manual 1 Press Tuner on the main unit several times to select either AM or FM 2 Press Tuning Mode on the unit so that the AUTO indicator on the display lights 3 Press Tuningjl on the unit The automatic tuning to a radio station starts Searching stops when one is tuned When tune...

Страница 19: ...Connect the PRE LINE OUT ZONE2 jacks of the unit and the line in jacks of the pre main amplifier in a separate room with an RCA cable Main room Zone 2 Settings are required in order to control volume and sound quality on this unit To adjust it with the unit press Receiver and then Setup on the remote controller select 3 Audio Adjust Multi Zone Zone 2 Out and set the setting to Variable If you conn...

Страница 20: ...remote controller press zReceiver Alternatively press Off on the main unit If ZONE 2 is on power consumption during standby becomes larger than normal While ZONE 2 is on the RI linked system function interlink between Onkyo components is disabled Pressing Input Selector on the remote controller while you are using the remote controller for Zone 2 will switch the controlled target to the main room ...

Страница 21: ...mation such as the video input source resolution color space color depth 3D information Aspect and output Tuner Displays information such as the band frequency and preset number This is displayed only when TUNER is selected as the input source 8 Other useful functions To adjust the sound quality It is possible to enhance or moderate the bass and treble of front speakers Press Tone on the main unit...

Страница 22: ... be sure to connect it to one of the HDMI IN1 to IN3 jacks of the unit Video and audio are out of synch Video may be delayed relative to audio depending on the settings and connections with your TV Adjust in Step 3 Playing Back 7 Quick Setup Menu A V Sync Cannot play digital surround To enjoy digital surround sound including Dolby Digital and DTS audio output should be set to Bitstream output on t...

Страница 23: ...SBC Transmission range A2DP 20 Hz 20 000 Hz Sampling frequency 44 1 kHz The actual range will vary depending on factors such as obstacles between devices magnetic fields around a microwave oven static electricity cordless phone reception sensitivity antenna s performance operating system software application etc General Power Supply AC 120 V 60 Hz North American AC 220 240 V 50 60 Hz Others Power ...

Страница 24: ...0 60 Hz 2560 1080p 24 25 30 Hz 50 60 Hz 4K 3840 2160p 24 25 30 Hz RGB YCbCr4 4 4 YCbCr4 2 2 8 10 12 16 bit 50 60 Hz RGB YCbCr4 4 4 8 bit YCbCr4 2 2 12 bit YCbCr4 2 0 8 10 12 16 bit 4K SMPTE 4096 2160p 24 25 30 Hz RGB YCbCr4 4 4 YCbCr4 2 2 8 10 12 16 bit RGB YCbCr4 4 4 8 bit 50 60 Hz YCbCr4 2 2 12 bit YCbCr4 2 0 8 10 12 16 bit HDMI input IN4 to IN6 HDCP1 4 720 480i 60 Hz RGB YCbCr4 4 4 YCbCr4 2 2 8...

Страница 25: ... 5 ES Undertegnede Onkyo Corporation erklærer herved at følgende udstyr DTR 20 7 overholder de væsentlige krav og øvrige relevante krav i direktiv 1999 5 EF Hiermit erklärt Onkyo Corporation dass sich das Gerät DTR 20 7 in Übereinstimmung mit den grundlegenden Anforderungen und den übrigen einschlägigen Bestimmungen der Richtlinie 1999 5 EG befindet Käesolevaga kinnitab Onkyo Corporation seadme DT...

Страница 26: ... technology licensed from Fraunhofer IIS and Thomson AccuEQ Music Optimizer RIHD and WRAT are trademarks of Onkyo Corporation All other trademarks are the property of their respective owners DISCLAIMER Through this device you are able to link to other services or websites which are not under the control of any company which has designed manufactured or distributed have distributed this device and ...

Страница 27: ...pany it with the complete corresponding machine readable source code which must be distributed under the terms of Sections 1 and 2 above on a medium customarily used for software interchange If distribution of object code is made by offering access to copy from a designated place then offering equivalent access to copy the source code from the same place satisfies the requirement to distribute the...

Страница 28: ...f you do not accept this License Therefore by modifying or distributing the Program or any work based on the Program you indicate your acceptance of this License to do so and all its terms and conditions for copying distributing or modifying the Program or works based on it Each time you redistribute the Program or any work based on the Program the recipient automatically receives a license from t...

Страница 29: ...om Lane Glenn Randers Pehrson Willem van Schaik libpng versions 0 89 June 1996 through 0 96 May 1997 are Copyright c 1996 1997 Andreas Dilger Distributed according to the same disclaimer and license as libpng 0 88 with the following individuals added to the list of Contributing Authors John Bowler Kevin Bracey Sam Bushell Magnus Holmgren Greg Roelofs Tom Tanner libpng versions 0 5 May 1995 through...

Страница 30: ...re for any purpose including commercial applications and to alter it and redistribute it freely subject to the following restrictions The origin of this software must not be misrepresented you must not claim that you wrote the original software If you use this software in a product an acknowledgment in the product documentation would be appreciated but is not required Altered source versions must ...

Страница 31: ...THE AUTHOR OR THE PUBLISHER BE LIABLE TO YOU ON ANY LEGAL THEORY FOR ANY SPECIAL INCIDENTAL CONSEQUENTIAL PUNITIVE OR EXEMPLARY DAMAGES ARISING OUT OF THIS LICENSE OR THE USE OF THE WORK OR OTHERWISE EVEN IF THE AUTHOR OR THE PUBLISHER HAS BEEN ADVISED OF THE POSSIBILITY OF SUCH DAMAGES Termination a This License and the rights granted hereunder will terminate automatically upon any breach by You ...

Страница 32: ...ra com cn Integra Division of Kitahama Chuo Bldg 2 2 22 Kitahama Chuo ku OSAKA 541 0041 JAPAN Tel 072 831 8023 Fax 072 831 8163 http www integraworldwide com Supplied Accessories Indoor FM antenna 1 AM loop antenna 1 Remote controller RC 899M 1 Batteries AA R6 2 Power cord 1 Speaker setup microphone 1 The number in parenthesis indicates the quantity On packaging the letter at the end of the produc...

Отзывы: