203
Figure 8-5 Checking the Driver Version
8.3
Installing/Updating the Driver
8.3.1
Installing/ Updating the Driver on Windows
When the current driver version of the server is lower than the version queried on
the Inspur official website, we recommend you to update the driver to ensure the
optimal performance of the server.
This section demonstrates with the Windows Server 2019 OS to guide you on
how to install or update the driver.
Procedure:
1.
Log in to the virtual console of the server.
2.
Log in to the server OS as the administrator.
3.
Load the driver.
4.
Update or install the driver according to the driver document.
5.
After the update or installation is completed, check whether the driver version
is the latest.
This section describes how to install the chipset driver on the Windows Server
2019 OS.
Procedure:
1.
Log in to the virtual console of the server.
2.
Log in to the server OS as the administrator and upload the chipset driver
package to the desktop.
Содержание OS
Страница 1: ...Inspur Server OS Installation Guide Document Version V2 3 Release Date January 19 2022 ...
Страница 16: ...7 Figure 4 1 Server Mgmt ...
Страница 17: ...8 Figure 4 2 Configuration Address Source Figure 4 3 BMC IP Setting ...
Страница 30: ...21 Figure 4 27 Setting the Language Time and Keyboard 2 Click Install now to start the OS installation ...
Страница 31: ...22 Figure 4 28 Clicking Install Now 3 Select Windows Server 2016 Standard Desktop Experience and click Next ...
Страница 32: ...23 Figure 4 29 Selecting the OS 4 Check I accept the license terms and click Next ...
Страница 37: ...28 Figure 4 35 User Login Screen 10 Enter the desktop and the installation is completed ...
Страница 43: ...34 Figure 4 41 Selecting a Drive 6 Press or to select a keyboard layout and press Enter to continue ...
Страница 44: ...35 Figure 4 42 Selecting a Keyboard Layout 7 Set the root password and press Enter to continue ...
Страница 46: ...37 Figure 4 44 Confirming the Installation 9 Wait for the installation to complete ...
Страница 47: ...38 Figure 4 45 Installing ESXi 7 0 1 10 When the installation is completed press Enter to reboot ...
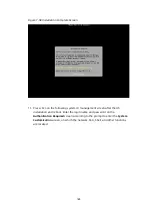
Страница 49: ...40 Figure 4 47 System UI Management Screen Figure 4 48 Authentication Required Screen ...
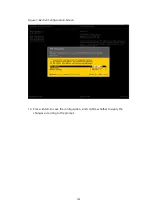
Страница 54: ...45 Figure 4 53 Selecting Restart Management Network Figure 4 54 Confirming the Management Network Restart ...
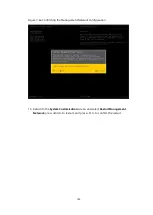
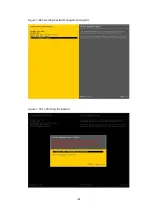
Страница 57: ...48 Figure 4 57 Selecting Restart Management Agents Figure 4 58 Confirming the Restart ...
Страница 68: ...59 Figure 5 12 Selecting INSPUR 8204 4 GB Figure 5 13 INSPUR 8204 4 GB Configuration Screen ...
Страница 71: ...62 4 Select Proceed to next Form Figure 5 17 Selecting Proceed to Next Form 5 Set RAID Level to RAID 5 ...
Страница 75: ...66 Figure 5 21 Setting System Date Figure 5 22 Setting System Time ...
Страница 85: ...76 Figure 5 36 Language Selection Screen 5 The INSTALLATION SUMMARY screen appears ...
Страница 90: ...81 Figure 5 41 Installation Progress Screen 10 After the installation is completed click Reboot System ...
Страница 102: ...93 Figure 5 58 Authentication Required Screen Figure 5 59 System Customization Screen ...
Страница 106: ...97 Figure 5 63 Selecting Restart Management Network Figure 5 64 Confirming the Management Network Restart ...
Страница 109: ...100 Figure 5 67 Selecting Restart Management Agents Figure 5 68 Confirming the Restart ...
Страница 121: ...112 Figure 6 16 Setup Wizard Screen 3 Select the language you like to use and click Continue ...
Страница 122: ...113 Figure 6 17 Selecting the Language 4 Set DATE TIME KEYBOARD and LANGUAGE SUPPORT ...
Страница 124: ...115 Figure 6 19 Software Selection 6 Select the destination drive to install the OS to and configure the partitions ...
Страница 126: ...117 Figure 6 21 Network Configuration 9 Check all the information and then start the installation process ...
Страница 127: ...118 Figure 6 22 Checking Information and Beginning Installation 10 Set the root password in USER SETTINGS ...
Страница 128: ...119 Figure 6 23 User Settings Figure 6 24 Setting the Root Password ...
Страница 130: ...121 Figure 6 26 Reboot Figure 6 27 Reboot Screen ...
Страница 136: ...127 Figure 6 32 Selecting a Drive 6 Press or to select a keyboard layout and press Enter to continue ...
Страница 137: ...128 Figure 6 33 Selecting a Keyboard Layout 7 Set the root password and press Enter to continue ...
Страница 139: ...130 Figure 6 35 Confirming the Installation 9 Wait for the installation to complete ...
Страница 140: ...131 Figure 6 36 Installing ESXi 7 0 1 10 When the installation is completed press Enter to reboot ...
Страница 142: ...133 Figure 6 38 System UI Management Screen Figure 6 39 Authentication Required Screen ...
Страница 147: ...138 Figure 6 44 Selecting Restart Management Network Figure 6 45 Confirming the Management Network Restart ...
Страница 150: ...141 Figure 6 48 Selecting Restart Management Agents Figure 6 49 Confirming the Restart ...
Страница 165: ...156 Figure 7 18 Setting System Date Figure 7 19 Setting System Time ...
Страница 174: ...165 Figure 7 31 User Login Screen Figure 7 32 Desktop ...
Страница 177: ...168 Figure 7 34 Language Keyboard and Product Selection 3 Check I Agree to the License Terms and click Next ...
Страница 181: ...172 Figure 7 38 Skipping Registration Dialog Box 7 Select the extensions and modules to be installed and click Next ...
Страница 182: ...173 Figure 7 39 Extension and Module Selection Figure 7 39 Add On Product Installation ...
Страница 185: ...176 Figure 7 42 Creating Mount Points 11 Set the time zone and click Next Figure 7 43 Setting the Time Zone ...
Страница 188: ...179 Figure 7 46 Installation Settings Figure 7 47 Performing Installation ...
Страница 196: ...187 Figure 7 56 Confirming the Installation ...
Страница 199: ...190 Figure 7 59 System UI Management Screen Figure 7 60 Authentication Required Screen ...
Страница 204: ...195 Figure 7 65 Selecting Restart Management Network Figure 7 66 Confirming the Management Network Restart ...
Страница 207: ...198 Figure 7 69 Selecting Restart Management Agents Figure 7 70 Confirming the Restart ...
Страница 214: ...205 Figure 8 8 Installation Step 1 Figure 8 9 Installation Step 2 ...
Страница 244: ...235 Figure 10 29 Modifying the Kdump Configuration 2 Figure 10 30 Modifying the Kdump Configuration 3 ...
Страница 247: ...238 Figure 10 35 Advanced System Settings 3 In the Startup and Recovery area select Settings ...
Страница 248: ...239 Figure 10 36 Startup and Recovery 4 Configure the Windows kernel crash in the Startup and Recovery dialog box ...
Страница 258: ...249 Figure 10 52 BIOS Serial Port Setting 1 Figure 10 53 BIOS Serial Port Setting 2 ...


