background image

BMC Settings

 155

not need to authenticate user and password, because he will get the highest privilege if 

someone accesses the HOST OS. So if the user forgets password or password expires, this is 

a way to change password or disable password security rules.

Please refer to IPMI 2.0 Spec, Appendix G - Command Assignments. Common privilege as 
below:
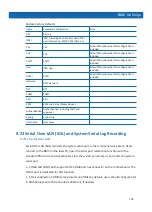
User Privilege for IPMI

User Privilege

Supported Operation

Administrator

Write/Read 

Operator

Read Only

User

Read Only

No Access

Non


User Privilege for Management Web GUI
Only IPMI/WEB/SSH Unified User supports Web GUI.


For “Operator” and “User” privilege, 

if with RO attribute, the settings are visible, but the input fields and buttons are disabled, 
so users cannot modify the settings; if with NA attribute, the settings are invisible and no 
operation can be taken.


“No Access” privilege cannot login Web GUI.

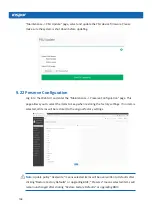
9.16 Date & Time

This page allows you to set the date and time of the BMC or automatically refresh the date 
and time via NTP.

Содержание NF3120M5

Страница 1: ...Inspur Server User Manual NF3120M5 V1 0 ...

Страница 2: ... or by any means without prior written consent of Inspur The information in this manual is subject to change without notice Inspur is the registered trademark of Inspur All the other trademarks or registered trademarks mentioned in this manual are the property of their respective holders Edition 1 0 February 2020 ...

Страница 3: ... If needed please contact Inspur for our support and guidance 2 Before disassembling the server s components please be sure to disconnect all the power cables connected to the server 3 BIOS and BMC setup is a significant factor in correctly configuring your server If there are no special requirements it is suggested to use the Default Values and not alter the parameter settings arbitrarily After t...

Страница 4: ...r up the Server 12 4 2 Power down the Server 12 4 3 Extend the Server from the Rack 12 4 4 Remove the Access Panel 13 4 5 Install the Access Panel 14 5 Setup 15 5 1 Optimum Environment 15 5 2 Rack Warnings 17 5 3 Identifying the Contents of the Server Shipping Carton 18 5 4 Installing Hardware Options 18 5 5 Installing the Server into the Rack 18 5 6 Installing the Operating System 19 6 Hardware O...

Страница 5: ...System Overview 100 9 3 IPMI2 0 103 9 4 Web GUI 110 9 5 SNMP 113 9 6 Smash Lite CLI 114 9 7 System Information and Status 114 9 8 Sensor 124 9 9 Logs 125 9 10 Event Alerting 129 9 11 Settings 131 9 12 BMC Self Recovery 147 9 13 Locator LED 148 9 14 BMC Network 149 9 15 Users 151 9 16 Date Time 155 9 17 BIOS and BMC 156 9 18 Storage 157 9 19 Power Control 160 9 20 Fan Speed Control 163 9 21 Firmwar...

Страница 6: ... Battery Replacement 185 12 Regulatory Compliance Notices 186 12 1 Regulatory Compliance Identification Numbers 186 12 2 Federal Communications Commission Notice 186 12 3 Cables 187 12 4 Chinese Notice 187 12 5 Battery Replacement Notice 187 13 Electrostatic Discharge 188 13 1 Preventing Electrostatic Discharge 188 13 2 Grounding Methods to Prevent Electrostatic Discharge 188 14 Warranty 189 14 1 ...

Страница 7: ...le ratings Ensure that the total rating of all equipment plugged into the extension cable does not exceed 80 percent of the ratings limit for the extension cable 4 Please be sure to use the power supply components that come with the server such as power cables power socket if provided with the server etc For your safety please do not replace power cables or plugs randomly 5 To prevent electric sho...

Страница 8: ...ing stabilizers before installing equipment into the rack may cause the cabinet to tip over possibly resulting to severe injury After installing the equipment and other components into the rack only one component can be pulled out from the rack through its sliding part at one time Pulling out several components at the same time may cause the rack to turn over resulting to serious personal injury 1...

Страница 9: ...damaging the motherboard please power off the system and wait for five seconds and then remove the components from the motherboard and or disconnect the peripheral device from the system Please remember that only service technicians trained by Inspur are authorized to remove the cover of the host and to remove and replace internal components 5 If there is modem telecom or LAN options installed in ...

Страница 10: ...nges to prevent damage to the components or scratching arms 4 Handle components and plug in cards with care Please do not touch the components or connection points on the plug in cards When handling the plug in cards or components firmly grab the edges of the plug in cards and components and or their metal fixed supports 8 During the process of rack installation and application please pay attentio...

Страница 11: ...station entry level workstation storage server cloud workstation media codec edge computing and Internet of Things 2 2 Features and Specifications Processor Processor Type 1 new generation Intel Xeon scalable processor up to 95W Chipset Chipset Type Intel C242 C246 chipset Memory Memory Type DDR4 w ECC UDIMM 2666MHz Memory Slot Qty 4 Total Memory Capacity Supports up to 128GB 32G per memory module...

Страница 12: ...SAS HDD SSD Power Specifications One PSU configuration Support 400W PSU Two PSU configuration Support 550W CRPS module Support 1 1 redundancy mode Power Input Please refer to the power input on the nameplate label of the host Physical External Packing Dimensions 871mm L x 651mm W x 232mm H Host Machine Dimensions 551mm L x 438mm W x 43 2mm H without ears 581mm L x 478mm W x 43 2mm H with ears Weig...

Страница 13: ...modules non hot plug 2 Hard drive modules hot plug 3 VGA port 4 USB2 0 port 5 USB3 0 port 6 Power button 7 UID LED button 8 Power status LED 9 Memory failure LED 10 Power failure LED 11 System overheat LED 12 Fan failure LED 13 System failure LED 14 Drive failure LED 15 Drive status LED 3 2 Rear Panel Components ...

Страница 14: ...erial port 8 GE electrical port onboard 1000M LAN0 9 GE electrical port onboard 1000M LAN1 10 IO module0 support half height PCIE card 11 IO module1 support half height PCIE card 12 PSU1 support hot plug 13 PSU0 support hot plug 14 IO module1 support full height PCIE card 15 PSU non hot plug configuration 3 3 Motherboard Components ...

Страница 15: ...tor 12 Fan connector3 13 Fan connector2 14 Fan connector B 15 SATA0 connector 16 SATA1 connector 17 SATA2 connector 18 SATA3 connector 19 Fan connector1 20 SATA4 connector 21 SATA5 connector 22 SATA6 connector 23 SATA7 connector 24 Fan connector0 25 USB3 0 4 USB2 0 5 VGA 1 ports 26 BP_SGPIO_SMBUS1 connector 27 Fan connector A 28 PCIE slot2 29 PCIE slot3 30 PCIE slot1 31 PCIE slot0 32 M 2 SSD slot ...

Страница 16: ... original status 3 4 LEDs and Buttons Description 3 4 1 LEDs and Buttons on Front Control Panel Icon LED Button Status Interpretation Power button LED Off No power Green Power on state Orange Standby state UID button LED Off Device not be located Blue Device be located Short press the UID button to turn on the LED Press and hold for 6 seconds to reset the motherboard BMC Power status LED Off Not p...

Страница 17: ...ve Tray LEDs Item Description Status Interpretation 1 Fault alarm LED Steady red A failure occurs Steady blue Drive positioning Flashing blue RAID rebuilding 2 Activity status LED Steady green Normal Flashing green Read and write activity ...

Страница 18: ...nternal circuitry remain active until AC power is removed IMPORTANT If installing a hot plug device it is not necessary to power down the server 1 Back up the server data 2 Shut down the operating system 3 Disconnect the power cables The system is now without power 4 3 Extend the Server from the Rack 1 Use a screwdriver to loosen the screws within the ears on both sides of the server 2 Extend the ...

Страница 19: ...ry from hot surfaces allow the drives and the internal system components to cool before touching them CAUTION For proper cooling do not operate the supercomputer without the access panel air baffle or fan installed If the supercomputer supports hot plug components minimize the amount of time the access panel is open To remove the component 1 Power down the server if performing a non hot plug insta...

Страница 20: ...1 Place the access panel on the server Open the hood latch and pull the panel backward 2 Press downward the hood latch The access panel slides into the closed position 3 Use a screwdriver to tighten the safety screw on the hood latch ...

Страница 21: ... cabinet and the rear door must be adequately ventilated to allow the warm air to escape from the cabinet CAUTION To prevent improper cooling and damage to the equipment do not block the ventilation openings When vertical space in the rack is not filled by a server or rack component the gaps between the components cause changes in airflow through the rack and across the servers Cover all gaps with...

Страница 22: ...irements Installation of this equipment must comply with local and regional electrical regulations governing the installation of information technology equipment by licensed electricians This equipment is designed to operate in installations covered by NFPA 70 1999 Edition National Electric Code and NFPA 75 1992 code for Protection of Electronic Computer Data Processing Equipment For electrical po...

Страница 23: ...ust install the equipment in accordance with any regional or national electrical wiring codes such as the International Electrotechnical Commission IEC Code 364 parts 1 through 7 Furthermore you must be sure that all power distribution devices used in the installation such as branch wiring and receptacles are listed or certified grounding type devices Because of the high ground leakage currents as...

Страница 24: ...g carton and locate the materials and documentation necessary for installing the server All the rack mounting hardware necessary for installing the server into the rack is included with the rack or the server The contents of the server shipping carton include Server Power cable Installation documentation Rack mounting hardware In addition to the supplied items you may need Operating system or appl...

Страница 25: ...le into a grounded earthed electrical outlet that is easily accessible at all times Unplug the power cable from the power supply to disconnect power to the equipment Do not route the power cable where it can be walked on or pinched by items placed against it Pay particular attention to the plug electrical outlet and the point where the cord extends from the server 5 6 Installing the Operating Syst...

Страница 26: ...electrostatic discharge 6 1 Processor Option The server supports single processor operation CAUTION To avoid damage to the processor and system board only authorized personnel should attempt to replace or install the processor in this server To help avoid damage to the processor and system board do not install the processor without using the processor installation tool CAUTION To install a faster ...

Страница 27: ...ligned with the mounting holes on the plate Screw in two diagonal screws until they are just snug do not fully tighten Then do the same with the remaining two diagonal screws Finish by fully tightening all the screws Notes It is required to coat thermal grease evenly onto the contact position between CPU heatsink and CPU During fixing CPU heatsink it is required to fasten screws according to the d...

Страница 28: ...e machine Detailed DIMM population and combination principles are as follows DIMM Qty DIMM_A0 DIMM_A1 DIMM_B0 DIMM_B1 1 V 2 V V 3 V V V 4 V V V V Step 1 Open the lock tabs on both ends of the DIMM slot Step 2 Align the bottom key with the receptive point on the slot press both ends of the DIMM with your thumbs Insert the DIMM into the slot completely and the lock tabs will automatically secure the...

Страница 29: ...r supports hot plug components minimize the amount of time the access panel is open 1 Check the status of the hard disk drive through the LED on the drive tray 2 Back up all data on the hard disk drive 3 Remove the hot plug hard disk drive Step 1 Press the drive panel button The lever on drive tray pops up automatically Step 2 Hold the lever and pull it outwards to remove the drive tray ...

Страница 30: ... or a blank 1 Access the product rear panel 2 Remove the power supply blank WARNING To reduce the risk of personal injury from hot surfaces allow the power supply or power supply blank to cool before touching it 3 Install the power supply into the power supply bay 4 Connect the power cable to the power supply 5 Route the power cable through the power cable anchor or cable management arm 6 Repositi...

Страница 31: ...ing do not operate the server without the access panel baffles expansion slot covers or blanks installed If the server supports hot plug components minimize the amount of time the access panel is open 1 Power down the server 2 Extend the server from the rack 3 Remove the access panel 4 Remove the PCIE riser cage Step 1 Loosen the locking screw hold the handle on the riser cage and lift up in the d...

Страница 32: ...26 Step 2 Install the expansion card to the riser card Step 3 Install the riser cage back into the server ...

Страница 33: ...ram of cabling for hot plug drive configuration using two power supplies 7 2 Schematic diagram of cabling for non hot plug drive configuration usingonepowersupply Note Please route the cables according to the purchased machine configuration ...

Страница 34: ...evious state if required If there is an exception such as failure to boot caused by changing the BIOS settings users can try to recover it through the Clear CMOS operation 2 The factory default settings are the optimal settings It is advised not to alter the parameters before understanding their denotations 3 The common settings are introduced in detail in this chapter but less common ones are not...

Страница 35: ...or return from submenu to main menu or Select a menu or Move the cursor up or down Home or End Move the cursor to the top or bottom of the screen or Select the previous or next numerical value or setting of the current one F1 Help F2 Restore to the last configuration F9 Restore to the default configuration F10 Save and exit Enter Execute commands or select a submenu Note Options in grey are not av...

Страница 36: ...and provides UEFI Shell environment This option can be set according to customer s demand If the Boot option filter is set to Legacy only the Option ROM execution mode of Network Storage Video and Other PCI devices must be set to Legacy If the Boot option filter is set to UEFI only the Option ROM execution mode of Network and Video must be set to UEFI and the Option ROM execution mode of Storage a...

Страница 37: ...31 BIOS Setup 8 2 4 View CPU Information Log in to the BIOS interface select Advanced CPU Configuration and press Enter to display the CPU detailed information ...

Страница 38: ...to display the manufacturer speed capacity and other information of the memories in position 8 2 6 View HDD Information and RAID Configuration 8 2 6 1 View HDD Information Log in to the BIOS interface select Chipset PCH IO Configuration SATA And RSTe Configuration and press Enter to display the HDD information of the current onboard SATA ports ...

Страница 39: ...8 2 6 2 RAID Mode Settings 1 Set the SATA Mode Selection Option to RAID press F10 to save the setting and the system reboots 2 When Boot option filter is set to UEFI only and Storage is set to UEFI in the BIOS Setup ...

Страница 40: ...ace there will be the Intel R RSTe SATA Controller menu 2 1 Press Enter the executable operation and the current disk information will be displayed 2 2 Create RAID volume Select Create RAID Volume option and press Enter ...

Страница 41: ...lume is allowed to be made on 4 disks which is only available when disk quantity is 4 or above RAID5 Parity This RAID volume is allowed to be made on 3 or above disks Select Disks Select disks to make RAID volume press Enter select X and then press Enter to return to Create RAID Volume interface Strip Size Please select the strip size only RAID0 and RAID5 volumes could enable this option Capacity ...

Страница 42: ...set to UEFI only and Storage is set to Legacy a prompt Press CTRL I to enter Configuration Utility will appear on the screen during system booting Press Ctrl and I keys at the same time to enter SATA RAID configuration as shown in the ...

Страница 43: ...xisting RAID volumes information including volume ID name RAID level capacity status bootable or not There are 5 executable menus in the SATA RAID configuration interface as shown in the following figure Key Instruction Table Key Description Used to move cursor in different menus or to change values of menu options TAB To select the next menu option Enter To select a menu Esc To exit menu or retur...

Страница 44: ...peated here Create RAID Menu Instruction Table Interface Parameters Function Description Name Please enter a volume label name less than 16 characters without containing any special characters RAID Level Please select RAID volume level If no volume has been created at present there are four volume levels of RAID0 Stripe RAID1 Mirror RAID10 RAID0 1 and RAID5 Parity for selection Please select volum...

Страница 45: ...ring Delete RAID Volume menu press DEL to delete the selected RAID volume and the system will prompt ALL DATA IN THE VOLUME WILL BE LOST Are you sure you want to delete Volume0 Y N To delete this RAID volume please enter Y to cancel the deletion please enter N 3 4 Reset Disks to Non RAID menu After entering Reset Disks to Non RAID menu system will display all disks in RAID volume Please use the sp...

Страница 46: ...prompt Are you sure you want to mask selected disks as Spare Y N enter Y or N according to the prompt It is to be noted that all data on this disk will be lost as the spare disk 3 6 Exit menu Select Exit menu through up and down keys or press ESC to exit SATA RAID configuration interface as shown in the following figure The system will prompt Are you sure you want to exit Y N enter Y to exit or en...

Страница 47: ...BMC Network Parameters Log in to the BIOS interface select Server Mgmt BMC Network Configuration BMC IPv4 Network Configuration BMC IPv6 Network Configuration Press Enter to view the current configuration of BMC IPv4 and BMC IPv6 network as shown in the following figures ...

Страница 48: ... BMC network status parameters When Get BMC Dedicated Parameters is set to Manual this option will be displayed Options include Unspecified Static DynamicBmcDhcp The static and dynamic settings take effect immediately Unspecified Current Configuration Address Display the current BMC network parameters configuration Station IP address BMC station IP address Subnet mask Subnet mask Station MAC addre...

Страница 49: ...tion Address Source option to Static If the setting succeeds BMC network will be set to static immediately Select the Station IP Address option Press Enter the Station IP Address window pops up Input the Static IP manually After the setting is completed press Enter to confirm ...

Страница 50: ...0 0 to the IP address The assignment only changes the IP address in BIOS Setup interface and does not notify BMC to change the IP settings The prompts of Subnet mask and Router IP address settings are similar to those of Station IP address setting there is no more detailed description here As shown in the following figure the BMC network parameters have taken effect you can log in to BMC Web inter...

Страница 51: ...Dynamic Network Parameters Set the Configuration Address Source option to DynamiBmcDhcp It will take effect after you save it exit and restart the system The settings of BMC IPv6 network parameters are similar to this which will be omitted here ...

Страница 52: ...core version Compliancy UEFI spec version BIOS Version BIOS version Build Date and Time Build date and time Access Level Current access level Product Name Product name Serial Number Serial number Customer ID Customer ID Processor Information Display the current CPU name type speed ID stepping package processor quantity and microcode version Memory Information Display the current total memory capac...

Страница 53: ...ch between system date and time directly input the value or use keys to change the value Press key the value increases by 1 and press key the value decreases by 1 8 3 2 Advanced Advanced interface includes the BIOS system parameters and related function settings such as ACPI serial port PCI subsystem CSM USB onboard NIC and so on Interface Parameters Function Description RC ACPI Setting System ACP...

Страница 54: ...on Display Intel TXT information SIO Configuration SIO 6796 configuration USB Configuration USB configuration parameters CSM Configuration CSM configuration Enabled Disabled Option ROM execution settings etc MVMe Configuration NVMe device options settings WHEA Configuration General WHEA configuration Onboard LAN Configuration Onboard LAN configuration Network Stack Configuration Network stack sett...

Страница 55: ...controls ASPM Options include Auto Enabled Disabled Auto Wake system from S5 Enable Disable system wake up alarm event Options include Enabled Disabled Disabled ACPI Debug Open the memory buffer where debug strings are stored Options include Enabled Disabled Disabled Low Power S0 Idle Capability This variable determines whether the ACPI low power S0 idle capability is enabled Options include Enabl...

Страница 56: ...abled Adjacent Cache Line Prefetch Adjacent cache prefetch on off settings Options include Enabled Disabled If this function is enabled during computer data reading it will intelligently consider the adjacent data is needed as well and it will prefetch these data during processing to speed up the reading process Enabled DCU Streamer Prefetcher DCU streamer prefetcher on off settings Options includ...

Страница 57: ...rforms a self test Enabled AES AES instruction on off settings Options include Enabled Disabled This menu mainly controls whether the CPU supports AES instruction These instructions are mainly used for system virtualization Enable this instruction system performance will be improved Enabled Machine Check Machine check Options include Disabled Enabled Machine check exception is an error detected by...

Страница 58: ...Enable Disable the RTH function RTH will dynamically increase the CPU frequency to enter the package C state faster to reduce the total power Options include Disabled Enabled Enabled Intel Speed Shift Technology Enable Disable the Intel Speed Shift Technology support Enabling will expose the CPPC v2 interface to allow hardware to control the P state Options include Disabled Enabled Enabled Turbo M...

Страница 59: ... State Un demotion Configure C state un demotion Options include Disabled C1 C3 C1 and C3 C1 and C3 Package C State Demotion Configure package C state demotion Options include Disabled Enabled Disabled Package C State Un demotion Configure package C state un demotion Options include Disabled Enabled Disabled Package C State Limit Maximum package C state limit setting Options include C0 C1 C2 C3 C6...

Страница 60: ...ecovery ME firmware version ME Firmware Features ME FW features ME Firmware Status 1 ME FW status value 1 ME Firmware Status 2 ME FW status value 2 Current State Current state Error Code ME FW error code TPM Device Selection Selects TPM device Options include dTPM PTT PTT 8 3 2 5 Thermal Configuration This option is used to set the system thermal ...

Страница 61: ...al temperature report not meet specifications Disabled ACPI T States Enable Disable ACPI T state Options include Disabled Enabled Disabled PECI Reset Enabling will trigger a PECI reset during boot to resolve rare Sx PECI issues Options include Disabled Enabled Disabled 8 3 2 6 Trusted Computing Trusted Computing interface describes how to configure security device support ...

Страница 62: ...ns include Enabled Disabled Enabled SHA256 PCR Bank Enable Disable SHA256 bank Options include Enabled Disabled Enabled Pending operation Pending operation of the safety device Note During the restart your computer will change the status of the security device Options include None TPM Clear None Platform Hierarchy Enable Disable platform hierarchy Options include Enabled Disabled Enabled Storage H...

Страница 63: ...es will be enumerated Options include TPM 1 2 TPM 2 0 Auto Auto 8 3 2 7 APM Configuration This option is used to set the system s wakeup mode and sleep mode Interface Parameters Function Description Default Value Restore AC Power Loss If set to Power Off the system will remain off when the system restores on AC power loss If set to Power On the system will be on after the power is interrupted If s...

Страница 64: ... Test Interface Parameters Function Description Default Value SMART Self Test Run SMART on all hard drives during POST Options include Disabled Enabled Disabled 8 3 2 9 Runtime Error Logging Settings Runtime Error Logging interface is used to set the runtime error logs ...

Страница 65: ...nfigure error options under PCIE Options include Enabled Disabled Enabled Corrected Error Enable Enable Disable PCI corrected error logging Options include Enabled Disabled Enabled Uncorrected Error Enable Enable Disable PCI uncorrected error logging Options include Enabled Disabled Enabled Fatal Error Enable Enable Disable PCI fatal error logging Options include Enabled Disabled Enabled Enable SE...

Страница 66: ...Description Default Value Terminal Type Terminal type settings Options include VT100 VT100 VT UTF8 ANSI ANSI Bits per second Baud rate settings Options include 9600 19200 38400 57600 115200 115200 Data Bits Serial port data width settings Options include 7 8 8 Parity Parity settings Options include None Even Odd Mark odd even check Space storage parity check None ...

Страница 67: ... off settings Options include Enabled Disabled Enabled Recorder Mode Recorder mode on off settings Options include Enabled Disabled Disabled Redirection 100 31 Expanded redirection resolution 100 31 on off settings Options include Enabled Disabled Enabled Putty KeyPad Putty function keys and keyboard settings Options include VT100 LINUX XTERMR6 SCO ESCN VT400 VT100 Legacy Console Redirection Setti...

Страница 68: ...ude COM0 COM1 COM0 Resolution Legacy OS redirection resolution settings Options include 80 24 80 25 80 x 24 Redirect After POST Redirection after BIOS POST settings Options include Always Enable BootLoader Always Enable 8 3 2 11 Intel TXT Information Intel Trusted Execute Technology information 8 3 2 12 SIO Configuration This option is used to set the system Super IO chip ...

Страница 69: ...63 BIOS Setup Interface Parameters Function Description Default Value Active Serial Port 1 2 View and set the basic performance of SIO logical devices ...

Страница 70: ...E8h IRQ 3 4 5 7 9 10 11 12 DMA IO 3F8h IRQ 4 DMA 8 3 2 13 USB Configuration This option is used to change the settings related with the USB devices Interface Parameters Function Description Default Value Legacy USB Support Enable Disable legacy USB support Options include Enabled Disabled Auto Enabled XHCI Hand off This is a workaround for some OS Options include Enabled Disabled Enabled USB Mass ...

Страница 71: ...sec 5 sec 10 sec 20 sec 20 sec Device reset time out USB mass storage device Start Unit command time out Options include 10 sec 20 sec 30 sec 40 sec 20 sec Device power up delay Maximum time the device will take before it properly reports itself to the Host Controller Options include Auto Manual Auto 8 3 2 14 CSM Configuration This option is used to set the compatibility support module to support ...

Страница 72: ...rer Force BIOS INT19 Trap Response Interrupt Capture signal response settings Options include Immediate Postponed Immediate HDD Connection Order Select the HDD connection order Some operating systems require that the HDDs are adjustable Options include Adjust Keep Keep Boot Option filter Boot mode settings Options include UEFI Mode Legacy Mode UEFI Mode Network NIC Option ROM execution mode settin...

Страница 73: ...67 BIOS Setup ...

Страница 74: ...EA Configuration Interface Parameters Function Description Default Value WHEA Support An operating system hardware error handling mechanism Options include Enabled Disabled Enabled 8 3 2 17 Onboard LAN Configuration ...

Страница 75: ...s well as IPSEC protocol Interface Parameters Function Description Default Value Network Stack Network stack on off settings Options include Enabled Disabled Only this option is enabled the following options can be displayed and the functions can be set Enabled Ipv4 PXE Support UEFI Ipv4 PXE support on off settings Options include Enabled Disabled Enabled Ipv4 HTTP Support Ipv4 HTTP support on off...

Страница 76: ...abled Enabled PXE boot wait time Set the wait time to cancel PXE boot after pressing ESC key the setting range is 0 5 0 Media detect count Device detect count settings the setting range is 1 50 1 8 3 3 Chipset This menu is used to change the chip settings 8 3 3 1 System Agent Configuration 8 3 3 1 1 Memory Configuration This menu is used to set the options related with memory ...

Страница 77: ...71 BIOS Setup Memory Thermal Configuration This menu is used to set the options related with thermal ...

Страница 78: ...y Test on Warm Boot Adjust whether to perform Memory Test again during Warm Boot Options include Enabled Disabled Enabled Maximum Memory Frequency Adjust the maximum memory frequency Options include Auto 2133 2200 2400 2600 2666 Auto ECC Support Enable Disable ECC support Options include Enabled Disabled Enabled Fast Boot Enable Disable fast boot Options include Enabled Disabled Enabled Train on W...

Страница 79: ... BIOS REFRESH_2X_MODE iMC enables 2x self refresh of memory during WARM and HOT Options include Disabled 1 Enabled for WARM or HOT 2 Enabled HOT only Disabled LPDDR Thermal Sensor When enabled MC uses MR4 to read the LPDDR thermal sensor Options include Enabled Disabled Enabled SelfRefresh IdleTimer Memory self refresh interval ranging from 512 to 65535 512 Throttler CKEMin Defeature Memory thrott...

Страница 80: ...rface Parameters Function Description Default Value Internal Graphics Adjust Intel iGFX Display function Options include Auto Enabled Disabled Disabled On board Video Adjust Aspeed VGA Display function Options include Enabled Disabled Enabled ...

Страница 81: ... Gen1 Gen2 Gen3 Auto PEG0 Slot Power Limit Value Adjust the max PEG0 power limit Options include 0 to 255 75 PEG 0 1 1 Enable Root Port Enable Disable root port support Options include Auto Enabled Disabled Enabled Max Link Speed Adjust the max link speed Options include Auto Gen1 Gen2 Gen3 Auto PEG1 Physical Slot number Adjust PEG1 s physical slot Options include 0 to 8191 2 PEG1 Hotplug Adjust w...

Страница 82: ...Options include 0 to 8191 3 VT d Above 4GB MMIO BIOS assignment X2APIC Opt Out option Interface Parameters Function Description Default Value VT d Enable Disable virtualization support Options include Enabled Disabled Enabled Above 4GB MMIO BIOS assignment Enable Disable above 4GB memory mapped IO BIOS assignment Options include Enabled Disabled Disabled X2APIC Opt Out Enable Disable X2APIC opt ou...

Страница 83: ...77 BIOS Setup 8 3 4 PCH IO Configuration BIOS automatically detects the installed SATA devices Not Present will be displayed when no SATA device is detected 8 3 4 1 SATA and RSTe Configuration ...

Страница 84: ...ons include AHCI RAID AHCI SATA Port 0 4 Port 0 4 Enable Disable SATA port Options include Enabled Disabled Enabled Hot Plug 0 4 Adjust SATA hot plug function Options include Enabled Disabled Enabled Spin Up Device 0 4 Adjust SATA spin up device function Options include Enabled Disabled Disabled SATA Device Type 0 4 Adjust SATA device type function Options include Hard Disk Drive Solid State Drive...

Страница 85: ...I function Options include Enabled Disabled Disabled USB Port Disable Override Enable Disable USB root port function Options include Disabled Select Per Pin Note Select Per Pin instructions USB3_0 FrontRight USB3_2 RearUp USB3_3 RearDown USB3_0 RearUp USB3_1 RearDown USB2_0 RearUp USB2_1 RearDown USB2_0 FrontRight USB2_1 FrontLeft USB2_2 RearUp USB2_3 RearDown Disabled 8 3 4 3 Security Configurati...

Страница 86: ...nclude Enabled Disabled Disabled PCH LAN Controller Enable Disable the onboard NIC Options include Enabled Disabled Enabled LAN Wake From DeepSx Wake from DeepSx Options include Enabled Disabled Enabled Wake on LAN Enable Enable Disable the integrated LAN to wake the system Options include Enabled Disabled Enabled SLP_LAN Low on DC Power Enable Disable the SLP_LAN Low on DC power Options include E...

Страница 87: ... uppercase and lowercase letters special characters and numbers within 8 20 characters User Password Create a user password It must contain uppercase and lowercase letters special characters and numbers within 8 20 characters Secure Boot Secure boot menu 8 3 6 Boot Menu This menu is used to change the system boot device and related functions ...

Страница 88: ...s Options include Enabled Disabled Enabled Quiet Boot Quite boot on off settings Options include Enabled Disabled If it is set to Enabled the boot logo displays as that set by manufacturer if set to Disabled the boot screen displays as the text mode POST interface Enabled Fast Boot Enable the fast boot function to reduce the time to enter the operating system Options include Enabled Disabled Disab...

Страница 89: ...Save Changes and Reset To save changes and reset Discard Changes and Reset To discard changes and reset Save Changes To save changes Discard Changes To discard changes Restore Defaults To restore defaults Save as User Defaults To save as user defaults Restore User Defaults To restore user defaults Boot Override To override the boot option you could select the boot device from the following options...

Страница 90: ...bios Event Log Settings Interface Parameters Function Description Default Value Enabling Disabling Options Smbios Event Log Enable Disable Smbios event log Enabled Erasing Settings Erasing Event Log Erase the event log No ...

Страница 91: ...tom Options Log EFI Status Code Enable EFI status code log Enabled Convert EFI Status Codes to Standard Smbios Type Enable EFI status code conversion to standard SMBIOS type Disabled 8 3 8 2 View Smbios Event Log Interface Parameters Function Description DATE Event log date TIME Event log time ERROR CODE Smbios error code SEVERITY Severity 8 3 9 Server Mgmt Menu This menu is used to display the se...

Страница 92: ...le Disable the interface to communicate with BMC Options include Enabled Disabled Enabled Wait for BMC Wait for BMC settings Options include Enabled Disabled Disabled FRB 2 Timer FRB 2 timer on off settings Options include Enabled Disabled Enabled FRB 2 Timer Timeout FRB 2 timer timeout settings Options include 3 minutes 4 minutes 5 minutes 6 minutes 6 minutes FRB 2 Timer policy FRB 2 timer policy...

Страница 93: ...et Power Down Power Cycle Reset Serial Mux Serial Mux on off settings Options include Enabled Disabled Disabled System Event Log System event log configuration submenu BMC self test Log BMC self test log submenu BMC Network Configuration BMC network configuration submenu VLAN Configuration VLAN configuration submenu View System Event Log View System Event Log submenu BMC User Settings BMC user set...

Страница 94: ... Do Nothing Erase Immediately Do nothing Log EFI Status Codes Select the option to log EFI status codes Options include Disabled Both Error code Progress code Error Code 8 3 9 2 BMC Self Test Log Interface Parameters Function Description Default Value Erase Log Erase log settings Options include Yes On every reset No Yes On every reset When log is full Select the action when the log is full Option...

Страница 95: ...isabled To enable VLAN it needs to set the VLAN ID first Disabled Sharelink Dedicated VLAN ID BMC sharelink dedicated VLAN ID settings the range is 2 4094 The setting takes effect immediately 2 Sharelink Dedicated VLAN Priority BMC sharelink dedicated VLAN priority settings the range is 1 7 The setting takes effect immediately 0 8 3 9 5 View System Event Log This submenu is used to view the system...

Страница 96: ... Add User Add user submenu Delete User Delete user submenu Change User Settings Change user settings submenu 8 3 9 6 1 Add user Add User interface is used to add a BMC user through BIOS The addition takes effect immediately and the user will be added to the BMC user list ...

Страница 97: ...the new user it needs to set the User option in the Change User Settings interface to Enabled and then this user can log in to the BMC Web interface 8 3 9 6 2 Delete User Delete User interface is used to delete a BMC user through BIOS The deletion takes effect immediately and this user can not log in to the BMC Web interface any more Interface Parameters Function Description User Name Input the na...

Страница 98: ...contain uppercase and lowercase letters special characters and numbers within 8 20 characters Channel NO Set BMC channel input 1 or 8 0 User Privilege Limit Modify the user privilege Options include Reserved Callback User Operator Administrator Reserved 8 4 Firmware update For BIOS update you could select to update in UEFI Shell or OS 8 4 1 Update BIOS in UEFI shell 1 Insert the U disk containing ...

Страница 99: ...Exit 5 Press F11 to enter Boot Override Find the latest BIOS file and press Enter key 6 Select UEFI Built in EFI Shell and press Enter to DOS environment a Input fs0 to enter the U disk b Find the path to the AfuEfi64 efi and BIOS ROM files c Input AfuEfi64 efi ROM p b n k to start the update ...

Страница 100: ...S ROM name to replace ROM 7 After the update is completed please reboot the system 8 4 2 Update BIOS in Linux 1 Insert the U disk containing the Linux AMI BIOS update program AfuEfi cif and the latest BIOS file into the USB port ...

Страница 101: ...etup 2 Move the latest BIOS file to the folder where the AMI BIOS update program AfuEfi cif is stored 3 Right click in the folder and select Open in terminal from the drop down menu to enter the DOS environment ...

Страница 102: ...n k to start the update 5 After the update is completed please reboot the system 8 4 3 Update BIOS in Windows 1 Insert the U disk containing the Windows AMI BIOS update program AfuEfi cif and the latest BIOS file into the USB port ...

Страница 103: ...97 BIOS Setup 2 Click Afu AfuWin 64 AfuWin64 then double click on AFUWINGUIx64 EXE 3 Select Open and open the latest BIOS file Click Open 4 Click Flash in the Setup tab to start the update ...

Страница 104: ...98 5 After the update is completed please reboot the system Parameter instructions B Program Boot Block P Program main bios image N Program NVRAM ...

Страница 105: ...99 BIOS Setup X Do not check ROM ID K Program all non critical blocks L Program all ROM Holes ME Program ME Entire Firmware Block ...

Страница 106: ...n processor and memory the host system can be managed by BMC system even if host hardware or OS hang or went down 9 2 1 Main Features ü Supports IPMI2 0 IPMI interfaces include KCS Lan and IPMB System interface KCS LAN interface supports RMCP System Event Log SEL Sensor Data Record SDR Field Replaceable Unit FRU Remote power on off and reset Serial Over LAN SOL Authentication type RAKP HMAC SHA1 E...

Страница 107: ...inistrators can coordinate the debugging Remote control and supervision via network Supports Directory Integration AD Active Directory and LDAP Users can operate 2 remote graphical interface consoles at the same time so that different managers can work together to solve problems in different places ü Firmware update DOS tool Web GUI Windows XP Vista 2003 2008 RHEL5 2 SLES10SP2 ü Prompt PET SNMP Tr...

Страница 108: ...rface CIM Common Information Model SMASH CLP WSMAN Notes It must support PMBus and PSMI Specifications are subject to change without notice 9 2 2 Integrated BMC Hardware ASPEED AST2500 is a processor of the server management subsystem based on the ARM1176JZF S 32 bit RISC CPU microcontroller The following functions are integrated into the component Baseboard Management Controller BMC with peripher...

Страница 109: ...protocol The USB 2 0 Hub interface is used for remote keyboard and mouse and remote storage support BMC supports various storage devices such as CDROM DVDROM CDROM ISO image floppy and USB flash disk Any of the storage devices can be used as a boot device and the host can boot from this remote media via redirection over the USB interface 9 3 IPMI2 0 9 3 1 Channel ID Assignment for Each Interface T...

Страница 110: ...entiality Algorithm 0 RAKP NONE NONE NONE 1 RAKP HMAC SHA1 NONE NONE 2 RAKP HMAC SHA1 HMAC SHA1 96 NONE 3 RAKP HMAC SHA1 HMAC SHA1 96 AES CBC 128 4 RAKP HMAC MD5 NONE NONE 5 RAKP HMAC MD5 HMAC MD5 128 NONE 6 RAKP HMAC MD5 HMAC MD5 128 AES CBC 128 7 RAKP HMAC MD5 MD5 128 NONE 8 RAKP HMAC MD5 MD5 128 AES CBC 128 9 RAKP_HMAC_ SHA256 NONE NONE 10 RAKP_HMAC_ SHA256 HMAC SHA256 128 NONE 11 RAKP_HMAC_ SH...

Страница 111: ... Enables App 62h Get Command Sub function Enables App 63h Get OEM NetFn IANA Support App 64h BMC Watchdog Timer Commands Reset Watchdog Timer App 22h Set Watchdog Timer App 24h Get Watchdog Timer App 25h BMC Device and Messaging Commands Set BMC Global Enables App 2Eh Get BMC Global Enables App 2Fh Clear Message Flags App 30h Get Message Flags App 31h Enable Message Channel Receive App 32h Get Mes...

Страница 112: ...vate Payload App 49h Get Payload Activation Status App 4Ah Get Payload Instance Info App 4Bh Set User Payload Access App 4Ch Get User Payload Access App 4Dh Get Channel Payload Support App 4Eh Get Channel Payload Version App 4Fh Get Channel OEM Payload Info App 50h unassigned App 51h Master Write Read App 52h unassigned App 53h Get Channel Cipher Suites App 54h Suspend Resume Payload Encryption Ap...

Страница 113: ... Receiver S E 00h Get Event Receiver S E 01h Platform Event S E 02h unassigned S E 03h 0Fh PEF and Alerting Commands Get PEF Capabilities S E 10h Arm PEF Postpone Timer S E 11h Set PEF Configuration Parameters S E 12h Get PEF Configuration Parameters S E 13h Set Last Processed Event ID S E 14h Get Last Processed Event ID S E 15h Alert Immediate S E 16h PET Acknowledge S E 17h Sensor Device Command...

Страница 114: ...itory Allocation Info Storage 21h Reserve SDR Repository Storage 22h Get SDR Storage 23h Add SDR Storage 24h Partial Add SDR Storage 25h Delete SDR Storage 26h Clear SDR Repository Storage 27h Get SDR Repository Time Storage 28h Set SDR Repository Time Storage 29h Enter SDR Repository Update Mode Storage 2Ah Exit SDR Repository Update Mode Storage 2Bh Run Initialization Agent Storage 2Ch SEL Devic...

Страница 115: ...Get TAP Response Codes Transport 13h Set PPP UDP Proxy Transmit Data Transport 14h Get PPP UDP Proxy Transmit Data Transport 15h Send PPP UDP Proxy Packet Transport 16h Get PPP UDP Proxy Receive Data Transport 17h Serial Modem Connection Active Transport 18h Callback Transport 19h Set User Callback Options Transport 1Ah Get User Callback Options Transport 1Bh Set Serial Routing Mux Transport 1Ch S...

Страница 116: ...SetDiscovered Bridge 12h GetChassisDeviceId Bridge 13h SetChassisDeviceId Bridge 14h Bridging Commands ICMB BridgeRequest Bridge 20h BridgeMessage Bridge 21h Event Commands ICMB GetEventCount Bridge 30h SetEventDestination Bridge 31h SetEventReceptionState Bridge 32h SendICMBEventMessage Bridge 33h GetEventDestination optional Bridge 34h GetEventReceptionState optional Bridge 35h OEM Commands for ...

Страница 117: ...nt Safari Step 1 Enter https BMC_IP in browser address bar Port number is modifiable See the Services section and the http port number is 80 disabled by default https port number is 443 If you modify the port number you need to specify the port number when logging in such as https BMC_IP sslport Step 2 In the Web login interface enter the default user name admin and password admin click the Login ...

Страница 118: ...video log BlackBox log Display and export black box log Settings Capture BSOD Display BSOD screen Date Time Set date time and zone External user services Set LDAP AD and RADIUS KVM mouse setting Mouse mode settings Log settings Log policy and advanced log settings Manage licenses View and add authorizations Media redirection settings Virtual media instance and redirection settings Network settings...

Страница 119: ...administrator Display system administrator information BIOS update BIOS firmware update PSU update PSU firmware update Sign out User logout 9 5 SNMP SNMP Simple Network Management Protocol is a network management standard based on the TCP IP protocol family It is a standard protocol for managing network nodes such as servers workstations routers switches etc in an IP network SNMP enables network a...

Страница 120: ...upports Smash Lite CLI users can log in to BMC via SSH and enter Smash Lite CLI By entering the show command related directories appear Users can enter the corresponding directories as needed to view specific information as the following figure shows l Smash Lite show Smash show 9 7 System Information and Status Log in to Web GUI to quickly view system information and status Click or move the mous...

Страница 121: ...splays the percentage of sensor events that occurred today or within 30 days including the total and name Sensor Monitoring Displays the current working status of the sensor 9 7 1 CPU Log in to the Web GUI and enter the System Inventory Processor page which displays the processor information It specifically includes ID name state max speed MHz activated cores maximum cores L1 cache KB L2 cache KB ...

Страница 122: ...KB L2 cache L3 Cache MB L3 cache 9 7 2 Memory Log in to the Web GUI and enter the System Inventory Memory Controller page which displays the memory controller information It specifically includes ID present size GB type maximum freq MHz manufacturer rank Table 6 Memory Information Attribute Value ID x x denotes the memory number Present Present Size GB Memory size Type DDR3 or DDR4 Maximum Freq MH...

Страница 123: ...ation Attribute Value Name Motherboard slot number where the device is located Connection Type Connection type Present Present Device Type Device type Device ID Device ID Vender ID Vendor ID Rated Width Rated width Rated Speed Rated speed Current Width Current width Current Speed Current speed 9 7 4 Network Log in to the Web GUI and enter the System Inventory BMC NIC Info page which displays the B...

Страница 124: ...age which displays the system NIC information It specifically includes name present location mac address port Table 8 BMC NIC Information Attribute Value Name Name Present Present Location Location IPv4 Address IPv4 address IPv6 Address IPv6 address ...

Страница 125: ...I and enter the System Inventory Storage page which displays the storage information It specifically includes hard disk backplane info present port number hard disk number hard disk info present front rear hard disk backplane error locate rebuild NVME Table 10 Hard Disk Backplane Information Attribute Value Present N Absent Y Present Port Number Port number Hard Disk Number Hard disk number ...

Страница 126: ...No 9 7 6 Power Log in to the Web GUI and enter the System Inventory Power page which displays the power control information It specifically includes present status manufacturer model serial number rated power W firmware version temperature input power W output power W input voltage V output voltage V input current A output current A Table 12 Power Attribute Value Present Present Status Power statu...

Страница 127: ...put voltage Input Current A Input current Output Current A Output current 9 7 7 Fan Log in to the Web GUI and enter the System Inventory Thermal page which displays the fan information It specifically includes name sensor number present state speed rpm duty ratio Table 13 Fan Information Attribute Value Name FANx_y x denotes FAN or FAN group number y denotes FAN number in group Sensor Number Senso...

Страница 128: ...firmware ME PSU CPLD VR version and related information Table 14 All Firmware Which Monitored by BMC Firmware Revision Information BMC Revision and build time BIOS Revision and build time ME Revision CPLD Revision PSU Revision VR Revision FPGA if present Revision PSOC if present Revision 9 7 9 FRU Log in to the Web GUI and enter FRU Information page which displays the information ...

Страница 129: ...0 FRU Device Name SEEPROM Chassis Information Chassis Information Area Format Version Chassis Type Rack Mount Chassis Chassis Part Number Chassis Serial Number Chassis Extra Board Information Board Information Area Format Version Language Manufacture Date Time weekday month day year Board Manufacturer Inspur Board Product Name Board Serial Number Board Part Number FRU File ID Board Extra ...

Страница 130: ...update the data by the database There may be a delay when receiving data in real time Sensors can be divided into several categories according to their functions can be distinguished by the icons Voltage Displays the monitoring of related voltage on the system Temperature Displays the monitoring of related temperature on the system Fan Displays the monitoring of related fans on the system Power co...

Страница 131: ...e occurred with this sensor Threshold To view and modify threshold settings for this sensor 9 8 2 Discrete Sensor Sensor Events Displays the events that have occurred with this sensor 9 9 Logs Log in to the Web GUI and enter the Logs Reports page which displays the IPMI event log system log audit log video log and blackbox log for troubleshooting ...

Страница 132: ...lear Event Logs to clear all event logs For the definition and description of logs refer to the SEL section in the IPMI file Table 16 SEL Attributes Event ID Event ID in SEL Time Stamp Event generate time Severity Event error level include Error Warning Information Sensor Name Sensor name to locate the device Sensor Type Sensor type defined in IPMI2 0 Description Event details 9 9 2 System Log Thi...

Страница 133: ...ry field which can be divided into alert critical error attention alarm debug emergency and information 9 9 3 Audit Log This page displays the audit logs on the device requires pre setting The audit log is mainly used to record the log in log out and other operations of users Click Download System Logs to download logs and click Clear System Logs to clear all system logs Select the start and end d...

Страница 134: ...dates from the calendar by the Filter by Date field to view the blackbox logs for a specific time range 9 9 5 Video Log This page displays the available recorded video files requires pre setting The content of the video file depends on the conditions set by the video trigger The video file can be downloaded closed played and paused If remote video support is enabled up to 3 pre event videos can be...

Страница 135: ...ceiver and set trap destination IP in BMC Web GUI When BMC detects an event BMC will send the event to the trap receiver BMC supports Trap SNMP v1 v2c v3 It depends on the user s connection method A Modular Information Block MIB file associated with the traps should be provided with the BMC firmware to help SNMP Trap receiver to translate the trap SNMP default port number is 161 Only IPMI sensor b...

Страница 136: ... 10 3 Syslog Syslog supports on off supports log level filtering supports 4 receiving targets and every target can configure the receiving server address IPv4 IPv6 FQDN port number log type and enable status and can send test information Report log supports security log operation log and system event log and it is configurable These logs carry host log Considering security Syslog report logs suppo...

Страница 137: ...ge provides LDAP E Directory Settings Active Directory Settings and RADIUS Settings LDAP E Directory Settings This page provides LDAP E Directory settings Lightweight Directory Access Protocol LDAP is an application protocol used to query and modify the date of directory services in the Internet Protocol IP network If you have a configured LDAP server in your network ...

Страница 138: ...use your existing LDAP server retains authentication function you always know which users are using network resources and you can easily define user or group rules for access control Active Directory Settings This page provides Active Directory settings Active Directory has several functions including providing object information organizing objects for better access allowing users and administrato...

Страница 139: ...BMC Settings 133 RADIUS Settings This page is used to enable or disable RADIUS authentication and enter the required information to access the RADIUS server ...

Страница 140: ... service needs to be enabled to display BSOD Please go to Settings Services KVM for setting 9 11 3 KVM Mouse Setting This page is used to select the mouse mode The Redirection Console controls a mouse emulation system from a local window to a remote screen Note Only the administrator has permission to modify this option Relative Positioning Relative mode calculates the relative displacement of the...

Страница 141: ...r Other Mode Other mode calculates the displacement of the local mouse at the center position and sends it to the server 9 11 4 Log Settings This page is used to manage the event logs SEL Log Settings Policy This page is used to set the log storage policy Advanced Log Settings This page is used for the advanced settings of event logs ...

Страница 142: ...ge Licenses This page is used to manage the licenses View Licenses On this page you can view the licenses and validity period Add License Key Licenses can be added on this page to activate or extend related functions ...

Страница 143: ... This page is used to set the media redirection General Settings This page allows you to enable or disable Remote Media Support including CD DVD and hard disk VMedia Instance Settings This page is used to set the quantity of the media devices ...

Страница 144: ...138 Active Redirections This page displays the media that have been redirected 9 11 7 Network Settings This page is used to set the network ...

Страница 145: ...ge you can manage the LAN support including IPv4 IPv6 and VLAN Network Bond Configuration This page is used to enable the network bonding function of the network interface DNS Configuration This page is used to manage the DNS service of the devices ...

Страница 146: ...thentication into the BMC PAM Authentication Order Please drag items to change the order 9 11 9 Platform Event Filter Platform Event Filtering PEF provides a mechanism to set the BMC to take selective action on the event information it receives or generates internally These actions include for ...

Страница 147: ...th common system failure events such as system overheating system startup failure fan errors etc Event Filter Configuration This page displays all event filtering entries and empty slots You can modify or add event filtering entries here 15 event filtering entries are defaulted for 40 empty slots Alert Policies This page shows all alert policies and empty slots You can modify or add policies here ...

Страница 148: ...142 LAN Destination Configuration This page shows all LAN destinations and empty slots You can modify or add LAN destinations here Up to 15 slots ...

Страница 149: ...tings Note Only the administrator has permission to modify this option 9 11 11 SSL Settings The SSL Secure Socket Layer protocol was developed by Netscape to ensure the transmission between network servers and browsers The protocol uses a third party Certificate Authority CA to identify one or both ends of the transmission View SSL certificate Users can view the uploaded SSL certificates on this p...

Страница 150: ...n on this page Upload SSL certificate SSL certificates and private key files can be uploaded on this page 9 11 12 System Firewall This page is used to build and manage the BMC firewalls General Firewall Settings This page is used to build new firewalls and manage the existing firewall settings ...

Страница 151: ...s Firewall Rules This page is used to build new firewalls based on IP and manage the existing firewall settings Port Firewall Rules This page is used to build new firewalls based on port and manage the existing firewall settings ...

Страница 152: ...9 11 13 Video Recording This page is used to adjust the Auto Video Settings and SOL Settings Auto Video Settings This item is used to set the events that can trigger the automatic recording function of the KVM server and display the recorded video files in the BMC Optional trigger event types and settings are as follows ...

Страница 153: ...rigger the automatic recording function of the SOL server and display the recorded video files in the BMC Optional trigger event types and settings are as follows 9 12 BMC Self Recovery BMC Self Recovery provides the ability of automatic recovery operations as well if necessary ...

Страница 154: ...dog time to 20 mins if timeout BMC will reset automatically When flashing image starts the watchdog will update to 20 mins if timeout BMC will reset automatically 9 12 2 Software Watchdog BMC regularly detects the working status of internal services When the progress is abnormal BMC will restart the corresponding service l IPMI Server l KVM Server l Virtual Media Server 9 13 Locator LED The system...

Страница 155: ...d as below BMC LAN Interface Channel ID Interface Support Sessions 1h Primary LAN eth1 Yes 8h Secondary LAN eth0 Yes l BMC network interface supports enable disable enabled by default The server s motherboard supports MEGARAC SP X remote management card with two LAN RJ 45 ports one for network connection and one for server management The ports for server management are labeled Shared LAN and DM_LA...

Страница 156: ... then anther plugged later the first NIC will be working l After bonding bonding interface uses shared NIC s MAC to access network including bonding to dedicated or shared NIC 9 14 3 NCSI NC SI Network Controller Sideband Interface is an electrical interface and protocol defined by the Distributed Management Task Force DMTF which enables the connection of a Baseboard Management Controller BMC to a...

Страница 157: ...s used for SNMP Get Set l Uboot password is used to access BMC Uboot through the BMC diagnostic serial cable 9 15 1 IPMI WEB SSH Unified User l BMC supports IPMI 2 0 user model Unified users can be created by IPMI CMD or Web GUI l Up to 16 users are supported l The 16 users can be assigned to any channel including dedicated LAN and NCSI LAN l All of the created users can login simultaneously l The...

Страница 158: ...rypted to store in BMC flash Password Complexity l When password complexity check is disabled password must be at least 1 character long l When password complexity check is enabled password must include special characters uppercase and lowercase letters and numbers at least 8 characters long l The maximum password length is 16 characters l Complexity check is disabled by default we strongly sugges...

Страница 159: ...I Password History Record l Password History Records The range is 0 5 l Disabled by default If enabled you could not set password same to Password History Records last N passwords l Password History Record is only supported in Web GUI 9 15 2 BMC System Root User The system root user can access the BMC diagnostic serial port Users can change the password through IPMI CMD or Web GUI User name sysadm...

Страница 160: ...er Security l SNMPV3 supports user authentication supported authentication algorithm is SHA and MD5 l SNMPV3 supports user privacy supported privacy algorithm is DES and AES 9 15 4 Uboot Password l Users can access BMC Uboot through the BMC diagnostic serial cable l For system security the initial password is not set in Uboot by default and users cannot access it l If users want to access Uboot th...

Страница 161: ... Supported Operation Administrator Write Read Operator Read Only User Read Only No Access Non User Privilege for Management Web GUI Only IPMI WEB SSH Unified User supports Web GUI For Operator and User privilege if with RO attribute the settings are visible but the input fields and buttons are disabled so users cannot modify the settings if with NA attribute the settings are invisible and no opera...

Страница 162: ...rmware update l BIOS Setup Menu Configuration l SEL repository device for system event logging l BIOS Port80 POST Code log l NMI to PCH Non Maskable Interrupt The highest priority interrupt in the system after SMI This interrupt has traditionally been used to notify the operating system fatal system hardware error conditions such as parity errors and unrecoverable bus errors It is also used as a D...

Страница 163: ... of RAID and SAS hard disks BMC physically interacts with the RAID and SAS controllers through I2C to obtain information such as controllers disks and arrays and to set RAID Currently Supported RAID and SAS Model Type Manufacturer Speed G Firmware Version 9361 8i RAID Broadcom 12 ALL 3108 RAID Broadcom 12 ALL 3008 IT SAS Broadcom 12 14 00 02 00 3008 IR SAS Broadcom 12 14 00 02 00 3008 iMR RAID Bro...

Страница 164: ...dcom 12 9440 8i RAID Broadcom 12 9440 16i RAID Broadcom 12 3408 IT SAS Broadcom 12 3408 iMR RAID Broadcom 12 3508 RAID Broadcom 12 3154 8i RAID Broadcom 12 HBA1100 SAS Microsemi 12 SmartHBA2100 SAS Microsemi 12 3152 8i RAID Microsemi 12 3154 8i RAID Microsemi 12 Schematic that BMC accesses RAID SAS controller storelib RAID Monitor I2C Driver BMC Firmware RAID Controller Internet HDDs ...

Страница 165: ...red Good Spin Down Hot Spare Spin Down Cluster Mode NCQ Coercion Mode Alarm Control Smart Copyback Enabled Auto Rebuild SAS Address Port Count Drive Count Virtual Drive Count NVRAM Size KB Memory Size MB Flash Size MB Min Strip Size KB Max Strip Size KB Spin Down Time Minutes Rebuild Rate Back Ground Init BGI Rate Consistency Check CC Rate Reconstruction Rate S M A R T Polling Cache Flush Interval...

Страница 166: ...ected Port Power State Device Interface Product ID Vendor Specific Info Negotiated Link Speed Gbps SAS Address Coerced size GB Predictive Fail Count Emulated Block Size B Is Path Broken FDE Capable Emergency Spare Commissioned Hotspare Clear All Data Secure Erase Patrol Read Array Enclosure Device ID Enclosure is Faulty Slot Count Internal Index Enclosure Type Drive Count 9 19 Power Control This p...

Страница 167: ... to do under the guidance of professional engineer In the case of meeting business power consumption reduce part of the power supply by 0 3V suppress the standby current output by the voltage difference and the system will be powered by the main power system The power supply is in a hot standby state once the main power supply is abnormal standby power will switch to the main power supply smoothly...

Страница 168: ...ich would cause heavy power loading l Power peak can be enabled or disabled Disabled by default l When it is enabled users can configure the maximum random time l BMC will power on server with a random time delay within the time configured Click Power Control to enter the configuration page Users can perform Power On action checking Stagger power on or entering the seconds of Delayed power on ...

Страница 169: ...ed Control 9 20 1 Fan Speed Control BMC supports Auto Fan Control by default and the fan module speed is controlled by the algorithm provided by thermal team Users can set the fan mode to automatic or customized mode in the Web GUI ...

Страница 170: ...t the fan speed according to the relevant temperature conditions Customized mode allows users to personalize the fan settings 9 20 2 Fan Speed Control Watchdog MCU or CPLD will monitor BMC fan control task by receiving BMC watchdog signal ...

Страница 171: ...ol for security 9 21 1 1 Firmware Integrity Checking Each firmware image has a MD5 code calculated by MD5 tool Hash exe Before firmware update users must check integrity using MD5 tool to make sure the firmware image file is the correct one 9 21 1 2 WEB Update BMC firmware update is supported via the Web GUI l Support hardware watchdog please refer to Hardware watchdog in section BMC Self Recovery...

Страница 172: ...166 ...

Страница 173: ...rts BIOS Firmware update via the Web GUI Log in to the Web GUI enter the Maintenance BIOS Update page select and upload the com file to update BIOS 9 21 3 PSU Firmware Update BMC supports PSU Firmware update via the Web GUI Log in to the Web GUI enter the ...

Страница 174: ...ation page This page allows you to select the items to keep when restoring the factory settings If no item is selected all items will be restored to the original factory settings Note Update policy Overwrite means selected items will be overwritten to defaults after clicking Restore Factory Defaults or upgrading BMC Preserve means selected items will remain unchanged after clicking Restore Factory...

Страница 175: ...KVM KVM and Virtual Media Devices Authentication Authentication including LADP and superuser Syslog System log Hostname Host name 9 23 Serial Over LAN SOL and System Serial Log Recording 9 23 1 Serial Over LAN Serial Over LAN SOL redirects the system serial port to the remote network client Users connect to the BMC on the local PC open the serial port redirection function with the standard IPMI co...

Страница 176: ...170 ...

Страница 177: ...rashes or restarts system serial log can be exported and fault information can be used for fault diagnosis 9 24 Console Redirection KVM Remote KVM redirects the host system s console to user s PC by BMC Users login BMC and open KVM then host s screen will be displayed in KVM application User PC s keyboard and mouse can be used to control server Log in to the Web GUI and click Launch H5Viewer for r...

Страница 178: ...up Note If KVM is enabled you need to unblock the pop up window If you use Internet explorer please enable the download file option from the settings 9 24 1 Remote KVM Interface Video This menu contains the following sub items 1 Pause Redirection This item is used to pause Console Redirection 2 Resume Redirection This item is used to restart Console Redirection when the session is paused ...

Страница 179: ...ck Privilege Request This item allows you to block access 3 Bandwidth This item allows you to select the bandwidth 4 Compression Mode This item allows you to select the YUV compression mode 5 DCT Quantization Table This item allows you to select the quality from 0 best to 7 worst Keyboard Keyboard Layout This item allows you to select the keyboard overview Send Keys 1 Hold Hold Down This item can ...

Страница 180: ...direction function will allow users to take various media devices and images that presented on the client side Local Media Support or remote Remote Media Support and attach them as virtual USB on the server side in which the BMC is resident To set up an image file enable Remote Media Support in Settings Media Redirection Settings General Settings Only administrators have permission to redirect or ...

Страница 181: ...quest operation is GET PUT POST PATCH DELETE and so on The sending and receiving data are all in json format Authentication type Basic Auth UserName Administrator Password superuser 9 26 1 GET The client gets the data of the specified URL via HTTP GET For example Use Postman to get information about existing users and the basic format is as follows URL https ip redfish v1 AccountService Accounts M...

Страница 182: ...ounts 1 Members odata count 2 View the specific information of user 1 the basic format is as follows URL https ip redfish v1 AccountService Accounts 1 Method GET Content Type application json Body empty Return the information about user 1 Use the Postman tool to query the user list as shown below ...

Страница 183: ... redfish v1 AccountService Accounts Method POST Content Type application json Body raw format Name Test account Description just test Enabled true Password superuser UserName admin RoleId Operator Locked false If the creation is successful message code 201 is returned and the created user information is displayed 9 26 3 DELETE The client deletes the data of the specified URL via HTTP DELTE and the...

Страница 184: ... server IP address are in the same subnet Execute Ping xx xx xx xx remote server IP on the local central server and confirm that the remote server can respond to the ping request 3 Check if the IP source is set to DHCP If set to DHCP you cannot set the IP address All SEL System Event Log cannot be displayed At most 900 SELs can be displayed Incorrect date time displayed in SEL System Event Log Che...

Страница 185: ...d well b If the power supply is normal insert the power module again and then power on for verification c If there is a machine and a power module of the same type you could change the power module to test whether there is a power module fault d If the instructions above do not resolve the problem please contact Inspur customer service 2 No display after power on Description After pressing the pow...

Страница 186: ...erface to view the BMC logs to check whether there are errors reported d If other LEDs are abnormal you can log in to the BMC Web interface to view the BMC logs to check whether there are errors reported e If above operations could not resolve the problem please contact Inspur customer service 4 Power module LED is off or red Description The server is under normal operation but a certain power mod...

Страница 187: ...ecovery Remove the HDD until the HDD motor stops completely to prevent damage to the motor For the operations on the RAID card management interface please refer to Inspur technical website www 4008600011 com 6 Chassis fans make excessive noise Suggestions a Firstly check whether the chassis fans operate at a high speed caused by the over temperature chassis b If the chassis has a high temperature ...

Страница 188: ...se performance When tested in a non system situation if the keyboard or mouse performance turns out to be normal a system fault could be considered If the keyboard or mouse fault still exists a motherboard interface fault could be considered and Inspur technical hotline can be called for support 9 USB interface problem Description Unable to use devices with a USB interface Suggestions a Make sure ...

Страница 189: ...ns could not resolve the problem please contact Inspur customer service 2 Abnormal memory capacity Description The memory capacity displayed in the OS and the physical memory capacity are inconsistent Suggestions a Check the OS version the supported memory capacity varies with the version of Windows OS Enter BIOS Setup to view the memory capacity if the memory is identified completely the operatin...

Страница 190: ...rk cable or the switch port is normal c If the direct connection is abnormal please visit Inspur website http www inspur com to download the latest NIC driver d If above operations could not resolve the problem please contact Inspur customer service ...

Страница 191: ...battery pack A risk of fire and burns exists if the battery pack is not properly handled To reduce the risk of personal injury Do not attempt to recharge the battery Do not expose the battery to temperatures higher than 60 C 140 F Do not disassemble crush puncture short external contacts or dispose of in fire or water Replace only with the spare designated for this product To remove the component ...

Страница 192: ...l devices into two classes A and B depending upon their intended installation Class A devices are those that may reasonably be expected to be installed in a business or commercial environment Class B devices are those that may reasonably be expected to be installed in a residential environment for example personal computers The FCC requires devices in both classes to bear a label indicating the in...

Страница 193: ...s A Equipment 12 5 Battery Replacement Notice WARNING The computer contains an internal lithium manganese dioxide a vanadium pentoxide or an alkaline battery pack A risk of fire and burns exists if the battery pack is not properly handled To reduce the risk of personal injury Do not attempt to recharge the battery Do not expose the battery to temperatures higher than 60 C 140 F Do not disassemble ...

Страница 194: ...ive component or assembly 13 2 Grounding Methods to Prevent Electrostatic Discharge Several methods are used for grounding Use one or more of the following methods when handling or installing electrostatic sensitive parts Use a wrist strap connected by a ground cord to a grounded workstation or computer chassis Wrist straps are flexible straps with a minimum of 1 megohm 10 percent resistance in th...

Страница 195: ... Conditions i Remote Services Inspur provides 24x7 remote service through Hotline E mail and Website Through Hotline and E mail Services Inspur engineer helps customers determine the cause of the malfunction and provide solution Website service provides a number of resources to help customers resolve problems and learn about our products such as product manuals drivers and Firmware Below is how to...

Страница 196: ...parts as well as any products the serial number of which falls off is damaged or obscure for the following reasons l Accident misuse abuse defiling improper maintenance or calibration or other external causes l Operating beyond the parameters as stipulated in the user documentation l Use of the software interface parts or supplies not provided by Inspur l Improper preparation place or maintenance ...

Отзывы: