12
Installation (continued)
1. Place the Positioning Restraint System in a forward facing position
on the vehicle seat.
If the front edge of the restraint extends
more that 1” (25mm) beyond the front edge of the seat, then
the vehicle seat is too shallow to properly support the restraint
system. If this is the case, do not install.
2. Attach the tension adjuster hooks of the tether to the upper anchor
points located on the sides of the Positioning Restraint System.
See
Installing the Tether Strap.
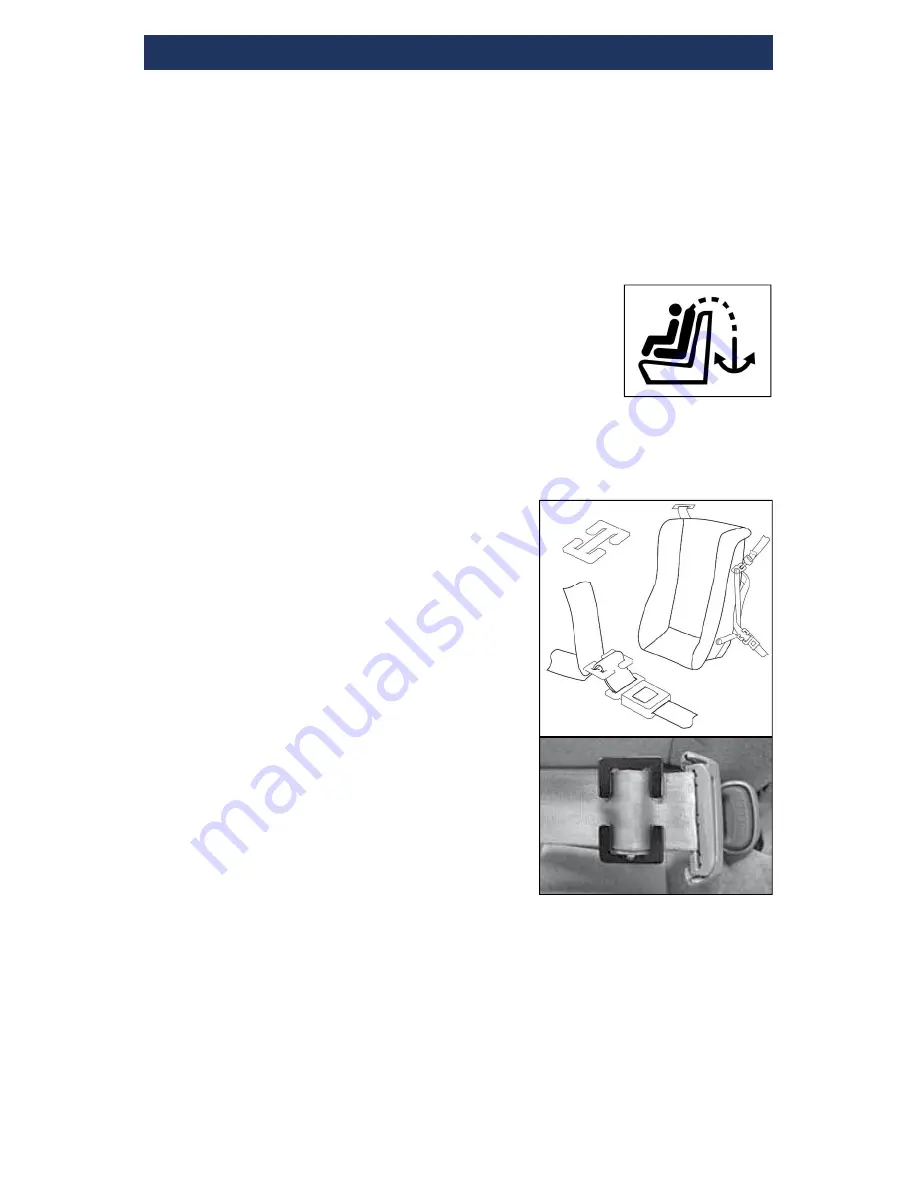
3. Attach the tether loosely to an approved anchor
point in the vehicle. In cars built after 2002,
approved anchor points can be identifi ed by this
symbol. Refer to your vehicle owner’s manual if
needed.
4. Verify that the seat belt in the vehicle can be
used with the Positioning Restraint System.
See Vehicle Seat Belt
Compatibility
.
5. Pull the seat belt out completely then
route the belt between the back of the
restraint and the metal tubes which
are located along the sides of the
Positioning Restraint System.
6. Make sure that the seat belt is not
twisted, then buckle in place.
7.
Make sure the restraint system is fl at
against the vehicle seat’s bottom and
back. Use your hands to apply fi rm
pressure to the restraint, pushing it
into the vehicle backrest or place your
knee on the restraint and push down
with all your weight while pulling on
the vehicle seat belt and removing all
slack from it.
8.
With one hand, fi rmly hold the
shoulder and lap portions of the seat
belt together immediately behind the
latch, then release the seat belt latch from the buckle.
9. Fold the webbing and thread it through the locking clip, one side at a
time keeping the locking clip as close as possible to vehicle belt latch
– no further than ½” (12mm) away.
See Figure 3.
Figure 3: Combination Lap/
Shoulder Belt with Locking Clip
Anchor point symbol
Содержание CSI-2000
Страница 9: ...9 Car Seat Components continued 7 8 10 1...


