46
December 2008 - InnoMedia
© 2001 InnoMedia. All rights reserved.
InnoMedia iPBX Administrative Guide
4.
Click the button
to assign the extensions and ext. groups to which customer service Auto
Attendant calls can be routed. Choose (highlight) selected numbers from ‘Available Number’ list
and send the selected items to the ‘Directory’ list.
If a call routed to any of the selected extensions and get no answered, the calls will be routed
back to the auto attendant main menu.
‘Auto add new extension numbers to the directory’ means whatever new extension added to
iPBX system, it will be automatically added to this particular Auto-Attendant Directory.
‘Enable to make outbound call’ means allowing 2-stage dialing to an external phone number.
This requires input a password in order to get further service or avoid fraud. Click ‘Change
Gateway Password’ button to secure the access of outbound calls.
5.
Click the button
to upload the Auto Attendant IVR (public greeting) to iPBX database and to
associate to this specific Auto Attendant number. Note that the audio file format should be g.729
or g.729A. (go to the following URL
to download the audio file conversion
utility). The IVR guides callers to enter numbers to get further service. (e.g., thank you for calling
…, please press 0 for “customer service”, or press ext. numbers, or …)
6.
Click the button
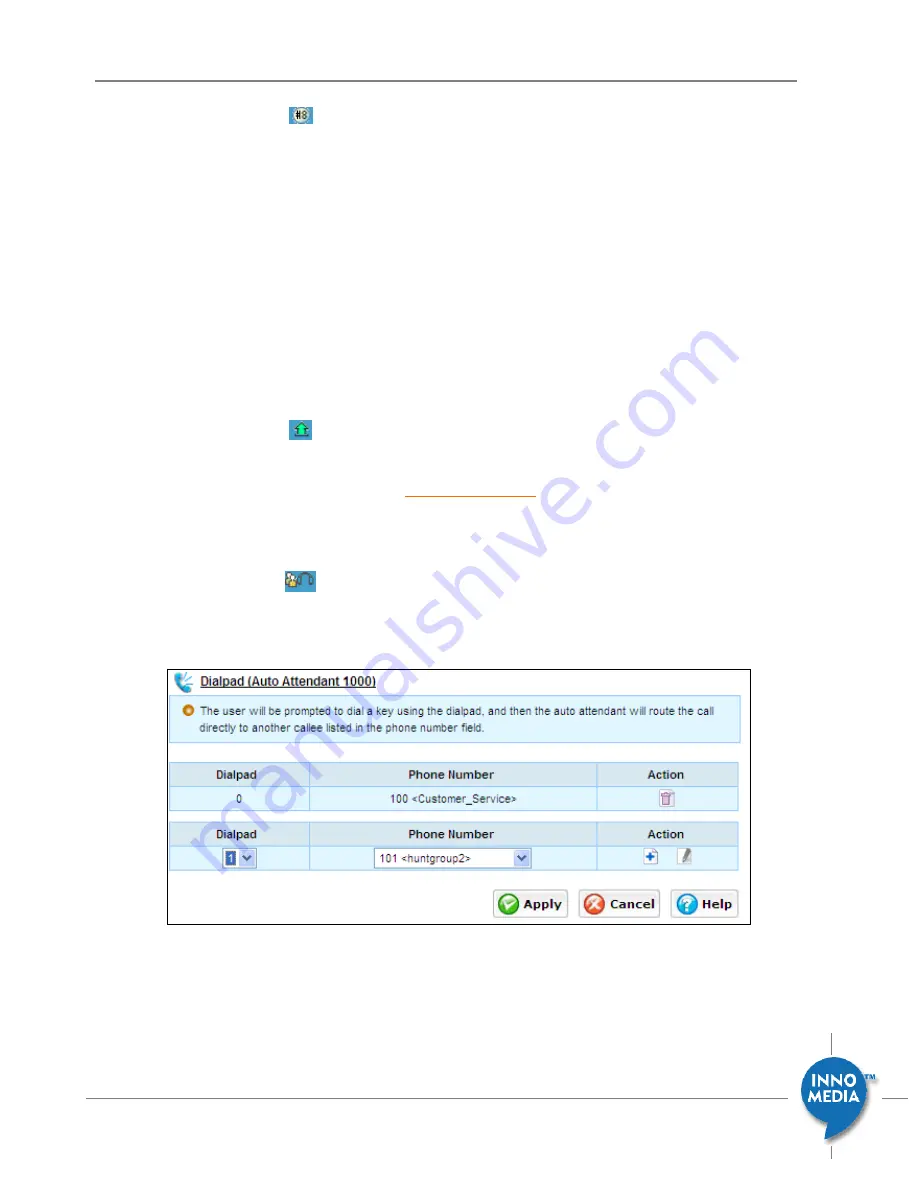
to configure to direct incoming calls to their intended destination. Ad the
following example in Figure 6.2, dialing 0 that directing calls to extension group 100 (customer
service), and dialing 1 to extension 101 (huntgroup2).
Figure 6.2 Defining Auto Attendant Dial Pad Keys


