125
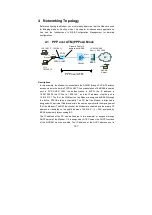
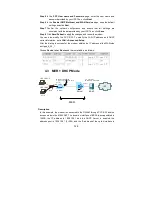
10.61.92.157. The WAN IP address of the modem is automatically obtained
through DHCP. The PC attached to the modem is assigned with a private IP
address (within the same segment as the management IP address 192.168.1.1).
The NAT functions of the modem is enabled and the private address of the PC is
translated to the public address 10.28.108.* (2~254) dynamically assigned by
BRAS for accessing ISP.
The IP address of the PC can be fixed (as in this example) or assigned through
DHCP server of the modem. If it is assigned by the DHCP server, the DHCP
functions of the modem must be enabled. The IP address of the DHCP address
pool is 192.168.1.* (2~254). The functions are enabled by default and at the same
time the PC is configured to obtain IP and DNS addresses dynamically.
Setting Procedure
Step 1
Open the Internet browser and enter
192.168.1.1
in the address bar to log
in to the modem.
Step 2
Choose
Advanced Setup
>
WAN
and click
Add
.
Step 3
In the
ATM PVC Configuration
page, set
VPI/VCI
to
8/35
and click
Next
.
Step 4
In the
Connection Type
page, select
MAC Encapsulation Routing (MER)
and set the
Encapsulation Mode
to
LLC/SNAP-BRIDGING
, and then
click
Next
.
Step 5
In the WAN IP Settings page, select Obtain an IP address automatically,
Obtain default gateway automatically and Obtain a DNS server address
automatically. Then, click Next.
Note
: You can manually configure the WAN IP address, default gateway, and DNS
server address.
Step 6
In the
Network Address Translation Settings
page, enable the NAT and
firewall. Keep default settings for other fields. Then, click
Next
.
Step 7
Confirm the network configuration and ensure that all settings are
consistent with the data provided by your ISP. Then, click
Save
.
Step 8
Click
Save/Reboot
to apply the changes and reboot the modem.
You can also modify the PVC 8/35. To modify the LAN IP address and DHCP
server information, set in
LAN
in
Advanced Setup
.
After the configuration is complete, the modem obtains the IP address at the
WAN-side port nas_8_35. Choose
Device Info
>
Route
and the routing table is as
follows.
Содержание W3100V
Страница 1: ...W3100V One port ADSL 2 Wireless Router User Manual ...
Страница 24: ...23 Click Reset Statistics at the bottom to restore the values to zero and recount them ...
Страница 26: ...25 ...
Страница 49: ...48 Click Next and the following page appears In this page you can modify the service name ...
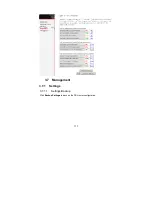
Страница 112: ...111 3 7 Management 3 7 1 Settings 3 7 1 1 Settings Backup Click Backup Settings to back up the DSL router configuration ...
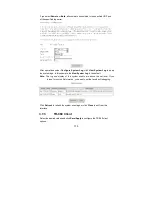
Страница 121: ...120 3 7 7 Save Reboot Click Save Reboot to show the following interface Click Save Reboot to save and reboot the router ...
Страница 133: ...132 ...

