


11
© 2002 - INLINE, Inc.
IN1401 Operation Manual - v1.5 7/12/02 11:18 AM
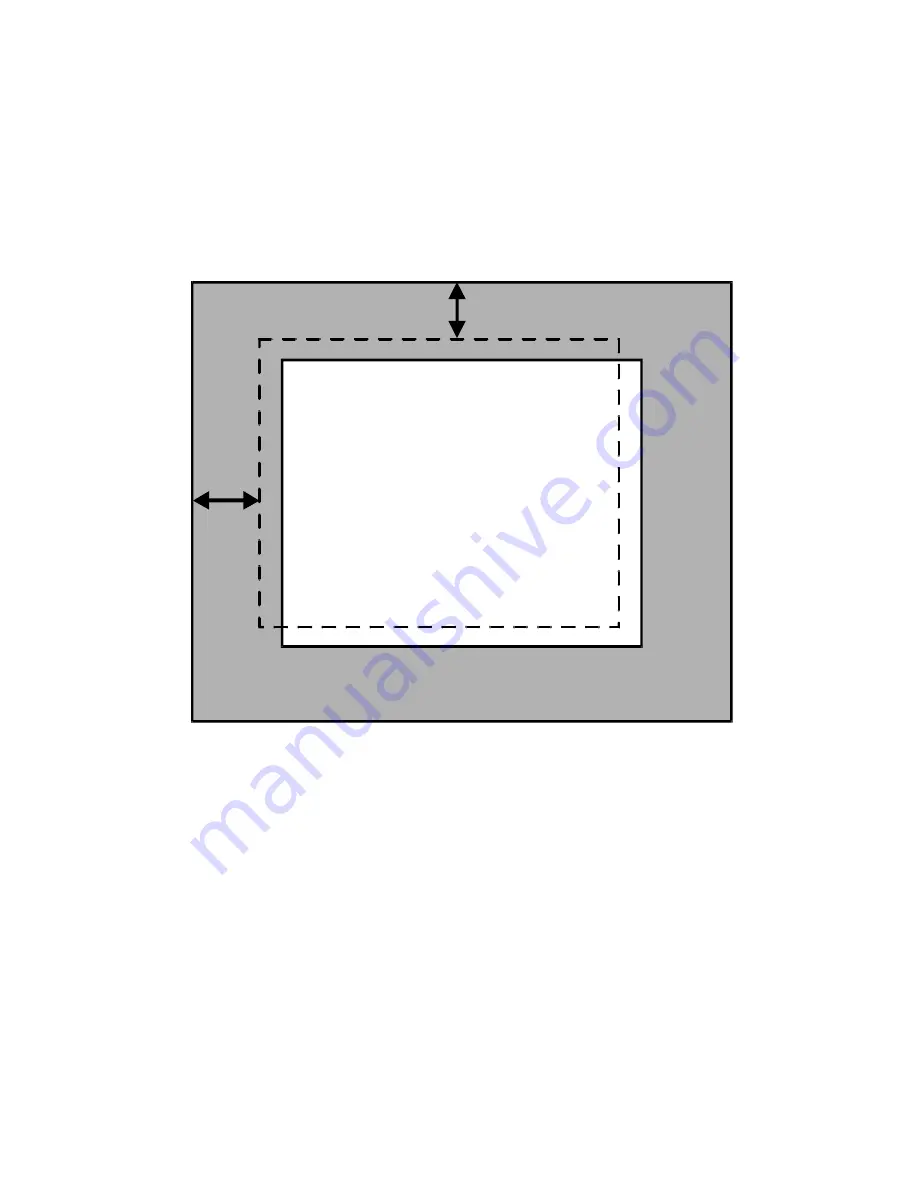
In Figure 2, the input blanking is set incorrectly (as indicated by the dashed lines). If the H-
Blanking is set less than the actual H-Blanking, the IN1401 will look for the active area before it
really occurs. This results in a blank border on the left side of the active area, and cropping on
the right side of the active area. This gives the apparent effect that the image is shifted to the
right. Similarly, if the V-Blanking is set less than the actual V-Blanking, the IN1401 will again
look for the active area before it really occurs. This results in a blank border on top of the active
area, and cropping on the bottom of the active area. This gives the apparent effect that the image
is shifted down.
Incorrect Blanking
H-
Bl
an
k
in
g
V-Blanking
Active Area
Active Blanking Area
Figure 2. Incorrect Input Blanking
Do not confuse input blanking with the output position. The input blanking adjusts where the
electronic scaling process takes effect, which may add blank borders or crop the active area if set
incorrectly. The input blanking and active area should be manually adjusted to match the input
video signal, framing the actual active area on the monitor.
The output position simply moves the image on the monitor. It does not add blank borders or
crop any part of the image. However, the apparent effect of blank borders and a cropped image
may be due to the image being incorrectly positioned on the monitor. The blue screen is available
to adjust the output image on the monitor. It as available at any time, even when the input
settings are incorrectly adjusted or the input signal is missing entirely. Use the blue screen to
adjust the output settings (resolution, refresh rate and position) and to verify the image on the
monitor. The video and input settings have no effect on the blue screen. Once the output settings
have been properly adjusted and verified on the monitor, the blue screen can be turned off, and
the video settings may then be adjusted.


