Page 9
Interactive Touch Display Hardware Guide
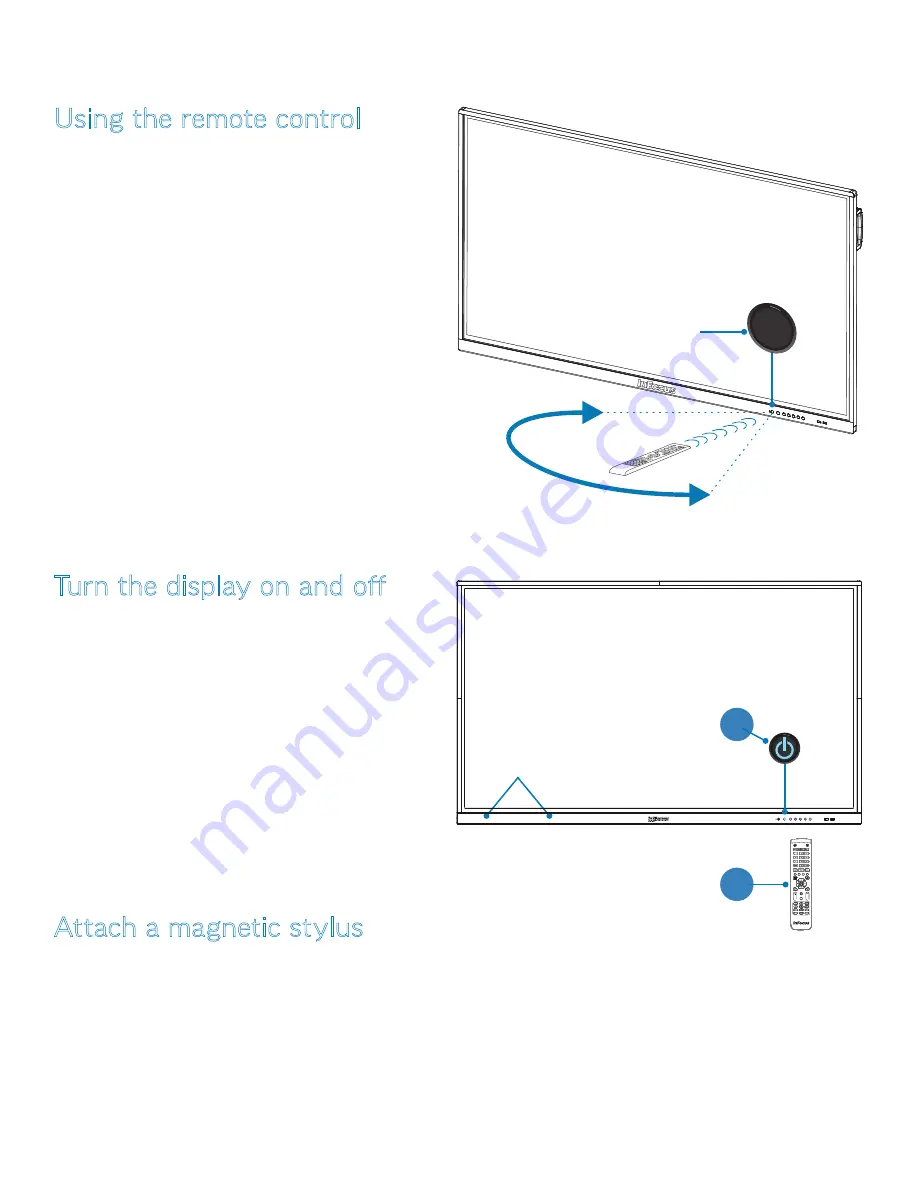
Turn the display on and off
Make sure that the power cord is connected to a power outlet
and that the on/off switch (page 8) is on.
1) Press the
Power
button on the remote (page 11); or
2) Press (long hold) the
Power
button on the front panel of
the touch display (page 16).
The power symbol on the front panel button turns from red to
blue (on) or from blue to red (off).
NOTE
: Tap the front panel
Power
button lightly to switch to
backlight off mode — the display screen is turned off. In this
mode, the
Power
button will switch colors continuously.
Tap the screen, or tap the front panel
Power
button, to turn the
backlight on.
Attach a magnetic stylus
1) Use one of the two
Magnetic zones
to attach one of the
included absorptive magnetic styluses to the front of the
display.
Magnetic
zones
1
2
Using the remote control
The remote uses two AAA batteries (not included). Install the
batteries by removing the cover from the back of the remote,
orienting the positive and negative ends of the batteries, sliding
them in place and replacing the cover.
To operate, point the remote at the
sensor button
on the front of
the touch display. The range of optimum operation is about 26'
(8m) and within a horizontal and vertical angle of 30 degrees.
NOTE
:
•
Dispose of batteries in an environmentally proper manner.
•
If the remote gets wet, wipe it dry immediately.
•
Avoid excessive heat and humidity.
•
Do not mix new and old batteries or different types of
batteries.
•
Replace the batteries as soon as they run out.
•
Remove the batteries if the remote will not be used for a
prolonged period.
30º
sensor button
BASIC FUNCTIONS


