


26
y
Data bits
y
Stop bits
y
Parity
y
Flow control
The introduction of each option as follows:
(1)
Baud rate
It has 15 options, 50, 75, 110, 150, 300, 600, 1200, 2400, 4800,
9600, 19200, 38400, 57600, 76800 and 115.2K.
(2)
Data bits
It has 4 options, 5, 6, 7 and 8.
(3)
Stop bits
It has 2 options, 1 and 2.
(4)
Parity
It has 3 options, none, odd and even.
(5)
Flow control
It has 3 options, none, soft and hard.
5.4 User Management
In the main menu, press
Ǐ
MENU
ǐ
key to enter the interface as
shown in Figure 5-1. Select "User" and press
Ǐ
ENT
ǐ
key to enter
user management interface, as shown in Figure 5-7. Press number
key
Ǐ
8
ǐ
also can enter the setting interface in the interface shown in
Figure 5-1.
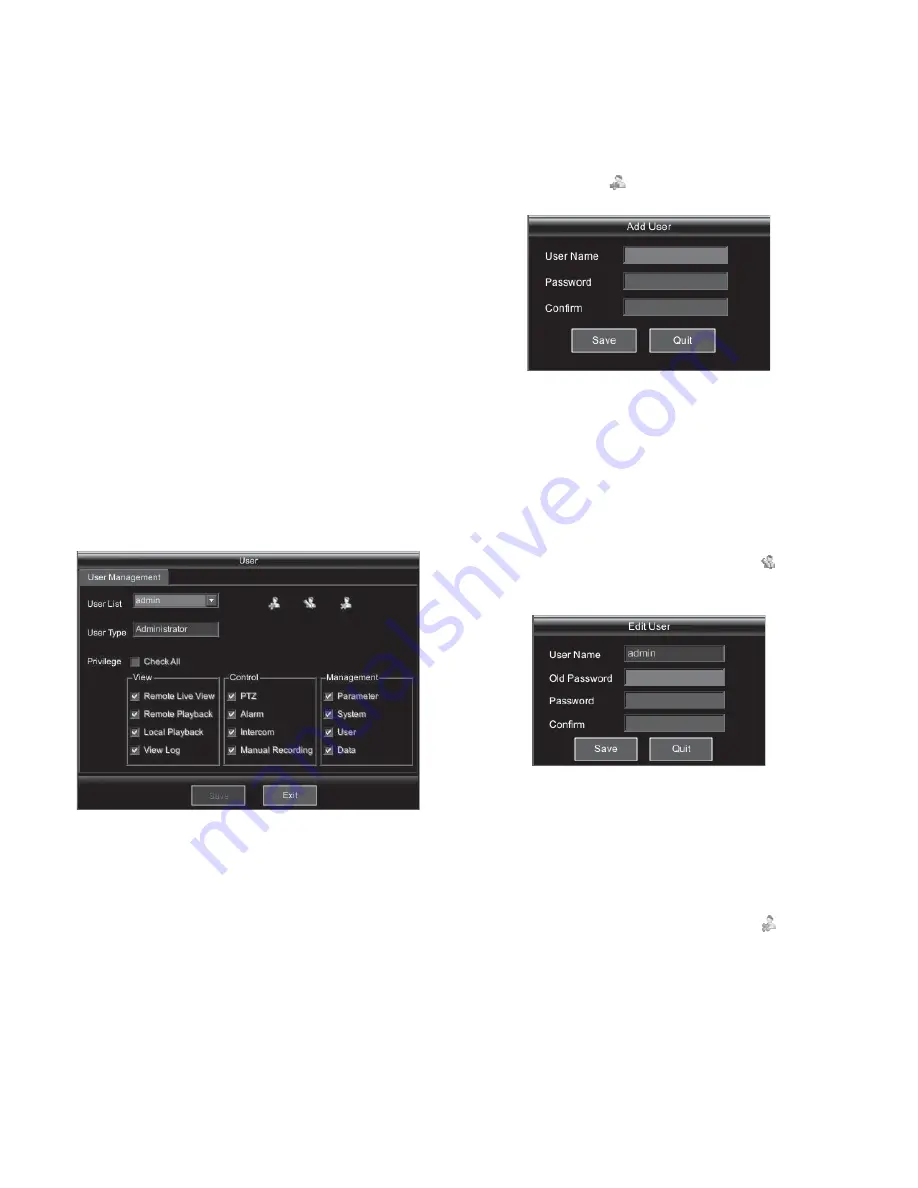
Figure 5-7
User management includes view user information, modify user
privilege, add user, edit user and delete user. These operations need
related operating authority. In the user management interface, the
information of users, user type, user privilege, add user, edit user
and delete user is displayed in a list box. The administrator has
authority to perform all functions related to user management.
(1)
View user information
In the user management interface, select the user in the "User list",
the system will display the user information, such as user type,
privilege and etc.
(2)
Modify user privilege
Login the system with administrator, and select the user. The
privileges of the selected user will display at the bottom side of the
interface. Move the cursor to select the privilege needs to be added
or cancelled, and press
Ǐ
ENT
ǐ
key to check or cancel the checkbox
to add or cancel the privilege.
(3)
Add user
Add user operation includes 3 parts, user name, password and
confirm password. Select
, and press
Ǐ
ENT
ǐ
key to enter add
user interface, as shown in Figure 5-8.
Figure 5-8
The user name could be letter and number with the length within 1
to 15 characters. The password should be number only with the
length within 8 to 15 characters.
Note
: The system support maximum 16 users.
The system will assign network preview, network playback, local
playback and view system log privileges for the new user. The
administrator can change the privileges of the new user.
(4)
Edit user
Select the user to be edited, and move the cursor to
icon, and
press
Ǐ
ENT
ǐ
key to enter edit user interface, as shown in Figure
5-9.
Figure 5-9
Edit user has 4 parts, user name, old password, new password and
confirm.
The administrator doesn't need to input the common user's old
password when modify the password. And the administrator needs
to input his old password if he modify his own password.
(5)
Delete user
Select the user to be deleted, and move the cursor to
icon, and
press
Ǐ
ENT
ǐ
key. The system pops up a prompt as shown in Figure
5-10. Press "OK" to delete the user, and "Cancel" or
Ǐ
ESC
ǐ
key to
quit the operation.
Содержание V3060 Series
Страница 6: ......


