background image

4

GB

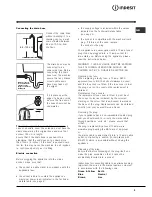
GREEN &
YELLOW

BROWN

BLUE

13 ampere fuse

CROSS-BAR
CORD GRIP

As the colours of the wires in the lead may not

correspond with the coloured markings identifyng

the terminals in your plug, proceed as follows:

Connect  Green  &  Yellow  wire  to  terminal  marked 

E

or   or coloured Green or Green & Yellow.

Connect  Brown  wire  to  terminal  marked 

L

  or

coloured  Red.

Connect  Blue  wire  to  terminal  marked 

N

  or  coloured

Black.

If a 13 amp plug (BS 1363) is used it must be fitted

with  a

13 amp fuse, either in the plug or adaptor or at the

distribution board.

If you are in any doubt the electrical supply to your

machine,  consult  a  qualified  electrician  before  use.

How  to  connect  an  alternative  plug:

The wires in this mains lead are coloured in

accordance  with  the  following  code:

BLUE

NEUTRAL  (N)

BROWN

LIVE  (L)

GREEN  &  YELLOW

EARTH  (E)

Disposing of the appliance:

When disposing of the appliance please remove the

plug by cutting the mains cable as close as possible

to the plug body and dispose of it as described

above.

 The washing machine should not be installed in an

outdoor  environment,  not  even  when  the  area  is

sheltered, because it may be very dangerous to

leave it exposed to rain and thunderstorms.

 When the washing machine is installed, the mains

socket  must  be  within  easy  reach.

 Do not use extensions or multiple sockets.

 The  power supply cable must never be bent or

dangerously  compressed.

 The power supply cable must only be replaced by

an  authorised  serviceman.

Warning! The company denies all liability if and when

these  norms  are  not  respected.

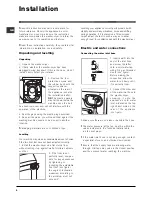
The first wash cycle

Once the appliance has been installed, and before

you use it for the first time, run a wash cycle with

detergent and no laundry, setting the 90°C

programme  without  a  pre-wash  cycle.

Содержание WIDXL 146

Страница 1: ...rying cycle Functions Detergents and laundry 10 Detergent dispenser Preparing your laundry Special items Precautions and advice 11 General safety Disposal Saving energy and respecting the environment Care and maintenance 12 Cutting off the water or electricity supply Cleaning your appliance Cleaning the detergent dispenser Caring for your appliance door and drum Cleaning the pump Checking the wate...

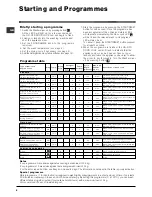
Страница 2: ...t resting it up against walls furniture cabinets or other 2 If the floor is not perfectly level compen sate for any unevenness by tightening or loosening the adjustable front feet see figure the angle of inclination measured according to the worktop must not exceed 2 Levelling your appliance correctly will provide it with stability and avoid any vibrations noise and shifting during operation If it...

Страница 3: ... plugged into a 13 amp socket for immediate use Before using the appliance please read the instructions below WARNING THIS APPLIANCE MUST BE EARTHED THE FOLLOWING OPERATIONS SHOULD BE CARRIED OUT BY A QUALIFIED ELECTRICIAN Replacing the fuse When replacing a faulty fuse a 13 amp ASTA approved fuse to BS 1362 should always be used and the fuse cover re fitted If the fuse cover is lost the plug must...

Страница 4: ... NEUTRAL N BROWN LIVE L GREEN YELLOW EARTH E Disposing of the appliance When disposing of the appliance please remove the plug by cutting the mains cable as close as possible to the plug body and dispose of it as described above The washing machine should not be installed in an outdoor environment not even when the area is sheltered because it may be very dangerous to leave it exposed to rain and ...

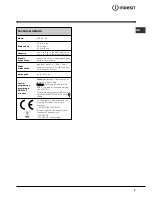
Страница 5: ...a 0 5 bar drum capacity 52 litres Spin speed up to 1400 rpm Control programmes according to EN 50229 directive Wash programme 2 temperature 60 C run with a load of 6 kg Drying first drying cycle performed with a 1 kg load by selecting a drying time of 60 min Second drying cycle performed with a 5 kg load and the DRYING knob on the setting This appliance is compliant with the following European Com...

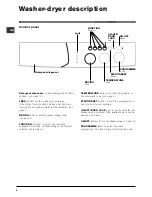
Страница 6: ...page 7 DRYING knob to set the desired drying cycle see page 9 FUNCTION buttons to select the functions available The button corresponding to the function selected will remain on TEMPERATURE knob to set the temperature or the cold wash cycle see page 9 START RESET button to start the programmes or cancel any incorrect settings ON OFF DOOR LOCK Led to find out whether the Washer dryer is on and if t...

Страница 7: ... flash to indicate that the DRYING knob needs to be set back to the 0 setting Function buttons The FUNCTION BUTTONS also act like LEDS When a function is selected the corresponding button is illuminated If the function selected is incompatible with the programme set the button will flash and the function will not be enabled If you set a function that is incompatible with another function you selec...

Страница 8: ... cycle Fabrics for sportswear Tracksuits shorts etc 13 30 C 60 600 Wash cycle rinse cycles intermediate and final spin cycles PAR TIAL PR OGR AM M ES R inse 800 R inse cycles and spin cycle Spin cycle 800 Draining and spin cycle Drain n o Drain Starting and Programmes Programme table Notes For programme 9 we advise against exceeding a wash load of 3 5 kg For programme 13 we advise against exceedin...

Страница 9: ... is illuminated Note The rapid flashing of the button indicates that the corresponding function cannot be selected for the programme set Function Effect Comments Enabled with programmes Delay Timer Delays the start of the wash by up to 9 hours Press the button repeatedly until the LED corresponding to the desired delay is turned on The fifth time the button is pressed the function will be disabled...

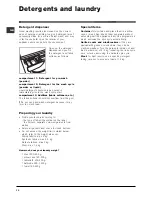
Страница 10: ...symbol on the label the colours separate coloured garments from whites Empty all pockets and check for loose buttons Do not exceed the weight limits stated below which refer to the weight when dry Sturdy fabrics max 6 kg Synthetic fabrics max 2 5 kg Delicate fabrics max 2 kg Wool max 1 5 kg How much does your laundry weigh 1 sheet 400 500 g 1 pillow case 150 200 g 1 tablecloth 400 500 g 1 bathrobe...

Страница 11: ...sed of in the normal unsorted municipal waste stream Old appliances must be collected separately in order to optimise the recovery and recycling of the materials they contain and reduce the impact on human health and the environment The crossed out wheeled bin symbol on the product reminds you of your obligation that when you dispose of the appliance it must be separately collected Consumers shoul...

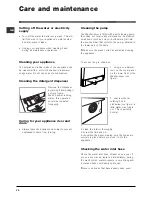
Страница 12: ... The Washer dryer is fitted with a self cleaning pump that does not require any maintenance Sometimes small items such as coins or buttons may fall into the pre chamber that protects the pump situated in the lower part of the same Make sure the wash cycle has ended and unplug the appliance To access the pre chamber 1 using a screwdriver remove the cover panel on the lower front of the Washer dryer...

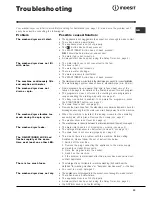
Страница 13: ... for each program The programme does not foresee the draining some programmes require enabling the draining manually see page 8 The Easy iron option is enabled to complete the programme press the START RESET button see page 9 The drain hose is bent see page 3 Remove the drain hose from the standpipe or under sink trap and check for blockages ensuring that the water can drain freely away from the m...

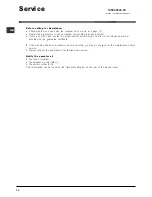
Страница 14: ...elephone number provided on the guarantee certificate If the machine has been installed or used incorrectly you may be charged for the maintenance callout service Always request the assistance of authorised servicemen Notify the operator of the type of problem the appliance model Mod the serial number S N This information can be found on the data plate situated on the rear of the washer dryer Serv...

Отзывы: