9. Place panel 11 centred on the floor, pull panel 10 out to
the side, as well as the upper part (blue arrow).
10
10. Arrange panel 9 to 7. Pull the upper and lower part of
the panel out to the side so that the panel forms a
rectangle.
9
12. Arrange panel 5 (corner panel). Pull out the upper cap
part (blue arrow). Then arrange panels 4 to 2 as described
under number 10.
11. Arrange panel 6 (corner panel). Pull out the upper part
of the canopy (blue arrow).
6
5
1
13. Arrange panel 1 (corner panel) and weigh down the
hem with a weight.
14. Check the lines of panel 1 (arrows) and the centre lines
to make sure they do not cross and running free.
1
1
1
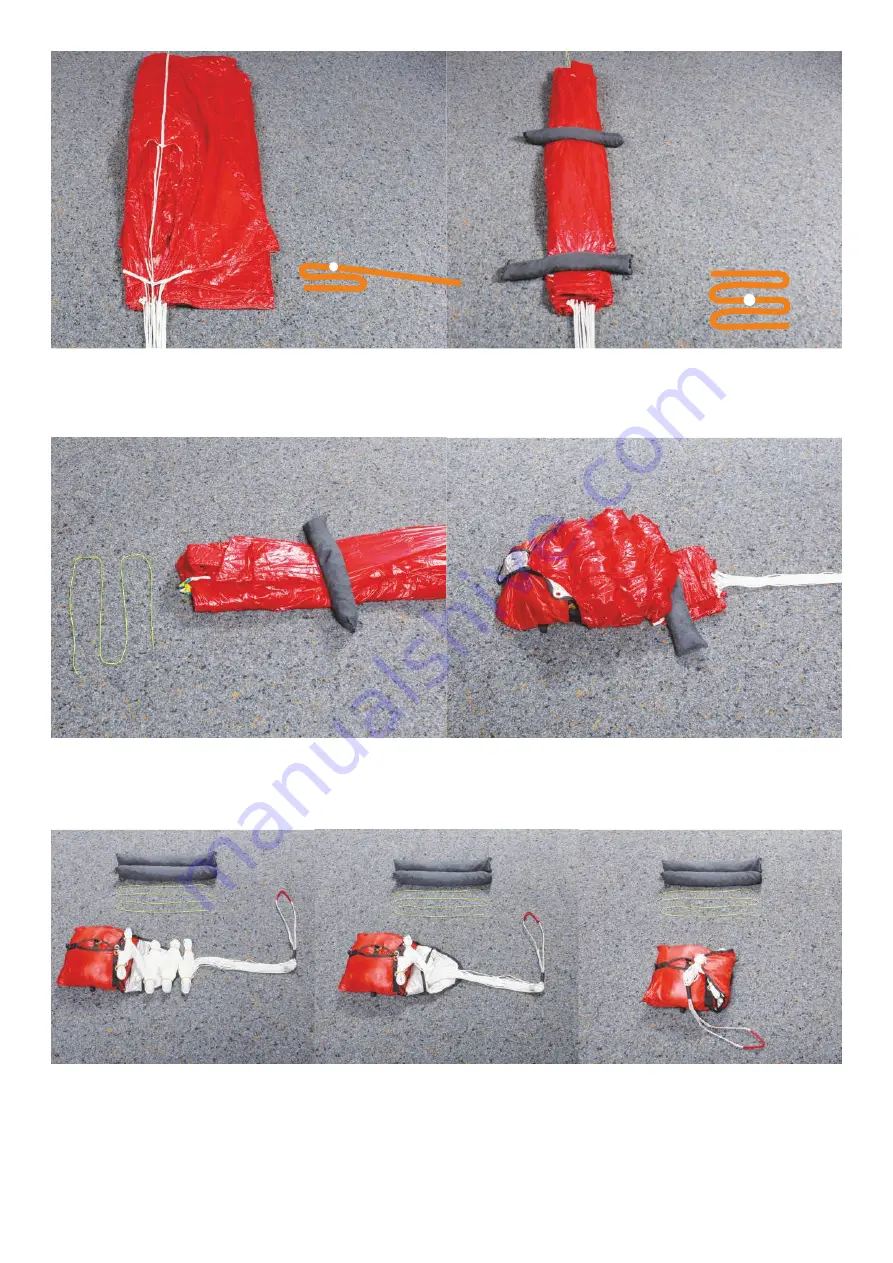
15. Fold the left side in an S-shape (step 1).
16. Fold the right side in an S-shape (step 2).
17. Remove packing cord.
18. Stow top of the canopy in the deployment bag. Fold the
rest of the canopy in small S-folds and place it in the
deployment bag.
1
1
21. Close the deployment bag with the
last 60 cm of lines.
Check that the packing tools are
complete!
20. Place the hanks in the lines
deployment bag.
19. Close the container. First the
middle, then the outside.
Bundle the lines in 3 x 3 "8-shaped"
hanks.
Do not bundle the last 60 cm of lines.
Attention:
New rubber bands must always be used for both the suspension lines and
the deployment bag each time they are packed!
Schematic
illustration
S-fold
Schematic
illustration
S-fold
8
9


