background image


19 


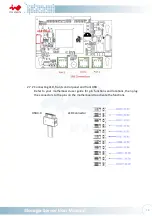
2.7.2


Connecting LED, front control panel and front USB   
Refer to your motherboard user guide for pin functions and locations, then plug 
the connectors to the pins on the motherboard to activate the functions.   


LED Connector 

USB 3.0 

Содержание IW-RS248-03

Страница 1: ...IW RS248 03 User Manual...

Страница 2: ...1 Removing the Fan Module 12 2 3 2 Installing the Fan Module 12 2 4 Removing and Installing the PSU Module 13 2 4 1 Removing the PSU Module 13 2 4 2 Installing the PSU Module 13 2 5 Installing Slide...

Страница 3: ...4 Expander Board Introduction 22 5 Compatibility Lists 23 6 Q A 23 7 Technical Support 24...

Страница 4: ...m and away from sources of heat including direct sunlight and radiators It should be kept away from sources of vibration or physical shock The space should be accommodated with a properly grounded wal...

Страница 5: ...rip the jumper carefully and plug the jumper to cover the jumper pins on the backplane Once you need to remove the jumper grip the jumper and carefully pull without squeezing CAUTION To avoid damage a...

Страница 6: ...plus SlimLine x 8 Backplane 2 2 pcs of Mini SAS HD 12Gb s with expander plus OcuLink x 8 Cooling Fan 80 x 38 mm PWM Fan x 4 Expansion Slot Low Profile PCI Slot x 7 SAS 12G Expander 2 pcs of Mini SAS H...

Страница 7: ...4 1 Product Introduction 1 1 Box Contents When you open the carton box of IW RS248 03 the contents should include...

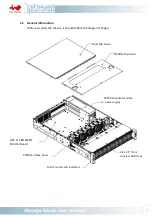
Страница 8: ...ou open the chassis it should reflect the diagram s image Rear top cover CRPS Redundant module power supply 48 x 2 5 7mm tool less HDD trays Front Controls and indicators ATX or CEB EEB Motherboard PW...

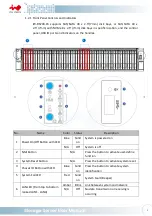
Страница 9: ...with LED Blue Solid on System is powered on N A Off System is off 2 NMI Button N A Press the button to activate user define function 3 System Reset Button N A Press the button to activate system reset...

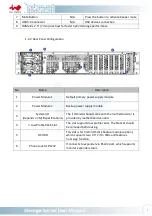
Страница 10: ...e 2 Backup power supply module 3 System I O depends on M B specifications The I O shield should come with the motherboard or is provided by motherboard vendors 4 7 Low Profile PCI E Slot The slot supp...

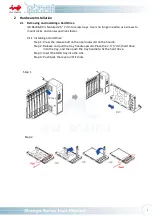
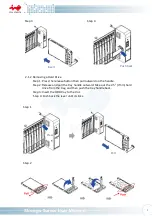
Страница 11: ...nd can swap drives faster 2 1 1 Installing a Hard Drive Step 1 Press the release button then pull outward on the handle Step 2 Release and pull the tray handle upward Place the 2 5 7mm hard drive into...

Страница 12: ...pull outward on the handle Step 2 Release and pull the tray handle outward Take out the 2 5 7mm hard drive from the tray and then push the tray handle back Step 3 Insert the HDD tray to the slot Step...

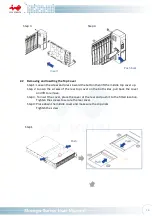
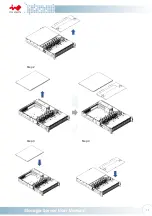
Страница 13: ...p 2 Loosen the screws of the rear top cover on the both sides pull back the cover and lift to remove Step 3 To insert the cover place the cover at the rear and push it to the fitted location Tighten t...

Страница 14: ...11 Step 2 Step 3 Step 4...

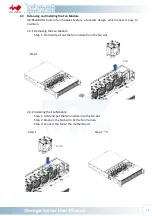
Страница 15: ...it easy to maintain 2 3 1 Removing the Fan Module Step 1 Hold and pull out the fan module from the fan slot Step 1 2 3 2 Installing the Fan Module Step 1 Hold and put the fan module into the fan slot...

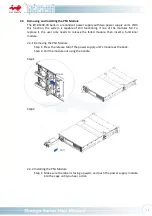
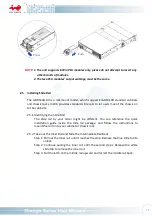
Страница 16: ...o replace it the user only needs to release the failed module then insert a functional module 2 4 1 Removing the PSU Module Step 1 Press the release tab of the power supply unit s module at the back S...

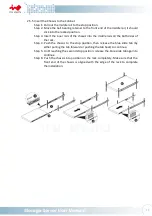
Страница 17: ...g the Slide Rail The slide rail by your order might be different You can reference the quick installation guide inside the slide rail package and follow the instructions to mount the rail on to your c...

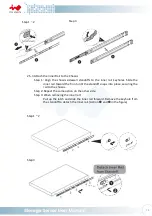
Страница 18: ...the inner rail toward the front until the standoff snaps into place securing the rail to the chassis Step 2 Repeat the same action on the other side Step 3 When removing the inner rail Pull up the lat...

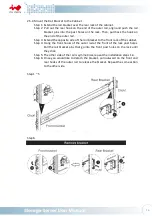
Страница 19: ...opposite side of the rail bracket to the front rack of the cabinet Step 4 Hang the front hooks of the outer rail at the front of the rack post holes Pull the rail bracket pins that go into the front...

Страница 20: ...o the middle rails on the both sides of the rack Step 4 Push the chassis to the stop position then release the blue slide tab by either pulling the tab forward or pushing the tab back to continue Step...

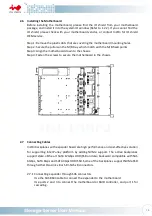
Страница 21: ...n to the chassis Step 4 Fasten the screws to secure the motherboard in the chassis 2 7 Connecting Cables InWin backplanes with expander board are high performance and cost effective solution for suppo...

Страница 22: ...ting LED front control panel and front USB Refer to your motherboard user guide for pin functions and locations then plug the connectors to the pins on the motherboard to activate the functions LED Co...

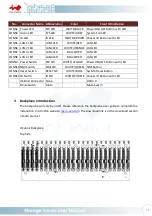
Страница 23: ...ED LAN4 LED BLACK RED LAN LED CONN9 Power Switch PW SW WHITE YELLOW Power ON OFF Button with LED CONN10 NMI Switch NMI SW WHITE GREEN NMI Button CONN11 Reset Switch RESET SW WHITE BLUE System Reset Bu...

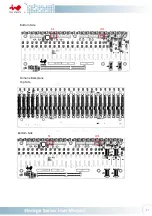
Страница 24: ...21 Bottom Side SlimLine Backplane Top Side Bottom Side S1 JD1 JD1 S1...

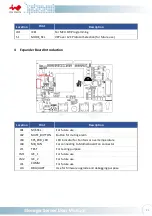
Страница 25: ...nt Description JB1 M S SEL For future use JB2 MUTE_BUTTON Button for muting alarm JB3 SYS_ERR_LED LED indicator for Fan fails or over temperature JB4 MB_FAN For connecting to Motherboard Fan connector...

Страница 26: ...losure A InWin IW RS248 03 supports 2 5 7mm form factor s SAS SATA disks It allows different types of disks to work together in an enclosure Yet to reach the best performance we recommend following th...

Страница 27: ...ng with InWin s channel partner for their suggestions h Where can I buy the SAS cable A 12Gb SAS to 4 SATA or 12Gb SAS to 6Gb SAS are standard cable that you easily buy from many vendors You can buy t...

Отзывы: