background image


iWaylink  Inc. 


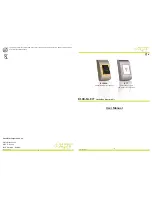
iMotion MP121 / MP131 U

ser’s Manual

                                                                              9


Features 


Front View 


Window 


Power Button 


Top Cover 


Open Button 


Feed Button 


Connector Cap 


Bluetooth Button 


Back View


MP121 

MP131 


Battery 


Belt Strap Hole 


Battery 


Shoulder Strap Holes 


Содержание MP121

Страница 1: ...MP121 MP131 Mobile Barcode Printer User s Manual Version A0 29 10 2020 ...

Страница 2: ...gy and if not installed and used in accordance with the instructions may cause harmful interference to radio communications However there is no guarantee that interference will not occur in a particular installation If this equipment does cause harmful interference to radio or television reception which can be determined by turning the equipment off and on the user is encouraged to try to correct ...

Страница 3: ...d Edition 2011 12 FCC part 15 subpart B NCC LP002 z Warranty Limits Unless otherwise agreed in a contract all the warranty period of the products lasts for two years since the date of purchase while that of the accessories such as battery USB cable etc lasts for six months since the date of purchase For any faults happened to the products under normal use and ascribed to the inherent problems of t...

Страница 4: ...esult in overheating combustion and or explosion of the battery by abnormal chemical reaction caused by incorrect polarity Do not directly connect the battery to an electrical power outlet not specified by iMotion or an automobile s cigarette lighter jack Doing so may result in overheating combustion and or explosion of the battery by over current and or over voltage Do not heat the battery or pla...

Страница 5: ...or modify the battery The battery contains safety equipment and a safety mechanism to prevent danger There is a potential risk of overheating combustion and or explosion caused by disassembly Do not charge the battery near open flames and or under direct sunlight Charging the ambient temperature at 0 C 40 C Because exposure to high temperatures triggers the operation of the safety mechanism the ba...

Страница 6: ...s 6 Chapter 1 Getting Started 8 Introduction 8 Unpacking 8 Features 9 Chapter 2 Printer Setup 11 Battery Installation 11 Paper Installation 11 Battery Charging 12 Belt Strap Shoulder Strap Usage 13 Driver 14 Install iMotion Label Design Software 15 Chapter 3 Setting and Control for Operation Panel 17 Operation Panel 17 Label Calibration and Self Test 19 Active Sleep Shutdown Charge Mode 20 Bluetoo...

Страница 7: ...ng 27 Appendix A Product Specifications 29 Specifications 29 Appendix B Interface 32 Pinout Description 32 Appendix C MP131 WiFi Setting 33 Check the Wireless Access Point Setting Value 33 Set up MP131 Wireless Network through iMotion WiFi tool 34 Activate DHCP function for MP131 36 Wi Fi Printer Sever Module Installation Quick Setting 37 ...

Страница 8: ...ture allows users to easily cope with accidental drops or unexpected environmental changes on the job Additionally MP121 MP131 also comes with a proprietary label design software to create labels or receipts for various workplaces It also supports image printing to help promote the corporate brand image for customers wherever and whenever possible This User s Manual provides information on how to ...

Страница 9: ...iMotion MP121 MP131 User s Manual 9 Features Front View Window Power Button Top Cover Open Button Feed Button Connector Cap Bluetooth Button Back View MP121 MP131 Battery Belt Strap Hole Battery Shoulder Strap Holes ...

Страница 10: ...iWaylink Inc iMotion MP121 MP131 User s Manual 10 Internal View Platen Roller Power Jack Tear Bar RS232 USB Port Top Cover Hooks Thermal Print Head ...

Страница 11: ... installation completed Battery Charging 1 Please make sure that the printer is switched off before charging and then connect the power adapter to a wall outlet 2 Turn on the printer The operator panel should now light up Paper Installation The printer is set to direct thermal transfer so no ribbon is required 1 Place the printer on a flat surface and press the open button to open the top cover 2 ...

Страница 12: ...re that the printer is switched off 2 Connect the jack of the power adapter to the printer and connect the plug of the power adapter to the socket of the wall Charge the battery around 3 hours before use please Charging the ambient temperature at 0 40 Close the external interface cap when printer does not connect an adapter or cable for avoiding dust away ...

Страница 13: ...iWaylink Inc iMotion MP121 MP131 User s Manual 13 Belt Strap Shoulder Strap Usage MP121 Use a coin to tighten the belt strap screw MP131 Connect the clips of the shoulder strap to the printer ...

Страница 14: ... page Then install the driver on your computer 1 After decompression click the Windows Printer Driver file to enter the installation wizard 2 Select I accept the terms in the license agreement and follow the instructions and click Next then click Finish 3 The Driver Wizard will guide you through the installation procedure Select Install printer drivers and click Next ...

Страница 15: ...he printer model Then the driver installation would be completed Install iMotion Label Design Software Please download iMotion Label label design software on iMotion official website Support page Then install the software on your computer 1 After decompression click the setup to enter the installation wizard 2 Follow the instructions and click Next And then complete the installation ...

Страница 16: ...iWaylink Inc iMotion MP121 MP131 User s Manual 16 3 Once the installation is complete you can start to make and print labels with iMotion Label or through the printer driver ...

Страница 17: ...down the POWER button for 3 second will turn the printer off BLUETOOTH Button Press the Bluetooth button Bluetooth function will be turned on FEED Button Turn on the printer and press the FEED button When you press the FEED button the printer will advance media until the FEED button is released If you are using continuous labels pressing the FEED button will advance a length of media until the but...

Страница 18: ...int the remaining eight labels you will need to press the FEED button again CANCEL PRINTING Press and hold the FEED button for 3 seconds during printing to cancel a print job The current print job is cancelled Example While a 10 label print job is running you press the FEED button Two of the labels have been printed The print job is cancelled and the remaining eight labels will not be printed 4 Du...

Страница 19: ...lly detect and store label height That means the host computer does not need to transmit the label height to the printer Self Test Self test function lets you check whether the printer is functioning normally Here is how you run the label size calibration and self test 1 Check that the label stock is loaded correctly 2 Turn off the printer and press the FEED button 3 Turn on the printer again whil...

Страница 20: ...de Sleep Mode Only FEED button functions active Go to Shutdown mode if no operation and over 30 3600 seconds to forever in Sleep mode Model Version USB ID Setting Serial Port Setting Port Status The default value is 1 which means that all ports open Number of Forms Number of Graphics Number of Fonts Number of Asian Fonts Number of Databases Number of Scalable Fonts Free Memory Size Speed Density R...

Страница 21: ...an be connected to devices equipped with Bluetooth communication capability 1 Press power button to turn on the printer 2 Press Bluetooth button Bluetooth function is turned on So that the printer can be searched Terminal Equipment Bluetooth function of the device must be turned on Pair with another Bluetooth device Note Do not press Bluetooth button while downloading information through standard ...

Страница 22: ...Battery Charger Optional 1 Connect the AC adapter to the Charger 2 Insert the battery into the Charger as shown in the figure the below 3 Gently slide the battery until it reaches the bottom of the charger 4 Charging starts as soon as the battery is completely inserted MP131 MP121 ...

Страница 23: ... despite several attempts 4 5 times to install the battery contact your local dealer The charging time may vary depending on the type of the charger or room temperature This battery has a protection mechanism in the battery overcharge or over discharge Car Charger Optional 1 Please make sure that the printer is switched off 2 Connect the car charger to your car s cigarette lighter jack 3 Open the ...

Страница 24: ...l 24 RS 232 Cable Optional 1 Please make sure that the printer is switched off 2 Open the external interface protection cap 3 Connect the mini USB cable to the power connector This RS232 USB Port only support signal transmission no charge function ...

Страница 25: ...User s Manual 25 Protective Case 1 Unzip to open up the protective case and insert your printer into the protective case 2 Open the paper discharger when using the printer 3 Connect the clips of the leather case with the shoulder strap ...

Страница 26: ...er or labels ensures a good print quality and a longer lifespan of the print head Cleaning Steps Here is how to clean the print head 1 Turn off the printer 2 Open the printer cover 3 To remove any label residue or other dirt from the print head please use a soft lint free cloth dipped with some alcohol Weekly to clean the print head one time Recommended When cleaning the print head please note tha...

Страница 27: ...ose the correct paper roll and a suitable printing mode The label stock jams during printing Clear the paper jam Remove any label material left on the thermal print head and clean the print head using a soft lint free cloth dipped in alcohol Please see page 26 There is no printed image on some parts of the label Check whether any label material is stuck to the thermal print head Check if there is ...

Страница 28: ... suitable Contact your dealer Check the paper guide settings A label is missing during printing Check the label height setting Check whether there is dust covering the sensor Run the auto detection function The printed image is blurred Check the darkness setting Check the thermal print head for dust or dirt Please see page 26 If this does not resolve the problem contact your dealer ...

Страница 29: ...Thermal receipt anti UV receipt gap label center alignment Inter label gap size from 2 mm to 4 mm 3 mm preferred Width 2 28 59 mm fixed Thickness Min 0 0508 mm Max 0 165 mm Media roll Diameter Max 1 57 40 mm Types Direct Thermal receipt anti UV receipt gap label left side alignment Inter label gap size from 2 mm to 4 mm 3 mm preferred Width Max 3 15 80 mm Min 1 5 38 1mm Thickness Min 0 0508 mm Max...

Страница 30: ...Fonts 16x16 24x24 Traditional Chinese BIG 5 Simplified Chinese GB2312 Japanese S JIS Korean KS X1001 90 180 270 rotatable and 8 times expandable in horizontal and vertical directions TTF Fonts 90 180 270 rotatable Control Panel 4 dual color LEDs for Power Battery Communication Error status indication 3 buttons for Power Feed and BT functions Barcodes 1 D Barcodes China Postal Code Codabar Code 11 ...

Страница 31: ...C Linux SDK Win CE NET Windows Vista Windows 7 Windows 8 8 1 Windows 10 Android Mac iOS User Environment Operation Temperature 10 50 14 122 Storage Temperature 20 60 4 140 Humidity 10 90 non condensing Sealing standard Intrusion Protection IP42 requirement for case design IP54 for protective case Drop resistance 1 5m Regulatory Compliance BSMI CE NCC CB Accessories Thermal Paper Roll 1 Belt Strap ...

Страница 32: ...iWaylink Inc iMotion MP121 MP131 User s Manual 32 Appendix B Interface Pinout Description USB Port mini B Type Pin No 1 2 3 4 5 6 7 8 Function GND VBUS D D TXD CTS RXD RTS ...

Страница 33: ...before carrying on the setting below Check the Wireless Access Point Setting Value Connect MP131 Wireless Module to Wireless Access Point and then connect the Module to the Mobile phones or computers through network About the parameters of wireless access point please refer to the figure below Example D Link AP SSID Securit y Pre Shared Key ...

Страница 34: ... MP131 Wireless Network through iMotion WiFi tool 1 Connect MP131 and computer by USB cable 2 Turn on MP131 3 Start iMotion Label 4 Click Generic Printer Setup Select MP131 as printer model and click Save see the screenshot below 5 Click Network WiFi Setting ...

Страница 35: ...Input parameters of wireless access point see the screenshot below 7 Click Set Data icon and the printer will reboot If printer doesn t reboot after a few seconds and 3 beeps are not heard please repeat the steps from Step 1 SSID Security Pre Shared Key ...

Страница 36: ... Manual 36 Activate DHCP function for MP131 1 First of all configure DHCP function through USB 2 Click Generic Printer Setup Printer Interface 3 Select USB port BP30 and click Save 4 Obtain the printer IP address through Network WiFi Setting ...

Страница 37: ...Printer Sever Module Installation Quick Setting Set up wireless network through iMotion WiFi tool 1 Turn on the MP131 connect printer and computer by USB cable 2 Start iMotion Label 3 Click Generic Printer Setup 4 Select MP131 as Printer Model and click Save ...

Страница 38: ...on MP121 MP131 User s Manual 38 5 Click Network WiFi Setting Quick Setting 6 Click the Search Button 7 Select your Server AP and click next button 8 Enter the password set on the server side and click the Setting button ...

Страница 39: ...P131 User s Manual 39 9 After the setting succeeded a prompt will pop up and the printer will restart 10 Enter the WiFi tool select the Other tab and click the Get Data icon after selecting IP Settings Then remember the IP address ...

Страница 40: ...iWaylink Inc iMotion MP121 MP131 User s Manual 40 11 Open the Printer Settings window Select the Printer Interface tab fill in the IP address and click Save to complete ...

Отзывы: