background image

7

4.2. Boot up instructions

4.2.1 Boot operation

Step

key

1

Power on

4.1(4)

2

Switch sewing mode

4.1(6)--a

--b

Содержание MB8024A

Страница 1: ...Manual CHANGZHOU WISDOM VALLEY ELECTRICAL TECHNOLOGY CO LTD Please read the operation manual of the touch screen interface before using the device Please keep this operation manual of touch screen in...

Страница 2: ...comply with current regulations IMB No part of this manual may be copied or transcribed without requesting prior authorization from IMB The contents of this manual may be subject to change without adv...

Страница 3: ...ENGLISH...

Страница 4: ...instructions 7 5 Operating instructions 8 5 1 Preparation before operation 8 5 2 Operation process description 8 5 2 1 Start the device 8 5 2 2 Fabric position 8 5 2 3 Start sewing 9 6 Debugging meth...

Страница 5: ...1 1 Basic information of the equipment 1 Feeding device 2 Cutting device 3 Touch screen 4 Folder 5 Pedal 1 2 3 4 5...

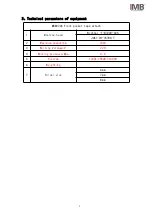
Страница 6: ...ipment MB8024A Front pocket tape attach 1 Machine head Brother T 8722D 405 JUKI LH 3578A 7 2 Maximum speed rpm 3000 3 Working Voltage V 220 4 Working pressure Mpa 0 5 5 Size mm 1200L 550W 1600H 6 Weig...

Страница 7: ...f the power or air supply while the machine is running 8 In order to prevent accidents caused by sudden starting please remove the cloth guide when the preparation work is finished and the sewing stat...

Страница 8: ...ine important safety information improper operation of the machine may cause personal injury Please read this instruction carefully and operate correctly before operation Please ventilate the machine...

Страница 9: ...ce of cutter 2 Presser foot pressure adjustment knob adjust presser foot pressure 3 Air pressure adjustment adjust the working air pressure 4 Power switch black on is the power on switch Red off is th...

Страница 10: ...6 a Automatic cutting interface b Non automatic cutting interface...

Страница 11: ...7 4 2 Boot up instructions 4 2 1 Boot operation Step key 1 Power on 4 1 4 2 Switch sewing mode 4 1 6 a b...

Страница 12: ...o make it meet the requirements of the machine Check that the eye guard is properly installed 5 2 Operation process description 5 2 1 Start the device When the power switch on button is pressed the de...

Страница 13: ...he sensor senses the cloth as shown in Fig b the cutter starts to remove the irregular cloth in front as shown in Fig c 3 After finishing the sewing the red spot of the sensor can t sense the cloth an...

Страница 14: ...hrough the two screws as shown in the figure below and then adjust the feeding position 6 2 Equipment debugging and parameter setting 1 Click Click in the touch screen Enter the following interface Cl...

Страница 15: ...figure below Click For example press the button behind the cutter cylinder The button changes to Cutter down As shown in the figure below Press the button behind the cutter cylinder again The button...

Страница 16: ...12 7 Electrical wiring...

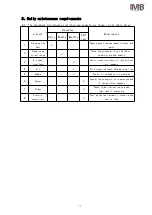
Страница 17: ...ng up oil pollution Clean the greasy dirt on the table needle plate and bobbin 3 Air tube interface The air tube interface is tight without air leakage 4 Oil Oil volume not lower than warning line 5 B...

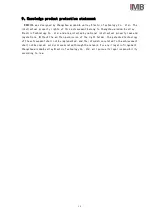
Страница 18: ...and are protected by national intellectual property laws and regulations Without the written permission of the right holder the patented technology of the achievement shall not be implemented and the...

Отзывы: