Image Engineering
Seite
10
von
12
5.
Select optionally a dark image for subtracting from the ColorChecker image. The size of this image
and the ColorChecker image must be the same.
6.
After clicking the
Start
button the selected ColorChecker image is opened and displayed. Select
the chart by drawing a rectangle around the patches from upper left to lower right and double click
on the rectangle. The ROIs for each patch are displayed in the next step and can be rearranged
manually. Double click outside ROIs to continue.
7.
Export the validation graph to an image (JPEG, PNG, TIFF, BMP, GIF) for documentation
purposes.
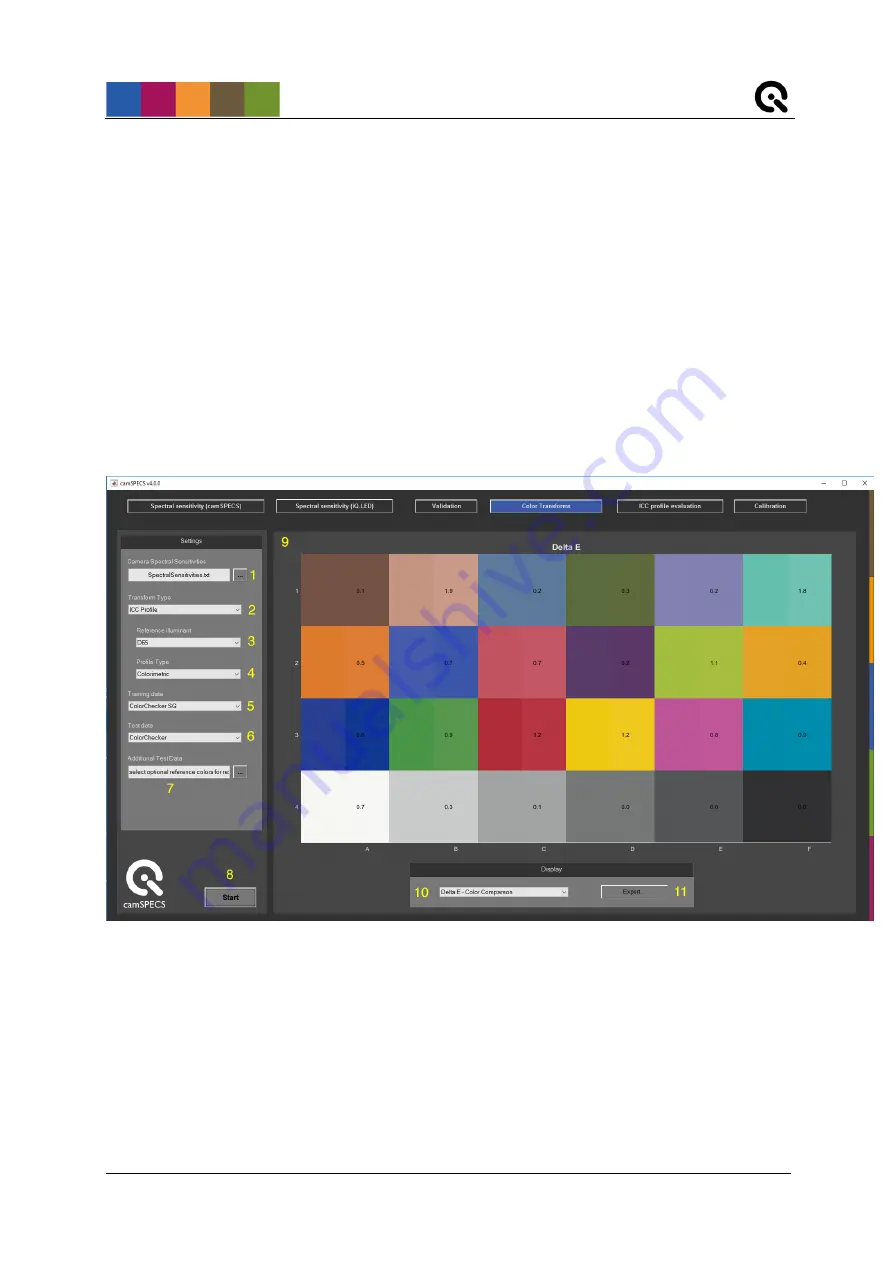
4.5 Color Transforms Module
1.
Select a
Camera Spectral Sensitivites
file that was created by camSPECS.
2.
Select the desired
Transform Type
from those available.
3.
Select the desired
Reference illuminant
spectral distribution file for the light source of the scene
adopted white point.
4.
Select the desired
Profile Type
for which the transform will be created.
5.
Select reflectance
Training data
. The resulting camera transforms will be optimized for the
selected combination of
Camera Spectral Sensitivities
and
Reference illuminant
which minimizes


