Ilumen
Installation Manual Ilumen PIDbox Mini v2.0
5
M
OUNTING
5.1
M
OUNTING LOCATION R
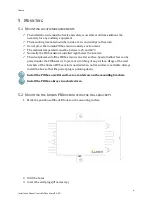
The installation site must be freely and safely accessible at all times without the
necessity for any auxiliary equipment.
The mounting location should be inside
Do not place the Ilumen
The ambient temperature must be between
Normally the PIDbox mini
The ideal placement of the PIDbox mini
placed under the PIDbox mini
brackets of the Ilumen PIDbox mini
install the box so that the power plug is pointing down.
Install the PIDbox on a flat surface to avoid stress on the mounting brackets.
Install the PIDbox always in a shaded area.
5.2
M
OUNTING THE
I
LUMEN
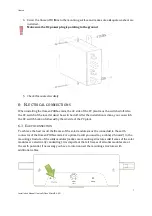
1.
Mark the positions of the drill holes
2.
Drill the holes
3.
Insert the wall plugs (if necessary)
Ilumen PIDbox Mini v2.0-EN
REQUIREMENTS
The installation site must be freely and safely accessible at all times without the
necessity for any auxiliary equipment.
mounting location should be inside a rain- and windproof location.
Do not place the Ilumen PIDbox mini in a dusty environment.
The ambient temperature must be between -25 and 60°C.
PIDbox mini is installed right below the inverter.
of the PIDbox mini is on a flat surface. Special rubber feet
PIDbox mini to prevent scratching of any surface. Usage
PIDbox mini is needed when no flat surface is available.
l the box so that the power plug is pointing down.
Install the PIDbox on a flat surface to avoid stress on the mounting brackets.
Install the PIDbox always in a shaded area.
LUMEN
PID
BOX MINI USING THE WALL BRACKETS
of the drill holes on the mounting surface
wall plugs (if necessary)
6
The installation site must be freely and safely accessible at all times without the
and windproof location.
Special rubber feet can be
Usage of the wall
is needed when no flat surface is available. Always
Install the PIDbox on a flat surface to avoid stress on the mounting brackets.
ETS

