Ilumen
Installation Manual Ilumen PIDbox Mini v2.0
Each side (A and B) has a maximum
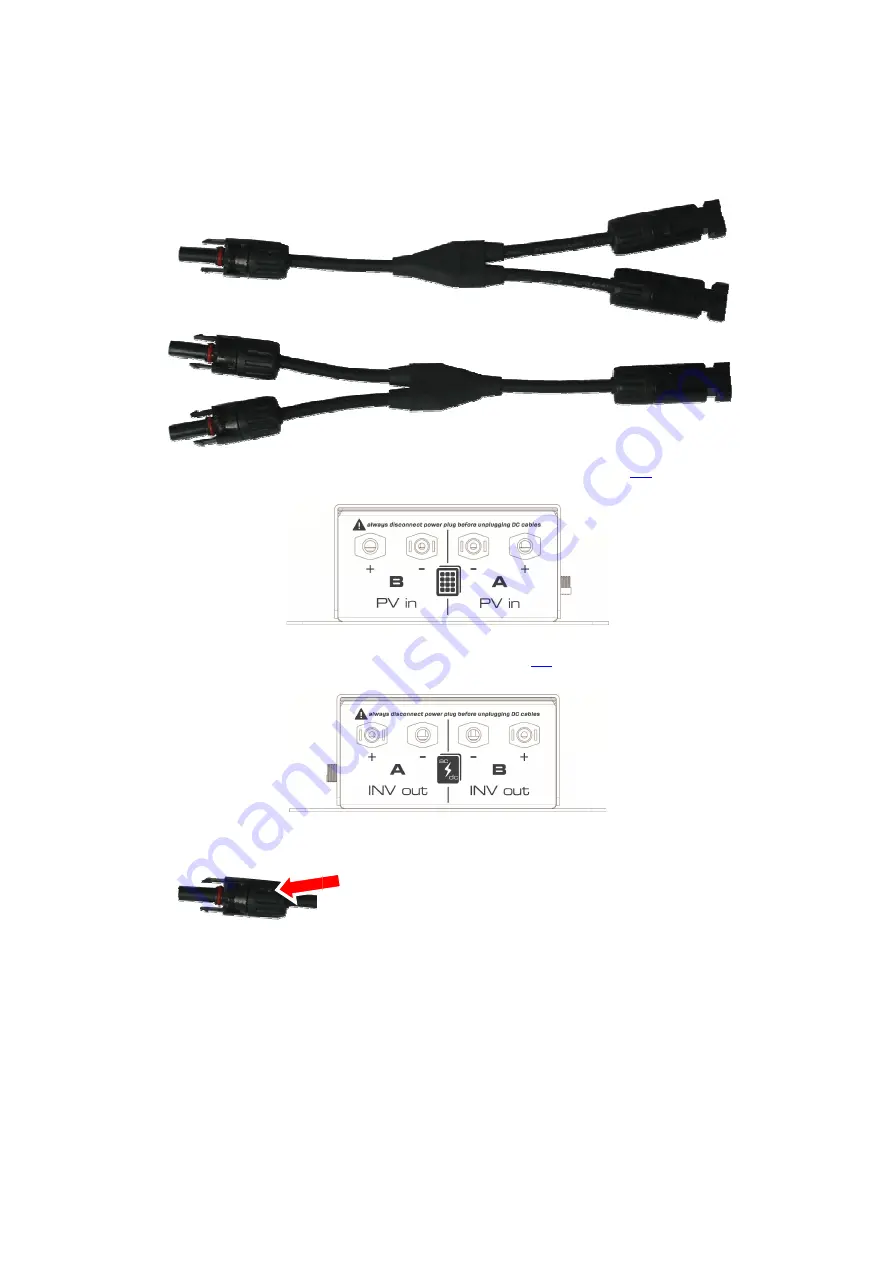
combined to form a bigger input
utilized. Two versions can be ordered. One with 2 and one with 3 connectors.
But always mind the maximum input current of 2
5)
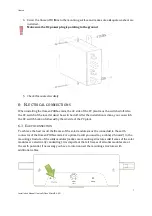
Connect the PV array cables to the Ilumen
6)
Connect the Ilumen PIDbox mini
7)
Make sure the glands on all connectors are properly tightened.
8)
Connect the DC power supply to the Ilumen
9)
Plug the DC power supply into an outlet (LED of the Ilumen
PVs are producing electricity
Ilumen PIDbox Mini v2.0-EN
has a maximum current input of 25Amps. So multiple strings can be
combined to form a bigger input per side. To do this a “DC combiner cable” can be
Two versions can be ordered. One with 2 and one with 3 connectors.
But always mind the maximum input current of 25Amps for each side (A and B).
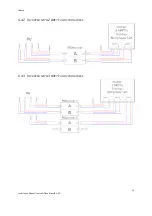
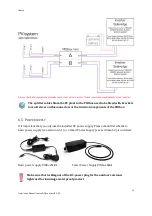
Connect the PV array cables to the Ilumen PIDbox mini inputs (see
6.3
PIDbox mini to the inverter (see
6.3
for details).
Make sure the glands on all connectors are properly tightened.
Connect the DC power supply to the Ilumen PIDbox mini.
Plug the DC power supply into an outlet (LED of the Ilumen PIDbox mini
PVs are producing electricity)
18
So multiple strings can be
. To do this a “DC combiner cable” can be
Two versions can be ordered. One with 2 and one with 3 connectors.
Amps for each side (A and B).
6.3
for details).
PIDbox mini lights up if the


