DECORATIVE LUMINAIRES
OUTDOOR
Giet 02 Plus ISTRUZIONI DI MONTAGGIO / INSTALLATION INSTRUCTIONS
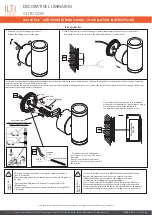
1- Allentare i 3 grani di fissaggio per la base.
-Remove the 3 fixing screws of the base.
2- Sfilare la base per procedere al fissaggio a parete tramite appositi tasselli a muro (non inclusi).
-Remove the base in order to fix it to the wall with wall dowels (not included).
Alimentat
o
re
F
eeder
- Praticare due fori nella parete alla distanza misurata e inserire due tasselli a espansione e viti opportune. Collegare la lampada al circuito primario (230Vac) tramite l’apposita
scatola di connessione in classe II all’interno (incluso).
- After calculating the distance, make 2 holes in the wall and insert the 2 rawlplugs and appropiate screws. Connect the lamp to the primary circuit (230V) through the internal
appropriate connection box Class II (included).
1
2
3
IP65 application
SM
AL
TIMENT
O/
DISPOSAL
Secondo la direttiva comunitaria WEEE (Waste Electrical and Electronic
Equipment) l’apparecchio non può essere smaltito con i rifiuti
indifferenziati. Deve essere portato nelle strutture locali per lo
smaltimento ed il riciclaggio dei prodotti elettronici.
In accordance with EU Directive WEEE (Waste Electrical and Electronic
Equipment), luminaires must not be disposed of with other household
waste. At the end of their life, luminaires must be taken to the appropriate
local facility available for the disposal or recycling of electronic products.
-Effettuare il cablaggio usando un sistema che garantisca almeno il
grado IP del faretto.
-Make the wiring using a system that guarantees at least the IP grade of
the spot.
- Dare tensione all’impianto solo dopo aver collegato tutti i LED
all’alimentatore.
- Connect the fitting to the power supply only after connecting all LED
to the driver.
CABLA
GGIO/
WIRING
Una volta fissata la base riposizionare la lampada
assicurandosi di rifissarla con i grani alla base a muro.
Once the base is fixed, fit the luminaire to
the base blocking it with the no head screws.
si consiglia la conservazione delle seguenti istruzioni - we suggest you to keep this copy for your files
MADE in ITALY_10 - 2018 (M)
ILTI LUCE srl ·
Lungo Dora P. Colletta, 113/9· 10153 Torino (Italy); tel (39) 011 765 73 01; fax (39) 011 853855; www.iltiluce.com; [email protected]
o-ring
rondella
dowel+rawplugs
220 -240V
50~60Hz
50~60Hz
220-240V
Scatola di connessione in classe II/
Connection box in class II
- Far passare cavo rete nella guaina
(accorciarlo se necessario) e fissarlo al
morsetto.
-Put the network cable in the sheat
(shorten it if necessary) and secure it to
the terminal.
L
marrone
N
blu
brown
blue
50~60Hz
220-240V
morsetto/clamp
50~60Hz
220-240V
42 mm
sheat (included)


