1 4
Owner’s Manual
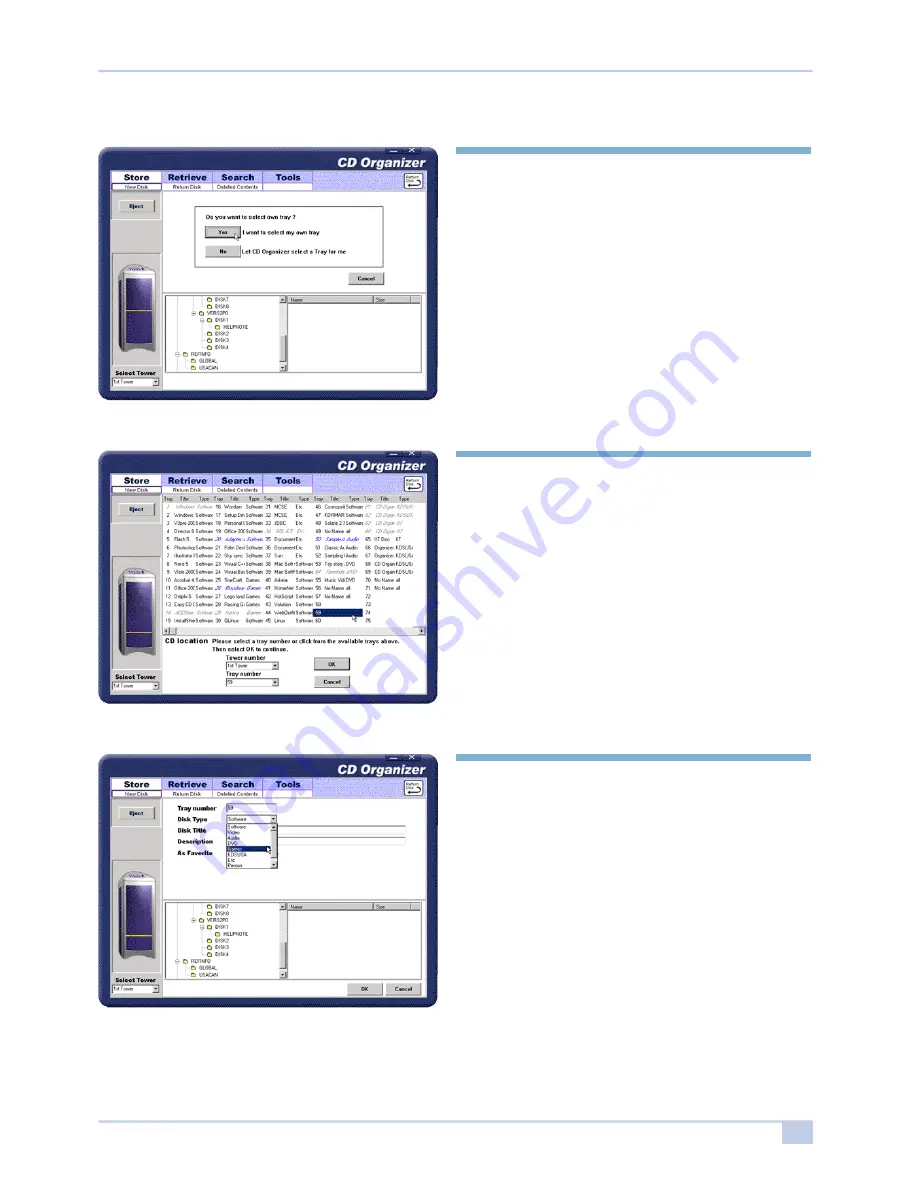
Step 4.
Select a method that will designate which disk
tray you desire to use.
Select [Yes] if you wish to choose the tray, or
select [No] if you want the CD Organizer to
choose one for you.
If [No] is selected, the CD O rganizer will
select the next available(empty) tray to store
the disk.
Step 5
If you select [Yes] from CD location, the
display will show all trays occupied regardless
if the disk is present or not. You can either
select an empty tray from one of the
unoccupied trays and click okay once the tray
is highlighted or click the down arrow beneath
the “Tray Number” from the CD Location
portion of the screen. Once you selected click
“ok”.
Step 6.
Select a disk type. Then review the inserted
disk title, description, provided by from Auto
function, Select As Favorite, if you would to
add if to your favorite list.
If you wish to add notes about this disk, enter
in the space provided below. If you finished,
click [OK].


