ITG-100AI Embedded System
Page 13
Step 3:
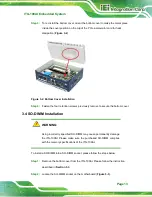
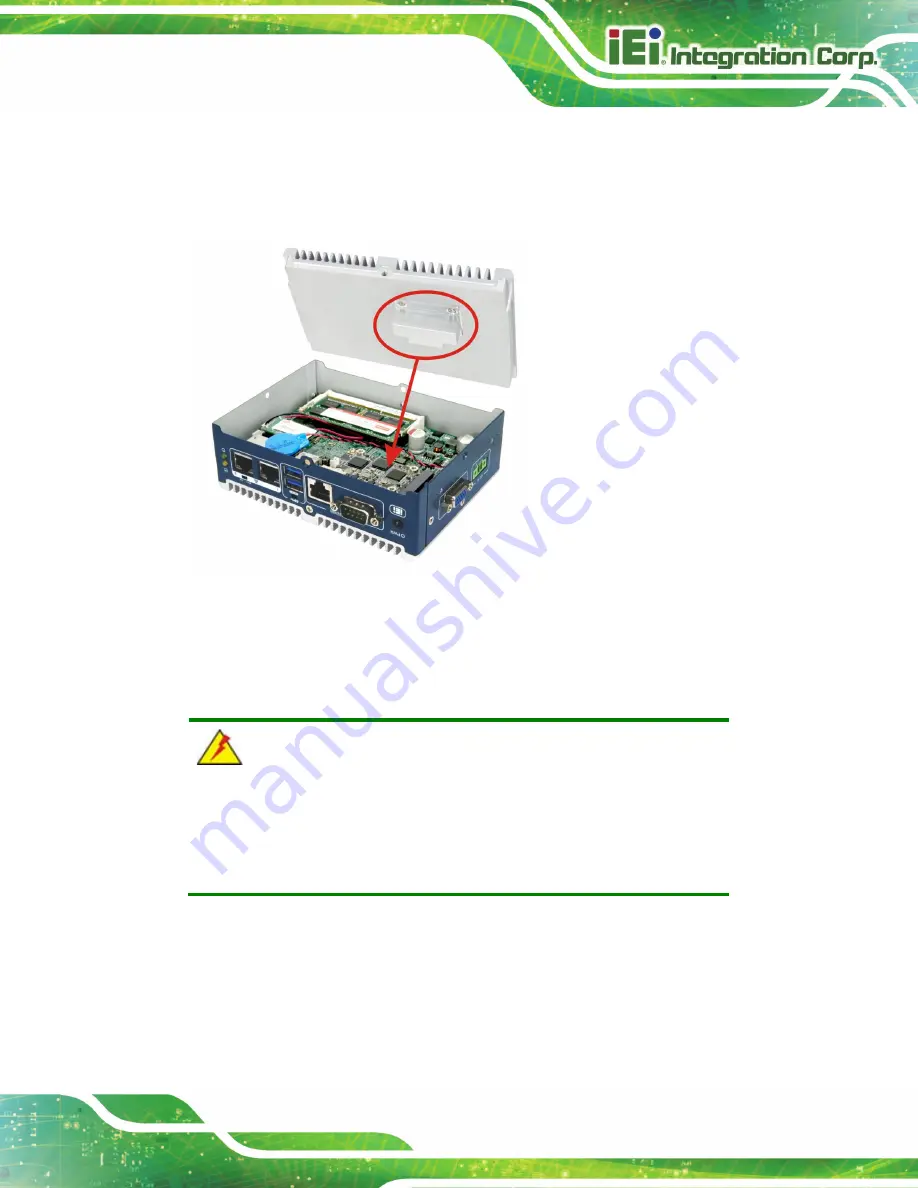
To re-install the bottom cover, orient the bottom cover to make the metal piece
inside the cover position on the top of the PCIe accelerator card for heat
dissipation (
Figure 3-2: Bottom Cover Installation
Step 4:
Fasten the four retention screws previously remove to secure the bottom cover.
3.4 SO-DIMM Installation
WARNING:
Using incorrectly specified SO-DIMM may cause permanently damage
the ITG-100AI. Please make sure the purchased SO-DIMM complies
with the memory specifications of the ITG-100AI.
To install a SO-DIMM into a SO-DIMM socket, please follow the steps below.
Step 1:
Remove the bottom cover from the ITG-100AI. Please follow the instruction
described in
Section 3.3
Step 2:
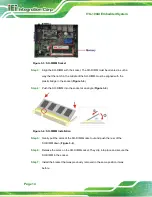
Locate the SO-DIMM socket on the motherboard (
).
Содержание ITG-100AI
Страница 2: ...ITG 100AI Embedded System Page ii Revision Date Version Changes October 2 2019 1 00 Initial release ...
Страница 11: ...ITG 100AI Embedded System Page 1 Chapter 1 1 Introduction ...
Страница 17: ...ITG 100AI Embedded System Page 7 Chapter 2 2 Unpacking ...
Страница 20: ...ITG 100AI Embedded System Page 10 Chapter 3 3 Installation ...
Страница 35: ...ITG 100AI Embedded System Page 25 Chapter 4 4 BIOS ...
Страница 64: ...ITG 100AI Embedded System Page 54 Chapter 5 5 Software Installation ...
Страница 68: ...ITG 100AI Embedded System Page 58 Appendix A A Regulatory Compliance ...
Страница 73: ...ITG 100AI Embedded System Page 63 B Safety Precautions Appendix B ...
Страница 79: ...ITG 100AI Embedded System Page 69 Appendix C C BIOS Menu Options ...
Страница 82: ...ITG 100AI Embedded System Page 72 Appendix D D Terminology ...
Страница 86: ...ITG 100AI Embedded System Page 76 Appendix E E Hazardous Materials Disclosure ...


