iSignager-300
Page 15
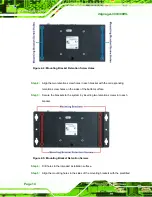
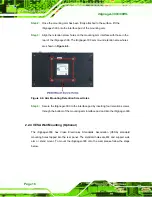
holes in the mounting surface.
Step 6:
Insert four retention screws, two in each bracket, to secure the system to the
wall.
Step 0:
2.2.2 Stand Mounting
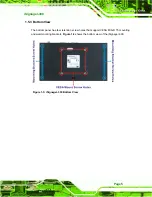
The iSignager-300 has Video Electronics Standards Association (VESA) standard
mounting holes tapped into the rear panel. The stand mounting plate has a matching
VESA hole pattern. To mount the iSignager-300 onto a stand, please follow the steps
below.
Step 1:
Line up the threaded holes on the iSignager-300 rear panel with the screw holes
on the stand mounting plate.
Step 2:
Secure the iSignager-300 to the stand with the supplied retention screws.
Step 0:
2.2.3 Arm Mounting
The iSignager-300 is VESA (Video Electronics Standards Association) compliant and can
be mounted on a VESA arm. To mount the iSignager-300 on an arm, please follow the
steps below.
Step 1:
The arm is a separately purchased item. Please correctly mount the arm onto
the surface it uses as a base. To do this, refer to the installation documentation
that came with the mounting arm.
NOTE:
When purchasing the arm please ensure that it is VESA compliant. If the
mounting arm is not VESA compliant it cannot be used to support the
iSignager-300.
Содержание Isignager-300
Страница 2: ...iSignager 300 300WL Page ii Revision Date Version Changes 5 November 2009 1 00 Initial release...
Страница 8: ......
Страница 9: ...iSignager 300 Page 1 Chapter 1 1 Introduction...
Страница 18: ...iSignager 300 300WL Page 10 Chapter 2 2 Installation...
Страница 27: ...iSignager 300 Page 19 Appendix A A Check and Modify the Player Status...


