iSignager-300
Page 17
Step 1:
Attach the wall mounting kit to the mounting surface with the included screws.
Make sure it is attached securely.
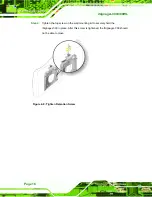
Figure 2-7: Attach Wall Mounting Kit to the Wall
Step 2:
Screw the mounting screws to the mounting holes on the rear of the
iSignager-300.
Step 3:
Hook the iSignager-300 into the mounting holes on the wall mounting kit.
Figure 2-8: Hook Onto Wall Mounting Kit
Содержание Isignager-300
Страница 2: ...iSignager 300 300WL Page ii Revision Date Version Changes 5 November 2009 1 00 Initial release...
Страница 8: ......
Страница 9: ...iSignager 300 Page 1 Chapter 1 1 Introduction...
Страница 18: ...iSignager 300 300WL Page 10 Chapter 2 2 Installation...
Страница 27: ...iSignager 300 Page 19 Appendix A A Check and Modify the Player Status...

